

Okay, so let me tell you—Halloween cookies are my favorite thing ever. They’re spooky, sweet, and just so fun to make. I mean, who doesn’t love cookies shaped like ghosts?
I remember last year, I made a big tray of them, and they disappeared in minutes. Kids, adults—everyone grabbed one (or three). It was the best kind of mess.
You don’t need fancy stuff, just some simple dough and fun toppings. Trust me, it’s easy and way more fun than store-bought treats. Plus, they make the whole house smell like fall.
So if you’re thinking about making something cute and tasty this Halloween, cookies are the way to go. I’ll show you how I do it—step by step. Let’s bake something boo-tiful together!

Why You’ll Love This Recipe
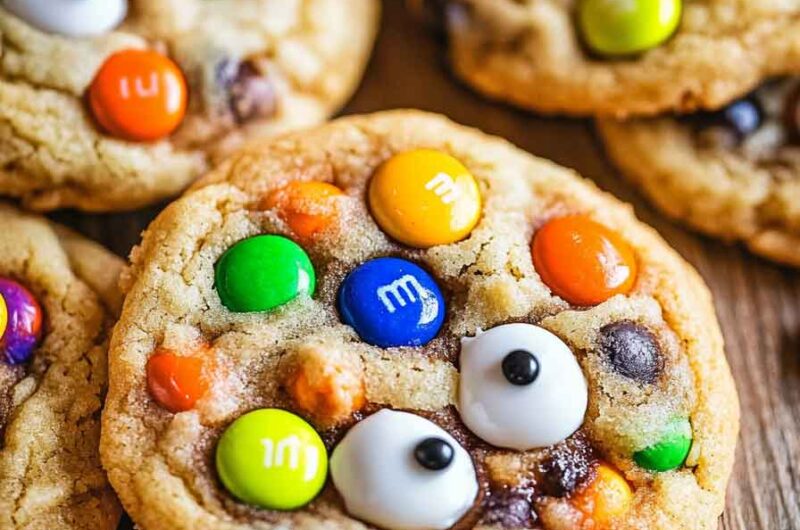
- Festive and Fun: These cookies are packed with Halloween-themed sprinkles and M&Ms, making them the perfect treat for spooky celebrations.
- Super Customizable: Change up the candy colors, add your favorite toppings, or make them as spooky as you like.
- Easy to Make: With a few simple ingredients and minimal prep time, you’ll have a batch of cookies in no time!
- Perfect for Baking with Kids: The kids will love helping you sprinkle on the Halloween-themed candy and eyes, making these cookies a great family activity.
- Great for Gifting: These cookies can be wrapped up in cute bags or boxes for fun Halloween gifts for teachers, friends, or neighbors.
Required Kitchen Tools
Before we get started, let’s make sure you have all the tools you need to whip up these delicious Halloween treats. Here’s a quick checklist of kitchen tools you’ll need:
- Mixing Bowls: You’ll need two medium-sized bowls – one for the dry ingredients and another for the wet ingredients.
- Hand Mixer or Stand Mixer: If you’re in the mood to work your muscles, you can always mix by hand, but a mixer will make the job a lot easier.
- Baking Sheets: Make sure to have two sheets to bake a full batch at once.
- Parchment Paper or Silicone Baking Mats: These will keep your cookies from sticking and make clean-up a breeze.
- Cookie Scoop: To make even cookies, a scoop (about 1.5 tablespoons) is your best friend. If you don’t have one, a tablespoon will do just fine!
- Cooling Rack: Once baked, the cookies need a place to cool down before you enjoy them.
Ingredients
Here’s what you’ll need to make these spooky, sweet treats. I’ve broken down the ingredients, so you know exactly what goes in. (Exact measurements are in the recipe card below!)
- Unsalted Butter (Softened): You want your butter softened to room temperature to ensure the perfect cookie texture. It helps with the smoothness of the dough.
- Brown Sugar (Packed): Brown sugar adds a slight molasses flavor and moisture to the cookies, making them chewy.
- Granulated Sugar: A small amount of granulated sugar balances the richness of the brown sugar and enhances the cookie’s sweetness.
- Vanilla Extract: A classic addition that brings out the flavors of the other ingredients.
- Large Egg: One large egg binds everything together and helps give the cookies that perfect texture.
- Instant Vanilla Pudding Mix (Boxed): This is the secret ingredient! It adds a rich, soft texture to the cookies and helps keep them moist.
- Baking Soda: This helps the cookies rise slightly and gives them the perfect lift.
- Salt: A pinch of salt balances out the sweetness and enhances the overall flavor of the cookie.
- All-Purpose Flour: The base of your dough! Use regular all-purpose flour for the best texture and structure.
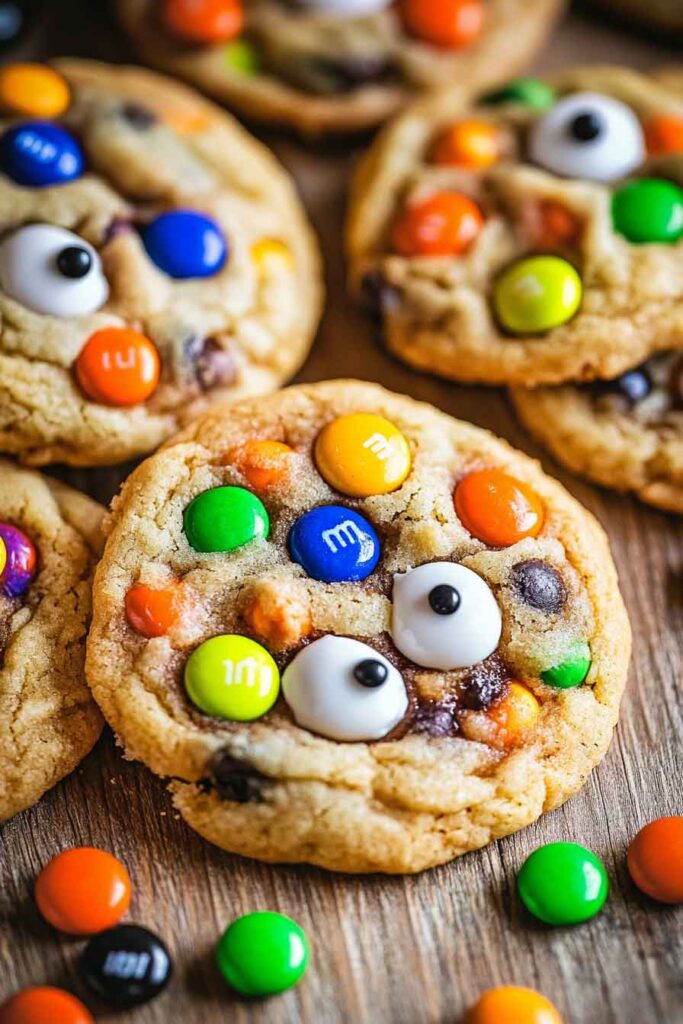
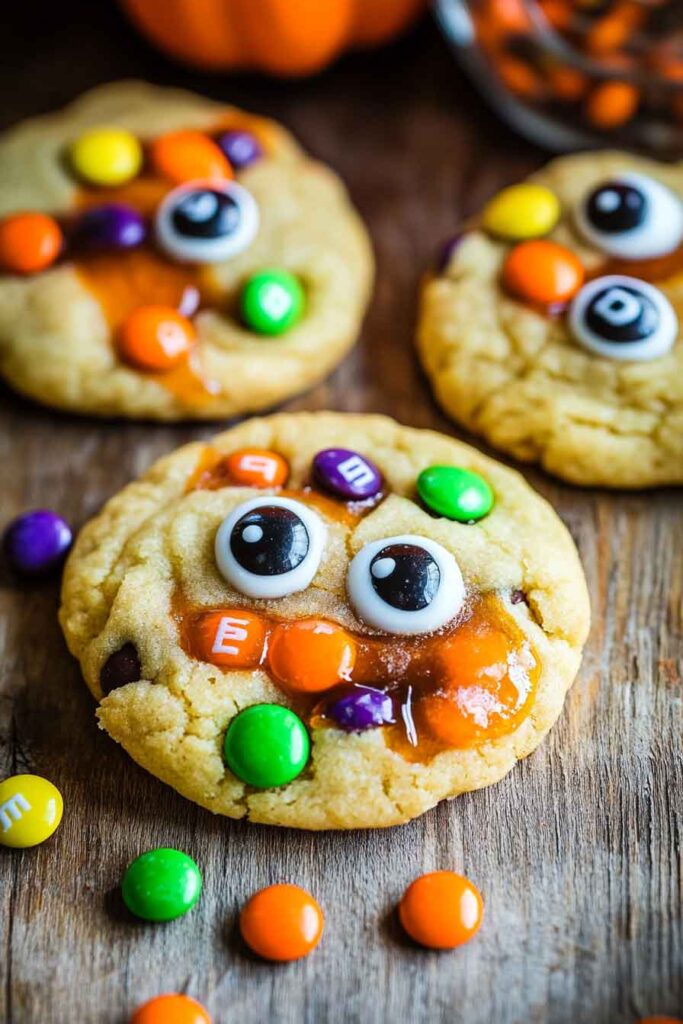
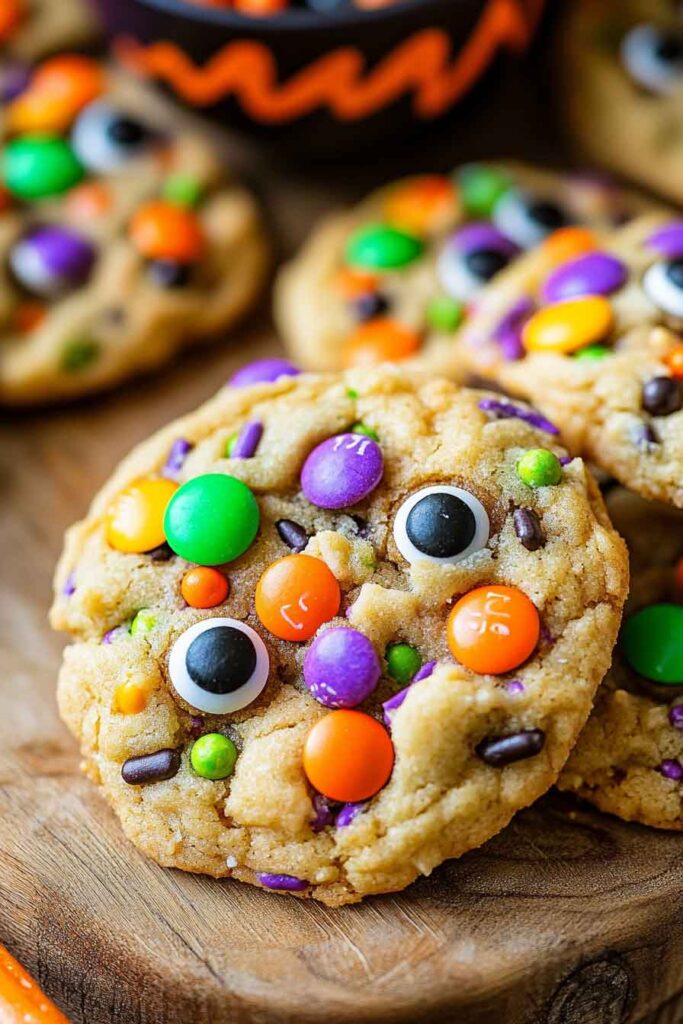
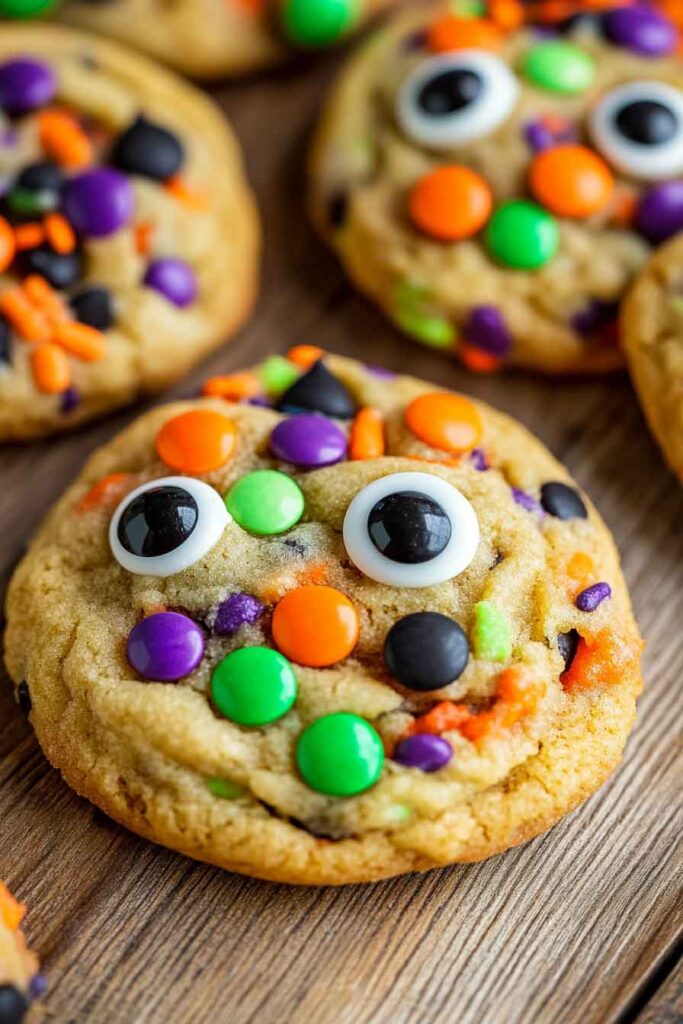
- Halloween Sprinkles: You can’t have Halloween cookies without some fun, colorful sprinkles! Go wild with different shapes and colors.
- Halloween M&Ms: Pick your favorite M&M flavors, but Halloween-themed colors are the way to go for added flair!
- Candy Eyes (Optional): Want to make your cookies extra spooky? Add candy eyes to give them that Halloween feel.
Variations for Halloween Cookies
- Switch the M&Ms: Try using Reese’s Pieces, Skittles, or any other candy you love. The colorful ones are perfect for Halloween!
- Add Chocolate Chips: For a more chocolatey flavor, toss in some mini chocolate chips. Dark chocolate chips will give your cookies a rich, semi-sweet taste.
- Use Different Sprinkles: There are so many fun Halloween sprinkles available – from bat and pumpkin shapes to spooky glitter. Have fun mixing and matching!
- Top with Candy Corn: If you’re a fan of this Halloween classic, sprinkle a few pieces of candy corn on top for a sweet treat.
- Go Vegan: For a vegan version, substitute the butter with dairy-free butter and use a flax egg instead of the regular egg. You can also swap the M&Ms for dairy-free chocolate chips.
Step-by-Step Instructions
1. Preheat the Oven and Prepare the Baking Sheets
Start by preheating your oven to 350°F (177°C). Line two baking sheets with parchment paper or silicone baking mats to ensure your cookies bake evenly and don’t stick.
2. Mix the Dry Ingredients
In a medium bowl, whisk together the flour, baking soda, and salt. This will ensure that the baking soda and salt are evenly distributed throughout the flour. Set the bowl aside.
3. Cream the Butter and Sugars
In another large bowl, beat the softened butter, brown sugar, and granulated sugar using a hand mixer or stand mixer. Beat for about 2-3 minutes until the mixture is light and fluffy. This step is essential for a soft, chewy cookie.
4. Add the Wet Ingredients
Once the butter and sugar mixture is fluffy, add the vanilla extract and egg. Beat until combined. Then, add the instant vanilla pudding mix and mix until smooth. The pudding mix is what makes these cookies extra soft and chewy, so don’t skip it!
5. Combine the Dry and Wet Ingredients
Now it’s time to bring everything together! Gradually add the dry ingredients to the wet mixture. Mix on low speed (or stir by hand) until the dough just comes together. Be careful not to over-mix, as this can make your cookies a little tough. You want a soft, slightly sticky dough.
6. Add the Fun Halloween Ingredients
Once your dough is ready, it’s time to add the fun part! Fold in your Halloween sprinkles and M&Ms. This is where you can get creative – you can add extra sprinkles or candy if you like. If you’re using candy eyes, fold them in gently so they don’t break. Make sure the dough is evenly mixed, but don’t overwork it.
7. Scoop the Dough
Using a cookie scoop or a tablespoon, scoop out about 1.5 tablespoons of dough per cookie. Roll each scoop into a ball and place them on the prepared baking sheets about 2 inches apart. If you’d like larger cookies, you can scoop more dough, but remember to adjust the baking time accordingly.
8. Add Extra Sprinkles and Candy Eyes (Optional)
If you want your cookies to look extra festive, you can press additional Halloween sprinkles and M&Ms onto the tops of the cookie dough balls. If you’re feeling spooky, top each cookie with a candy eye or two, so they look like little creepy critters staring back at you!
9. Bake the Cookies
Place the baking sheets in the preheated oven and bake for 10-12 minutes, or until the edges are lightly golden, and the centers are set. Keep an eye on them, as oven times can vary. The centers may look slightly soft, but don’t worry – they’ll firm up as they cool.
10. Cool the Cookies
Once the cookies are done baking, let them sit on the baking sheets for about 5 minutes. This will allow them to firm up and be easier to transfer. After 5 minutes, transfer the cookies to a wire rack to cool completely. They’ll finish setting up as they cool, so don’t try to eat them too soon – unless you like warm, gooey cookies (which I totally understand)!
How to Serve Halloween Cookies
These Halloween Cookies are delicious on their own, but they can also be served with a variety of fun pairings:
- With a Glass of Milk: Classic, right? These cookies are perfect for dipping in a cold glass of milk, making it a fun and nostalgic treat.
- In a Cookie Sandwich: Spread a bit of your favorite frosting between two cookies to create a spooky sandwich. You could even tint the frosting black or orange to add to the Halloween vibe!
- As Party Favors: Wrap the cookies in cute Halloween-themed bags or boxes and give them as treats to guests at your Halloween party.
- Serve with Ice Cream: For an extra decadent treat, pair the cookies with a scoop of vanilla, pumpkin, or chocolate ice cream. It’s like a Halloween sundae!
Storing Halloween Cookies
- Room Temperature: These cookies will stay fresh for 3-4 days at room temperature when stored in an airtight container. Keep them in a cool, dry place to prevent them from getting soft.
- Freezing: If you want to make these ahead of time, freeze the cookie dough balls (before baking) for up to 3 months. When you’re ready to bake, just pop them on the baking sheet and bake from frozen. They might need an extra minute or two in the oven.
- Baked Cookies in Freezer: You can also freeze the baked cookies for up to 3 months. Place them in a single layer on a baking sheet and freeze until solid, then transfer to a freezer-safe bag or container. Thaw at room temperature when ready to eat.
Nutrition Information (Optional)
These Halloween Cookies are a sweet treat to indulge in during the Halloween season. They’re packed with sugar, butter, and festive candy, so they’re definitely a treat and not something you’d want to eat every day (unless you’re in the mood for some fun!). Here’s a rough breakdown of the nutrition per cookie:
| Nutrient | Amount per Cookie |
|---|---|
| Calories | 180 |
| Total Fat | 9g |
| Saturated Fat | 5g |
| Cholesterol | 25mg |
| Sodium | 70mg |
| Total Carbohydrates | 26g |
| Dietary Fiber | 1g |
| Sugars | 15g |
| Protein | 1g |
These cookies have a nice balance of sweetness and fat, making them the perfect treat to share at Halloween parties or enjoy as a special snack.
Conclusion
These Halloween Cookies are everything you need to celebrate the spooky season: fun, festive, and absolutely delicious. With the perfect balance of chewy cookie texture, candy-coated crunch, and just the right amount of sweetness, they’ll be a hit with kids and adults alike. Whether you’re baking them for a Halloween party, a school treat, or just to enjoy with family, these cookies are a guaranteed crowd-pleaser!
Remember, the best part about making these cookies is how customizable they are. Feel free to add more candy, sprinkles, or any other spooky embellishments to make them your own! Don’t forget to share them with friends and family, or package them as cute gifts for the season.

Halloween Cookies: A Spooky, Sweet Treat to Enjoy with Family and Friends!
Course: Uncategorized24
cookies15
minutes10
minutes180
kcalIngredients
1/2 cup unsalted butter (softened)
1/2 cup brown sugar (packed)
1/2 cup granulated sugar
1 tsp vanilla extract
1 large egg
1 (3.4 oz) box instant vanilla pudding mix
1/2 tsp baking soda
1/4 tsp salt
2 cups all-purpose flour (unsifted)
1/2 cup Halloween sprinkles
1 cup Halloween M&Ms (or your favorite M&M flavor)
Candy eyes (optional)
Directions
- Preheat your oven to 350°F (177°C) and line two baking sheets with parchment paper or silicone mats.
- In a medium bowl, whisk together the flour, baking soda, and salt. Set aside.
- In a large bowl, cream together the butter, brown sugar, and granulated sugar until light and fluffy. Add the vanilla and egg and mix until combined.
- Add the pudding mix and mix until smooth.
- Gradually add the dry ingredients to the wet mixture, mixing until just combined.
- Gently fold in the Halloween sprinkles and M&Ms (and candy eyes if using).
- Scoop dough into 1.5 tbsp portions and place them on the baking sheets, about 2 inches apart.
- Bake for 10-12 minutes, or until the edges are golden. Let cool on the baking sheets for 5 minutes before transferring to a wire rack to cool completely.
Halloween Cookies FAQs
Can I use different candy in these cookies?
Absolutely! You can swap the M&Ms for any candy you like. Reese’s Pieces, Skittles, or even chopped-up candy bars would be a fun choice.
Can I make these cookies in advance?
Yes! You can make the dough ahead of time and refrigerate it for up to 2 days. You can also freeze the dough (before baking) for up to 3 months. Just bake from frozen!
Are these cookies soft or crunchy?
These cookies are soft and chewy, with a slight crispness around the edges. The addition of pudding mix gives them a wonderfully soft texture.