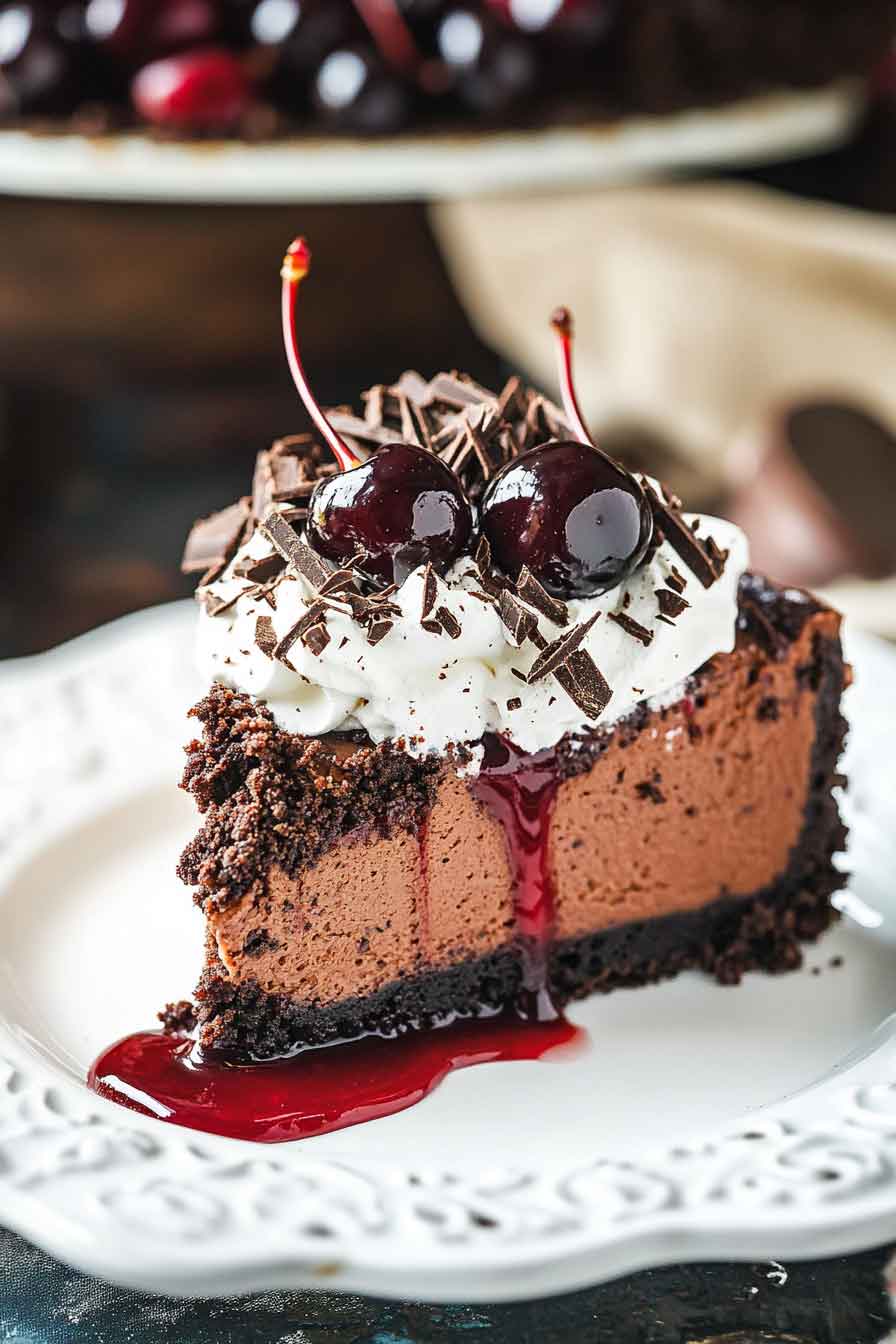
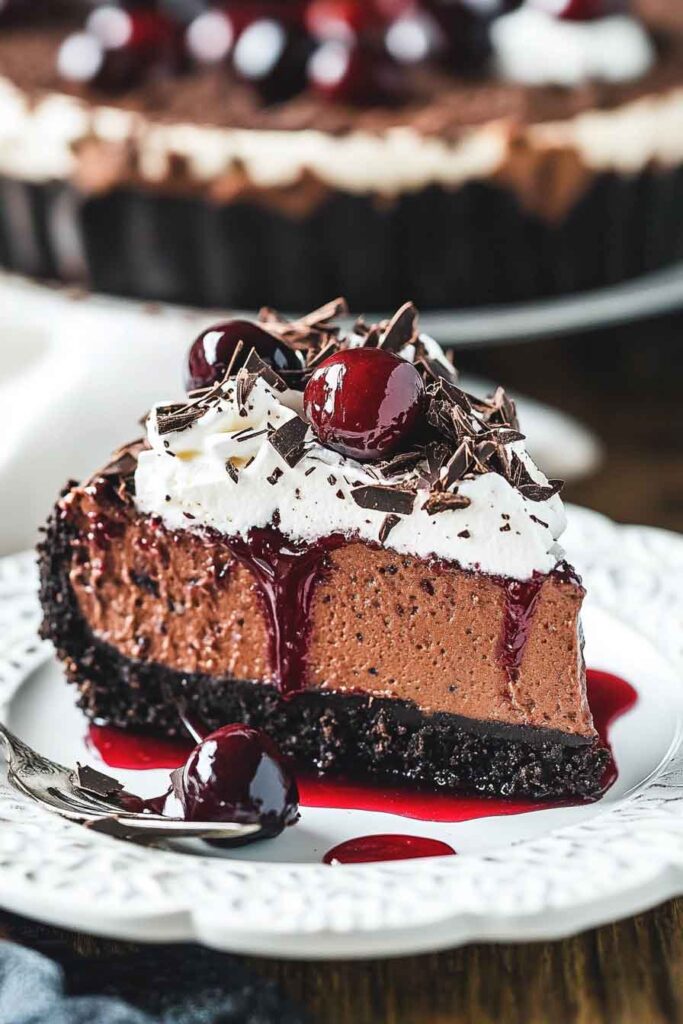
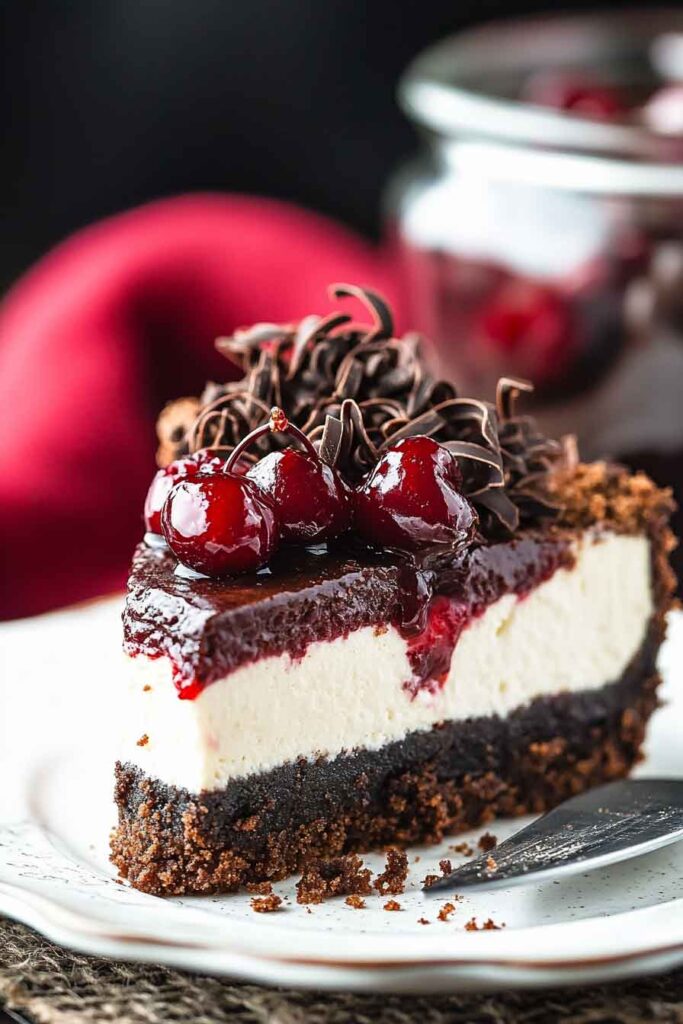
Black Forest Cheesecake
I still remember the first time I made a Black Forest Cheesecake. The rich chocolate, sweet cherries, and creamy layers felt like magic. It was one of those desserts that made me stop and smile.
You know how some cakes just look fancy but taste plain? Well, this one is the opposite. It’s bold, it’s sweet, and every bite feels special. That’s why I keep coming back to it.
And the best part? It’s not as hard as it looks. I’ll show you how I made mine, and I promise it’ll feel simple and fun. Ready to dive in?

Why You’ll Love This Recipe
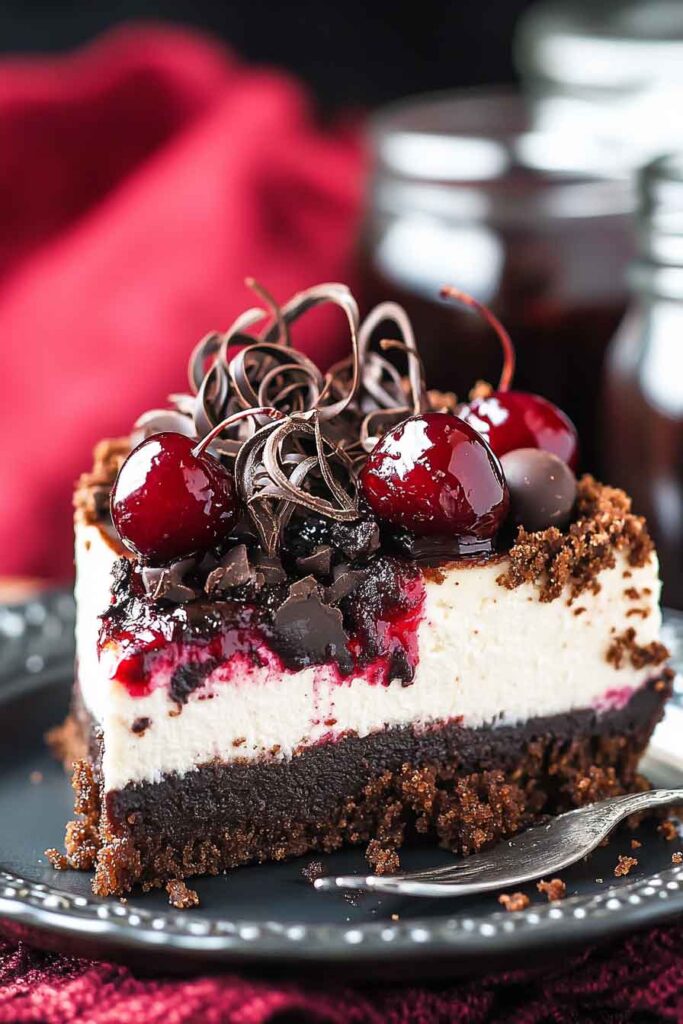
- Rich & Creamy: The cheesecake filling is smooth, rich, and perfectly balanced, providing that melt-in-your-mouth sensation.
- Decadent Toppings: With homemade cherry pie filling, whipped cream, and chocolate shavings, each bite is pure bliss.
- Great for Special Occasions: Whether it’s a birthday, anniversary, or holiday, this cheesecake will impress everyone.
- Easy to Make: Despite the indulgent flavors, the recipe is surprisingly easy to prepare, with a simple crust and filling.
- Make-Ahead Friendly: You can prepare the cheesecake in advance, allowing you to enjoy your event stress-free.
Required Kitchen Tools
- Springform Pan: A 9-inch springform pan is essential for this cheesecake, ensuring easy removal once it’s chilled.
- Food Processor: For crushing the Oreo cookies into fine crumbs for the crust.
- Hand or Stand Mixer: This will help you achieve a smooth, lump-free cheesecake filling.
- Whisk & Bowls: You’ll need a whisk and mixing bowls for both the cheesecake filling and the cherry topping.
- Spatula: To smooth the cheesecake filling and carefully spread the cherry topping.
- Oven & Baking Sheet: For baking the crust and cheesecake, as well as keeping the cheesecake stable while it cools.
Ingredients
Here’s everything you’ll need to make this indulgent dessert (exact measurements are in the recipe card below):
For the Crust:
- Oreo Cookies (20 pieces): Crushed in a food processor until they form fine crumbs, providing the perfect chocolatey base for the cheesecake.
- Unsalted Butter (3 tablespoons): Melted to help bind the Oreo crumbs together and form a solid crust.
For the Cheesecake:
- Cream Cheese (32 ounces): Room temperature cream cheese is key to achieving a smooth, creamy filling.
- Granulated Sugar (½ cup): Sweetens the cheesecake filling to perfection without overpowering the other flavors.
- Eggs (4 large): Room temperature eggs ensure a smooth, uniform filling when mixed into the cheesecake batter.
- Pure Vanilla Extract (2 teaspoons): Adds a warm, fragrant note to the cheesecake filling.
- Heavy Cream (½ cup): Provides richness and helps to give the cheesecake a luscious texture.
- Semisweet Chocolate Chips (2 cups): Melted and mixed into the cheesecake filling to give it that irresistible chocolate flavor.
- All-Purpose Flour (2 tablespoons): Helps stabilize the filling, ensuring a smooth and firm texture after baking.
For the Topping:
- Homemade Cherry Pie Filling: Fresh or canned cherries can be used to make a delicious homemade cherry topping. The cherries’ tartness balances the sweetness of the cheesecake.
- Whipped Cream: Light, fluffy whipped cream is the perfect topping to add extra indulgence to each slice.
- Chocolate Shavings: Adds an extra touch of chocolatey goodness and an elegant presentation to the cheesecake.
Variations for Black Forest Cheesecake
- Use Different Cookies for the Crust: If you want a variation from Oreos, try using graham crackers, digestive biscuits, or chocolate wafer cookies for a unique crust flavor.
- Add More Layers of Chocolate: Swirl some melted chocolate into the cheesecake batter before baking for extra richness.
- Try Other Fruits: While cherries are classic for a Black Forest dessert, you could substitute them with raspberries, strawberries, or blueberries for a fun twist.
- Make It a No-Bake Cheesecake: If you prefer a no-bake option, you can skip the baking step and refrigerate the cheesecake until set. Just ensure the cream cheese is well-mixed and firm enough for the desired texture.
Step-by-Step Instructions
1. Prepare the Crust
Start by preheating your oven to 325°F (163°C). Grease your 9-inch springform pan with butter and line the bottom with parchment paper to ensure the cheesecake comes out easily once it’s finished.
In a food processor, crush the Oreo cookies until you have fine crumbs. You can do this in batches if necessary. Once crushed, transfer the crumbs to a bowl, and stir in the melted butter. Mix until all the crumbs are evenly coated in butter.
Press the Oreo crumb mixture firmly into the bottom of the prepared springform pan to form an even crust layer. Use the back of a spoon or your fingers to press the crumbs down firmly. Once done, bake the crust for 8-10 minutes, just until it firms up. After baking, remove it from the oven and allow it to cool completely while you prepare the filling.
2. Make the Cheesecake Filling
While the crust is cooling, it’s time to make the creamy cheesecake filling. Start by beating the room-temperature cream cheese in a large mixing bowl using a hand or stand mixer. Beat on medium speed for about 2 minutes until the cream cheese is smooth and lump-free.
Add the granulated sugar and continue mixing until fully combined, about 1 minute. Then, add the eggs, one at a time, making sure each egg is fully incorporated before adding the next one. Once the eggs are mixed in, add the vanilla extract and heavy cream. Mix again until everything is well combined.
Melt the semisweet chocolate chips in a heatproof bowl over a pot of simmering water or in the microwave, stirring every 30 seconds to prevent burning. Once melted and smooth, let it cool for a few minutes before adding it to the cream cheese mixture. Stir in the melted chocolate, followed by the all-purpose flour. The flour helps stabilize the filling and gives it that perfect creamy texture after baking.
3. Bake the Cheesecake
Pour the cheesecake filling over the cooled Oreo crust, spreading it out evenly. Tap the pan gently on the countertop to release any air bubbles in the filling.
Place the cheesecake in the preheated oven and bake at 325°F (163°C) for about 50-60 minutes. The cheesecake should be set around the edges but slightly wobbly in the center. If the top of the cheesecake begins to brown too much, you can loosely cover it with aluminum foil.
Once baked, turn off the oven and leave the cheesecake inside for an additional hour with the door slightly ajar. This will help it cool gradually and prevent cracking. Afterward, remove it from the oven and let it cool completely at room temperature.
4. Chill the Cheesecake
Once the cheesecake has cooled, refrigerate it for at least 4 hours, or preferably overnight, to allow it to firm up and set properly.
5. Make the Cherry Topping
While the cheesecake is chilling, prepare the homemade cherry topping. If you’re using fresh cherries, pit and slice them. If you’re using canned cherries, simply drain the syrup and set them aside. To make the topping, place the cherries in a small saucepan over medium heat with a little sugar and a splash of lemon juice. Cook for 5-7 minutes until the cherries release their juices and the mixture thickens into a syrup-like consistency.
Let the cherry topping cool completely before adding it to the cheesecake. Once cool, spoon the cherry topping generously over the cheesecake just before serving.
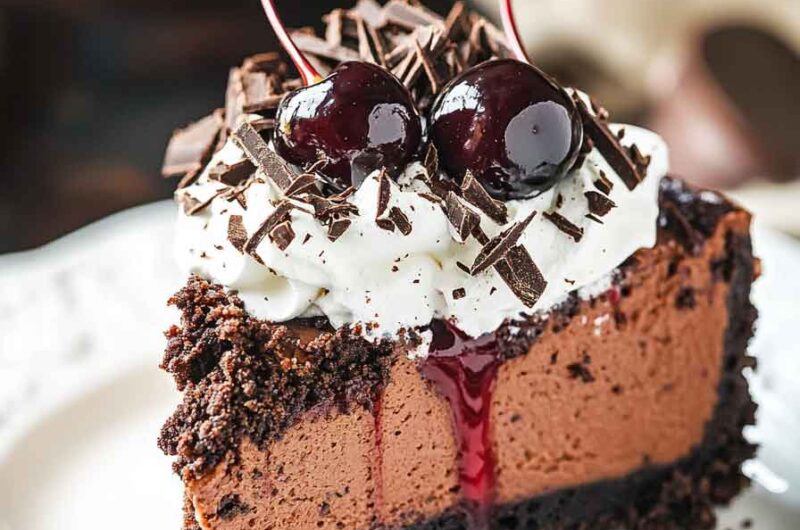
6. Serve and Decorate
Once your cheesecake is fully chilled and the cherry topping is ready, it’s time to finish decorating. Top the cheesecake with fluffy whipped cream, spreading it around the edges or creating beautiful peaks with a piping bag. For an extra special touch, sprinkle chocolate shavings over the whipped cream and the cherry topping.
Slice, serve, and enjoy the delicious layers of chocolate, cheesecake, and cherries in every bite!
Storing Black Forest Cheesecake
- Leftover Cheesecake: Store leftover cheesecake in the refrigerator in an airtight container for up to 5 days. Make sure to cover the surface with plastic wrap to prevent it from drying out.
- Freezing Cheesecake: You can freeze the cheesecake for up to 3 months. Be sure to wrap it tightly in plastic wrap and aluminum foil to prevent freezer burn. Let it thaw in the fridge overnight before serving.
Nutrition Information (per serving)
| Nutrient | Amount |
|---|---|
| Calories | 500 |
| Total Fat | 35g |
| Saturated Fat | 20g |
| Cholesterol | 130mg |
| Sodium | 200mg |
| Total Carbohydrates | 45g |
| Dietary Fiber | 2g |
| Sugars | 35g |
| Protein | 7g |
Conclusion
This Black Forest Cheesecake is the perfect combination of creamy cheesecake, decadent chocolate, and sweet cherries. With its rich, indulgent flavors and stunning presentation, it’s a dessert that will wow your friends and family every time. Whether you’re making it for a special celebration or just a treat for yourself, this cheesecake is sure to be a hit! Plus, the recipe is simple enough that even beginner bakers can make it successfully. So go ahead, give it a try, and get ready to fall in love with this heavenly dessert.
Black Forest Cheesecake
Course: Uncategorized12-16
servings30
minutes50
minutes500
kcal4
hoursIngredients
- For the Crust:
20 Oreo cookies, crushed into fine crumbs
3 tablespoons unsalted butter, melted
- For the Cheesecake:
32 ounces cream cheese, room temperature
½ cup granulated sugar
4 large eggs, room temperature
2 teaspoons pure vanilla extract
½ cup heavy cream
2 cups semisweet chocolate chips
2 tablespoons all-purpose flour
- For the Topping:
Homemade cherry pie filling
Whipped cream
Chocolate shavings
Directions
- Preheat oven to 325°F (163°C). Grease a 9-inch springform pan and line with parchment paper.
- Prepare the crust by crushing the Oreo cookies in a food processor and mixing with melted butter. Press into the bottom of the pan and bake for 8-10 minutes. Let cool.
- Make the cheesecake filling by beating cream cheese and sugar until smooth, then adding eggs, vanilla, heavy cream, melted chocolate, and flour. Mix until well combined.
- Pour the filling over the cooled crust and bake for 50-60 minutes, then let cool in the oven for an hour. Chill in the refrigerator for at least 4 hours or overnight.
- Top with homemade cherry pie filling, whipped cream, and chocolate shavings before serving.