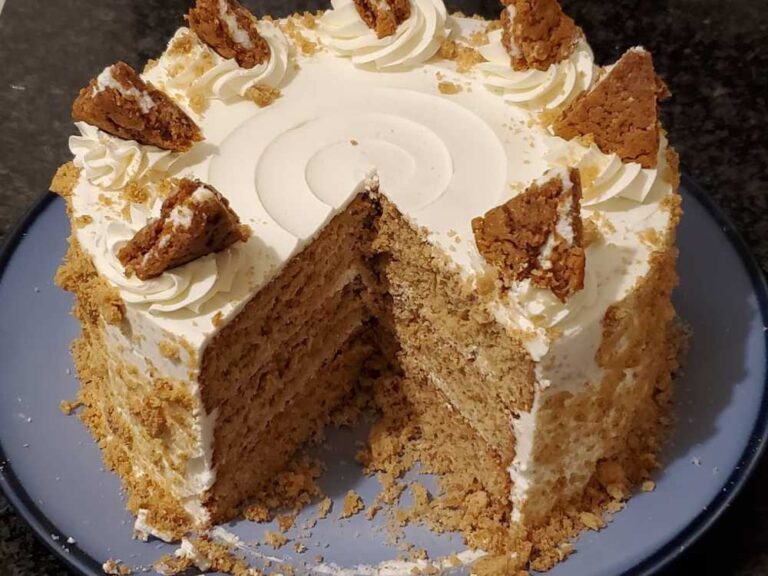
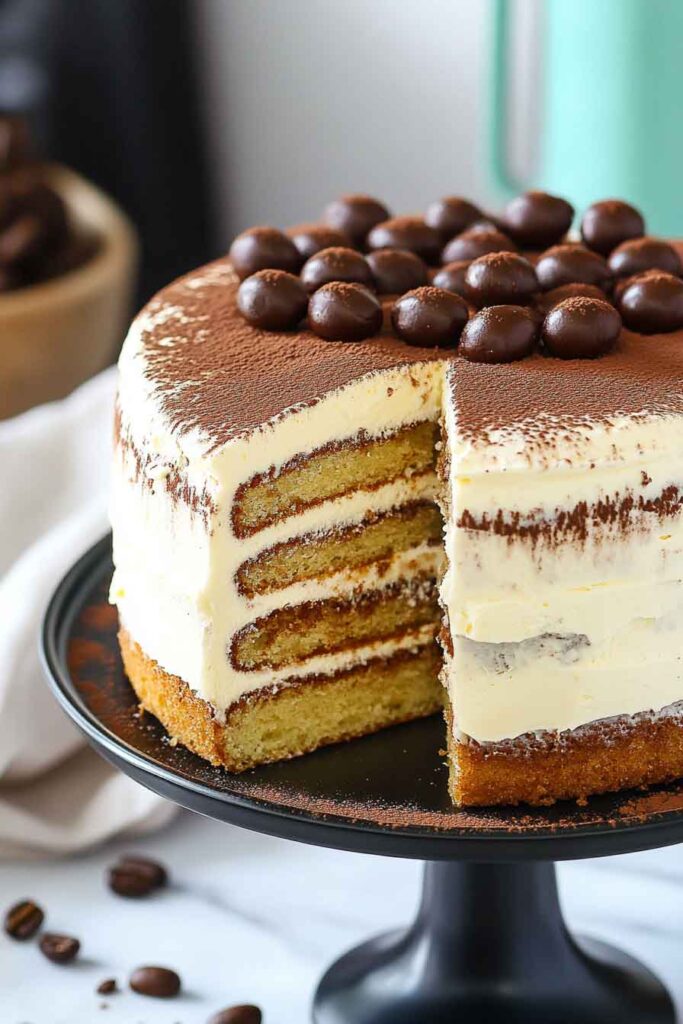
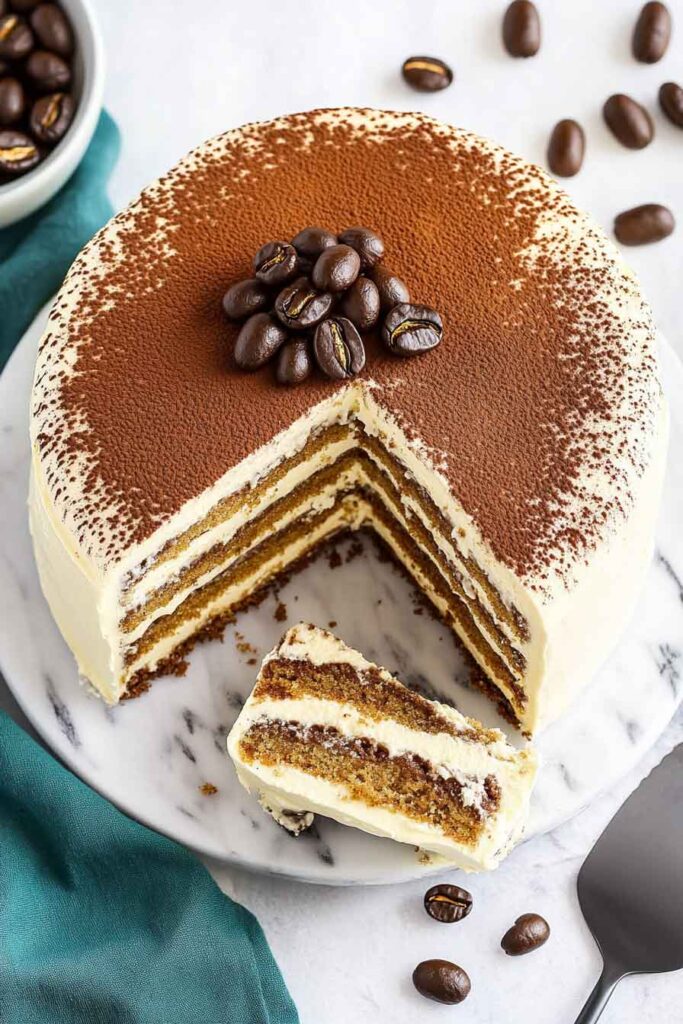
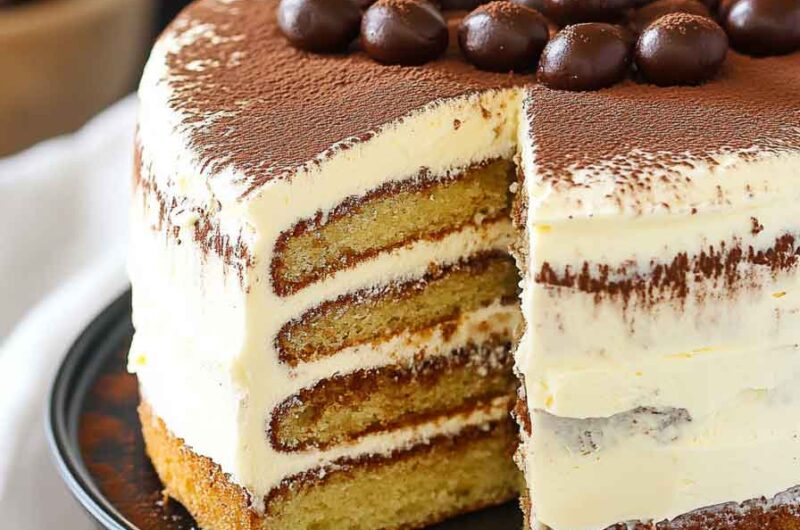
Tiramisu Layer Cake

Oh wow, you know that feeling when you want something fancy but still super cozy? That’s how I felt when I made this Tiramisu Layer Cake. It’s soft, sweet, and has that dreamy coffee-chocolate vibe.
The layers are fluffy, the cream is smooth, and the taste is just… wow. Every bite feels like a little hug with coffee and cocoa. Honestly, I couldn’t stop smiling after the first slice.
The best part is it looks amazing but it’s not too hard to make. With a few simple steps, you can have a cake that feels special enough for a party but easy enough for home. And it always impresses friends and family.
So let’s grab some coffee, cocoa, and a mixing bowl. This Tiramisu Layer Cake is waiting, and trust me, you’re going to love it.
Why You’ll Love This Recipe
- A Twist on a Classic: If you’re a fan of classic tiramisu, you’re going to love this cake. It takes the beloved Italian dessert and turns it into a show-stopping layered cake.
- Rich and Creamy: With layers of mascarpone cheese frosting and a delicate Genoise sponge cake soaked in coffee liqueur, each bite is an explosion of flavor.
- Perfect for Special Occasions: Whether you’re celebrating a birthday, holiday, or just because, this Tiramisu Layer Cake is sure to impress your friends and family.
- Customizable: If you prefer a more intense coffee flavor or want to experiment with different liqueurs, this recipe is versatile enough for you to make your own signature version.
- Make-Ahead Friendly: This cake actually improves with time, making it an excellent choice for preparing in advance.
Required Kitchen Tools
Before diving into the recipe, make sure you have the following tools on hand to make your Tiramisu Layer Cake:
- Stand Mixer or Hand Mixer: For whipping the frosting and batter.
- Two 8-inch Cake Pans: To bake the layers of cake evenly.
- Whisk: To mix dry ingredients.
- Measuring Cups and Spoons: Precision matters!
- Spatula: For spreading the mascarpone frosting.
- Cooling Rack: To ensure the cake layers cool properly.
- Fine Mesh Sifter: For dusting the cake with cocoa powder at the end.
- Parchment Paper: To line the cake pans and ensure easy removal after baking.
Ingredients
Here’s everything you need to create this indulgent treat:
For the Genoise Sponge Cake:
- 6 large eggs (room temperature): Eggs provide structure and moisture to the cake.
- 200 g granulated sugar: Sweetens the cake while helping it rise.
- 130 g cake flour: For a light, airy texture.
- ½ teaspoon baking powder: Ensures the cake rises perfectly.
- 2 teaspoons espresso powder: Adds a deep coffee flavor that complements the mascarpone.
- 150 ml hot water: Helps dissolve the espresso powder and adds moisture to the cake.
- 30 ml coffee liqueur (such as Kahlua): This gives the cake an extra layer of flavor, intensifying the coffee notes.
For the Mascarpone Frosting:
- 500 g mascarpone cheese (softened): The heart of the tiramisu frosting, providing a rich, creamy texture.
- 250 g whipping cream: Whipped to perfection to create a light, airy frosting that complements the cake.
- 150 g powdered sugar: Sweetens the frosting and helps stabilize the whipped cream.
- Cocoa powder (for dusting): Adds the finishing touch with a subtle cocoa flavor.
Variations for Tiramisu Layer Cake
While this Tiramisu Layer Cake recipe is a crowd-pleaser on its own, there are several ways to make it your own!
Add Flavor with Different Liqueurs:
- Swap Kahlua for Amaretto: If you want a hint of almond flavor, substitute Kahlua with Amaretto.
- Use Dark Rum: Dark rum will give your cake a deeper, more intense flavor profile.
Coffee Variations:
- Make It Decaf: For those avoiding caffeine, you can substitute the espresso powder with decaffeinated coffee powder.
- Add a Hint of Cinnamon: For a cozy twist, sprinkle cinnamon over the frosting or mix it into the cake batter.
Add Chocolate:
- Chocolate Sponge Cake: Swap out some of the cake flour for cocoa powder to create a chocolate-flavored Genoise sponge cake.
- Chocolate Chips: Stir in chocolate chips into the frosting or cake batter for a bit of texture.
Step-by-Step Instructions for Tiramisu Layer Cake
1. Make the Genoise Sponge Cake
- Prepare the Oven and Pans: Preheat your oven to 350°F (175°C). Grease two 8-inch cake pans and line the bottom with parchment paper to ensure the cakes come out easily.
- Mix the Wet Ingredients: In a small bowl, dissolve the espresso powder in the hot water. Stir in the coffee liqueur and set this mixture aside. In a large mixing bowl, beat the eggs and granulated sugar together until light and fluffy, about 5 minutes. This creates a rich and airy base for your cake.
- Combine the Dry Ingredients: In a separate bowl, sift together the cake flour and baking powder. Gradually add the dry ingredients to the egg mixture, stirring gently to avoid deflating the batter.
- Add the Coffee Mixture: Carefully fold the dissolved espresso and coffee liqueur mixture into the batter. The coffee will give your sponge cake a wonderful depth of flavor.
- Bake the Cake: Divide the batter evenly between the two cake pans. Bake in the preheated oven for 25-30 minutes, or until a toothpick inserted into the center comes out clean. Allow the cakes to cool in the pans for 10 minutes before transferring them to a wire rack to cool completely.
2. Make the Mascarpone Frosting
- Whip the Whipping Cream: In a chilled mixing bowl, whip the heavy cream until stiff peaks form. This can take 2-3 minutes with a hand or stand mixer. Be careful not to overwhip.
- Combine Mascarpone and Sugar: In another large mixing bowl, beat the softened mascarpone cheese and powdered sugar together until smooth and creamy.
- Fold in the Whipped Cream: Gently fold the whipped cream into the mascarpone mixture. Use a spatula to combine until light and fluffy. Be careful not to deflate the whipped cream.
3. Assemble the Cake
- Prepare the Cake Layers: Once the cake layers are fully cooled, carefully slice each layer in half horizontally. This will give you four layers in total.
- Soak the Cake: Brush each cake layer with a generous amount of the coffee liqueur mixture. This will help infuse the cake with moisture and flavor.
- Frost the Cake: Place the first cake layer on a serving plate and spread a thick layer of mascarpone frosting on top. Repeat this process with the next three layers. Make sure to coat the entire cake with the frosting, smoothing it out as you go.
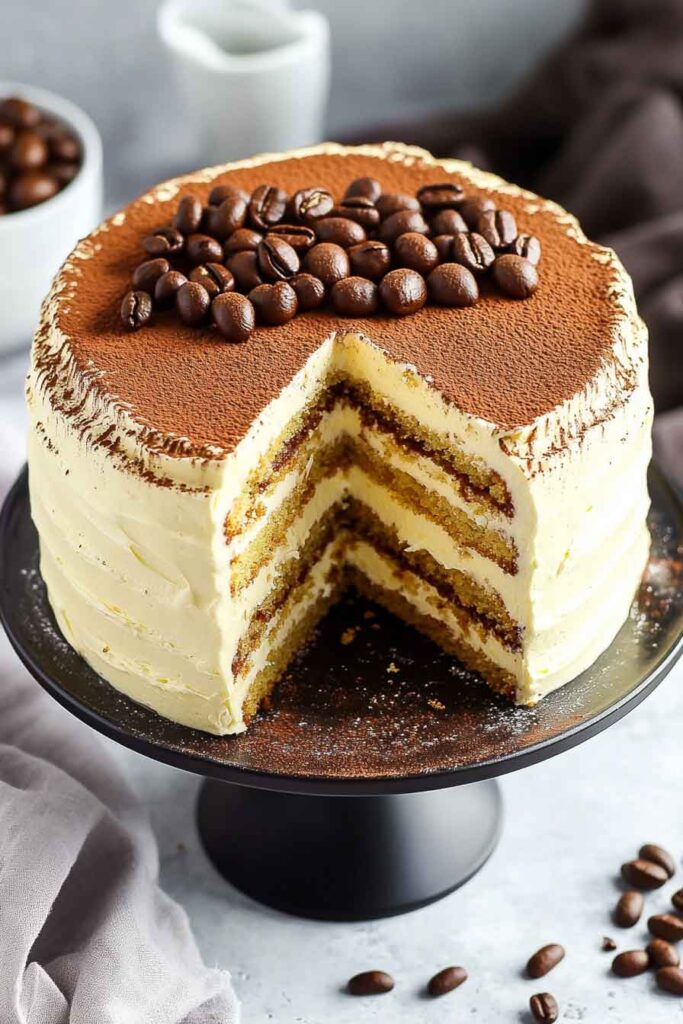
4. Dust with Cocoa Powder
Once the cake is assembled, use a fine mesh sifter to dust the top of the cake with cocoa powder. This adds a beautiful finishing touch and enhances the coffee flavor.
How to Serve Tiramisu Layer Cake
- Classic Italian Style: Serve the cake slices with a small cup of espresso or a chilled glass of dessert wine for an authentic Italian experience.
- Layered on Plates: For an elegant presentation, place each slice on individual dessert plates and garnish with extra cocoa powder or chocolate shavings.
Storing Tiramisu Layer Cake
- In the Refrigerator: Because of the mascarpone frosting, this cake needs to be stored in the fridge. Keep it covered in an airtight container for up to 4 days.
- Freezing: You can freeze individual slices of the Tiramisu Layer Cake for up to 2 months. Just wrap them tightly in plastic wrap and place them in a freezer-safe container. Thaw in the refrigerator overnight before serving.
Nutrition Facts (Per Serving)
- Calories: 420 kcal
- Total Fat: 24 g
- Saturated Fat: 14 g
- Cholesterol: 130 mg
- Sodium: 180 mg
- Total Carbohydrates: 45 g
- Dietary Fiber: 1 g
- Sugars: 30 g
- Protein: 6 g
Tiramisu Layer Cake FAQs
Can I make this cake without coffee liqueur?
Yes, you can substitute the coffee liqueur with more hot water or coffee for a non-alcoholic version. It will still have the delicious coffee flavor but without the extra kick.
Can I use a different frosting?
If you’re not a fan of mascarpone, you can try using whipped cream cheese or a simple buttercream. Just keep in mind that it will change the flavor profile of the cake.
How do I make the cake more coffee-flavored?
For a stronger coffee taste, increase the amount of espresso powder or use freshly brewed espresso in place of hot water for soaking the cake layers.
Tiramisu Layer Cake
Course: Uncategorized8-10
servings45
minutes25
minutes420
kcalIngredients
- Genoise Sponge Cake:
6 large eggs, room temperature
200 g granulated sugar
130 g cake flour
½ teaspoon baking powder
2 teaspoons espresso powder
150 ml hot water
30 ml coffee liqueur (e.g., Kahlua)
- Mascarpone Frosting:
500 g mascarpone cheese, softened
250 g whipping cream
150 g powdered sugar
Cocoa powder, for dusting
Directions
- Preheat the oven to 350°F (175°C) and prepare two 8-inch cake pans.
- Whisk together the espresso powder, hot water, and coffee liqueur. Set aside.
- Beat eggs and sugar until light and fluffy. Gradually add sifted flour and baking powder. Fold in the espresso mixture.
- Divide batter between the prepared pans and bake for 25-30 minutes. Cool completely.
- Whip the cream to stiff peaks and fold into mascarpone cheese and powdered sugar.
- Assemble the cake by slicing the cooled cake layers in half. Brush with the coffee mixture and layer with frosting.
- Dust with cocoa powder and refrigerate until ready to serve.
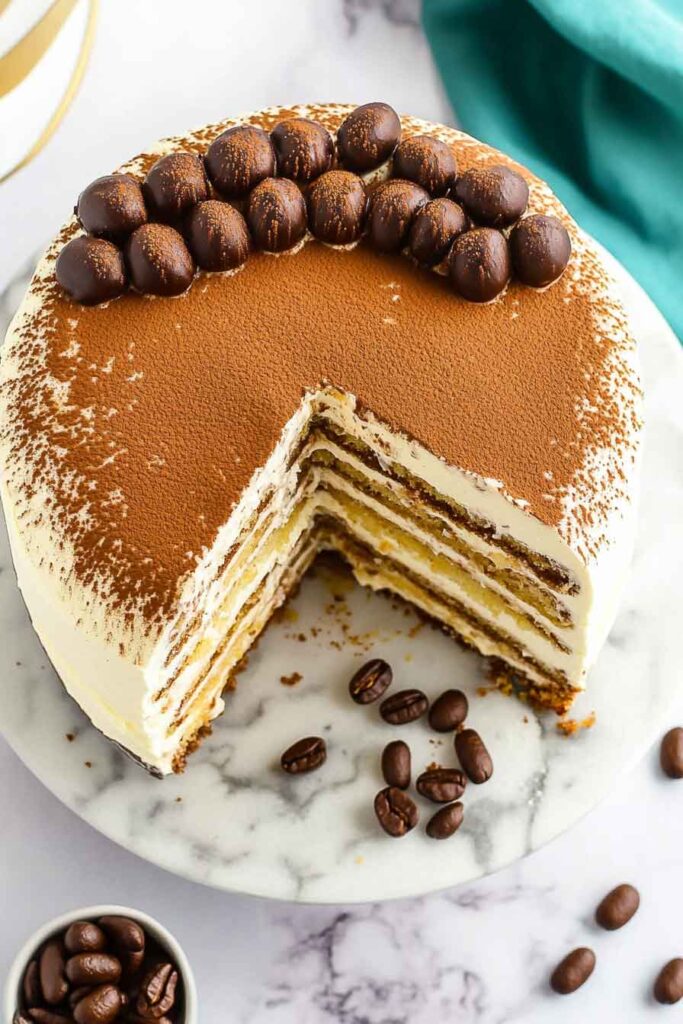
Conclusion
Tiramisu Layer Cake is a showstopper for any occasion. With layers of rich sponge cake soaked in coffee and coffee liqueur, paired with a creamy mascarpone frosting, it’s a dessert that truly encapsulates the indulgence of traditional tiramisu in a fresh and exciting form. Perfect for anyone who craves a little sweetness with a touch of elegance, this cake is sure to become your new go-to for celebrations. Enjoy!