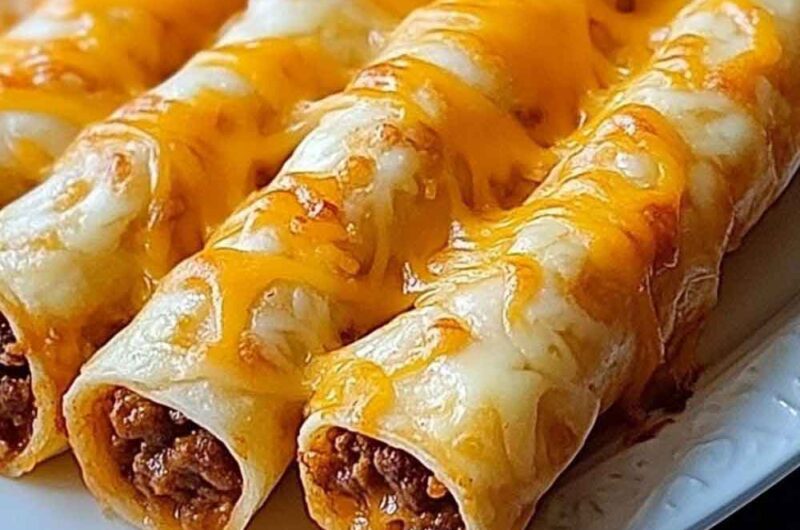
Taco Flavored Breadsticks – A Cheesy, Spiced Snack You’ll Love
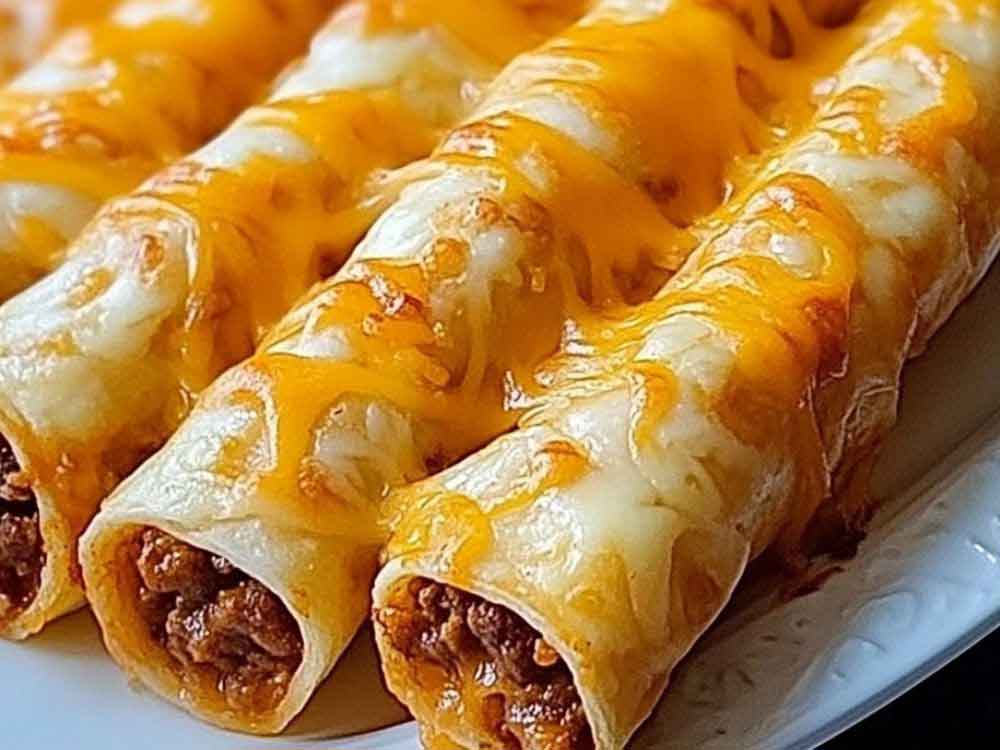
You know that feeling when you’re craving tacos but also want something crispy to snack on? That’s exactly why we made Taco Flavored Breadsticks! They’ve got all the bold, cheesy, and spicy taco goodness packed into a crunchy, dippable stick.
Imagine biting into a warm, crispy breadstick with hints of smoky paprika, tangy cheddar, and a little kick of spice. Every crunch is like a mini taco party in your mouth! Oh, and they’re perfect for dipping in salsa, guac, or queso.
We couldn’t stop eating them, and we know you won’t be able to either. Whether it’s snack time, game night, or just because—you need these in your life. They’re fun, flavorful, and totally addicting.
So, what are you waiting for? Grab a batch, dip away, and let the taco magic happen! Trust us—your taste buds will thank you.

Why You’ll Love This Recipe
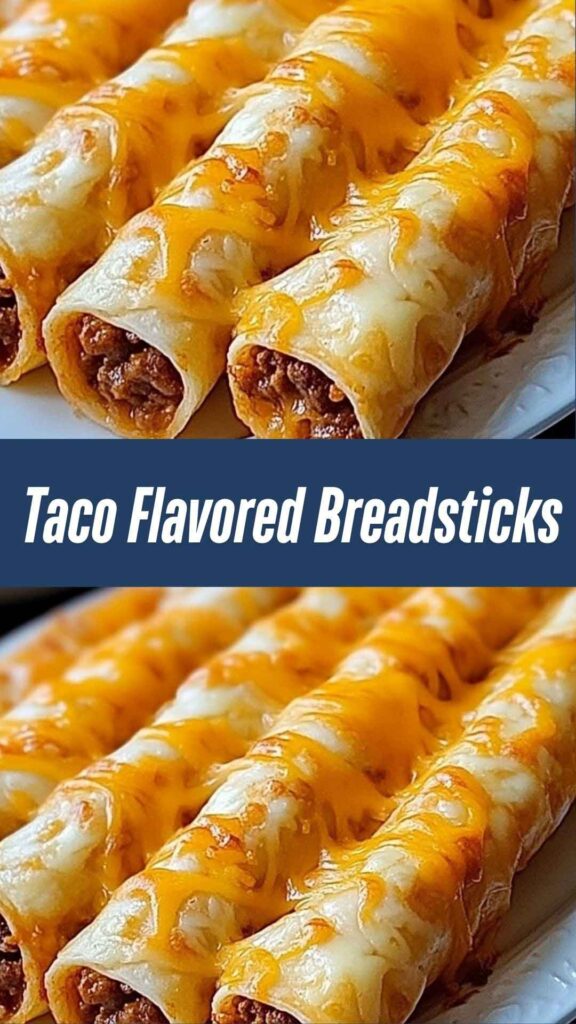
- Ultimate Flavor Fusion: A crispy, golden breadstick filled with seasoned beef, taco spices, and gooey melted cheese.
- Perfect for Any Occasion: Serve as an appetizer, snack, or even a unique side dish for taco night.
- Family Favorite: Kids and adults alike will love these cheesy, savory, taco-spiced breadsticks.
- Easy to Make: Uses store-bought pizza dough, making prep super simple.
- Great for Dipping: Serve with salsa, guacamole, or even queso for an extra kick!
Required Kitchen Tools
Before we start, here’s what you’ll need to make these taco-flavored breadsticks:
- Large Skillet – For browning the beef and cooking the taco-flavored mixture.
- Baking Sheet – To bake the breadsticks to crispy perfection.
- Rolling Pin – To roll out the pizza dough into a rectangle.
- Brush – For spreading olive oil over the top for a golden finish.
- Knife or Pizza Cutter – To slice the dough into strips.
Key Ingredients for Taco Flavored Breadsticks
For the Filling:
- Ground Beef (1/2 lb): The hearty, seasoned filling that gives these breadsticks a taco-inspired kick.
- Small Onion (Diced, 1/4 cup): Adds a slightly sweet, savory depth to the beef.
- Garlic (Minced, 2 cloves): Enhances the overall flavor with its aromatic touch.
- Taco Seasoning (1 1/2 tbsp): The essential blend of spices that gives these breadsticks their signature taste.
- Mexican Cheese Blend (1 cup, shredded): A mix of cheeses that melts beautifully inside and on top of the breadsticks.
For the Dough:
- Pizza Dough (1 lb, store-bought or homemade): The base for the breadsticks, easy to roll and work with.
- Olive Oil (2 tbsp): Brushed on top for a golden, crispy finish.
For Dipping:
- Salsa: Adds a tangy, spicy contrast to the breadsticks.
- Guacamole: Provides a creamy, cool complement to the cheesy breadsticks.
Variations for Taco Flavored Breadsticks
Want to customize this recipe to your taste? Try these fun variations:
- Spicy Kick: Add diced jalapeños to the beef mixture for extra heat.
- Cheesy Explosion: Add more cheese inside for an ultra-gooey, cheesy breadstick.
- Vegetarian Version: Swap ground beef for black beans or sautéed mushrooms.
- Chicken or Turkey Option: Use ground turkey or shredded chicken instead of beef.
- Extra Crunch: Sprinkle crushed tortilla chips on top before baking for extra crunch.
Step-by-Step Instructions
1. Cook the Beef Filling
- Heat a large skillet over medium heat.
- Add the diced onion and cook until softened (about 2-3 minutes).
- Add the minced garlic and stir for another 30 seconds until fragrant.
- Add the ground beef, breaking it apart with a spatula as it cooks.
- Stir in the taco seasoning and cook until the beef is fully browned.
- Drain excess grease if needed and set aside to cool slightly.
2. Prepare the Dough
- Preheat your oven to 375°F (190°C) and line a baking sheet with parchment paper.
- Roll out the pizza dough into a large rectangle on a lightly floured surface.
- Using a pizza cutter or knife, slice the dough into strips about 1.5 inches wide.
3. Assemble the Breadsticks
Now that the dough is ready, it’s time to assemble these taco-inspired breadsticks!
- Add the Filling:
- Take each dough strip and place a small spoonful of the cooked taco beef in the center.
- Sprinkle shredded Mexican cheese blend over the beef for extra cheesiness.
- Seal the Breadsticks:
- Fold each strip over the filling, pinching the edges tightly to seal.
- Gently roll each breadstick to form a cylindrical shape, making sure no filling is spilling out.
- Place the filled breadsticks onto the prepared baking sheet, leaving some space between them.
- Brush with Olive Oil:
- Lightly brush the top of each breadstick with olive oil for a crispy, golden finish.
- Optionally, sprinkle a little extra taco seasoning or shredded cheese on top for more flavor.
4. Bake Until Golden
- Place the baking sheet in the preheated oven (375°F/190°C).
- Bake for 12-15 minutes, or until the breadsticks turn golden brown and crispy.
- Remove from the oven and let them cool for a few minutes before serving.
How to Serve Taco Flavored Breadsticks
These breadsticks are perfect for dipping! Here are some fun ways to serve them:
- Classic Salsa: A tangy, slightly spicy dip to complement the taco flavors.
- Guacamole: Creamy avocado goodness that balances the spice.
- Queso Dip: For a cheesy overload, dip these breadsticks in warm queso!
- Sour Cream: A cool, creamy contrast to the seasoned breadsticks.
For a fun presentation, arrange them in a basket with a side of dips. Serve them at parties, family gatherings, or even as a game-day snack!
Storing and Reheating
Want to save some for later? Here’s how:
- Refrigeration: Store leftover breadsticks in an airtight container in the fridge for up to 3 days.
- Freezing: Freeze unbaked or baked breadsticks for up to 2 months in a freezer-safe container.
- Reheating: Warm them in a preheated oven (350°F/175°C) for 5-7 minutes to bring back the crispy texture. You can also reheat in an air fryer for a few minutes.
Tips and Tricks for Perfect Taco Flavored Breadsticks
Want to make these breadsticks even better? Here are some expert tips:
- Seal the Dough Well: To prevent the filling from leaking, pinch the edges of the dough tightly or use a fork to press them together.
- Don’t Overfill: Adding too much filling makes the breadsticks hard to seal and may cause them to burst while baking.
- Use Freshly Shredded Cheese: Pre-shredded cheese has anti-caking agents that can make it less melty—shred your own for the best gooey texture.
- Brush with Garlic Butter: For extra flavor, mix melted butter with garlic powder and brush it over the breadsticks before serving.
- Try an Air Fryer: Cook in an air fryer at 375°F for 8-10 minutes for extra crispiness!
Nutrition Information (Per Serving)
| Nutrient | Amount (Per Breadstick) |
|---|---|
| Calories | ~190 kcal |
| Carbohydrates | 22g |
| Protein | 8g |
| Fat | 9g |
| Saturated Fat | 4g |
| Cholesterol | 22mg |
| Sodium | 280mg |
| Fiber | 1g |
Note: Nutrition may vary based on ingredients used.
Conclusion
These Taco Flavored Breadsticks bring a bold, cheesy, and crunchy twist to traditional breadsticks! Whether you’re serving them at a party, as a snack, or alongside a taco-inspired meal, they’re guaranteed to be a crowd-pleaser.
Taco Flavored Breadsticks – A Cheesy, Spiced Snack You’ll Love
Course: Uncategorized10-12 breadsticks
servings15
minutes15
minutes~190 kcal
kcalIngredients
- For the Filling
1/2 lb ground beef
1/4 cup diced onion
2 cloves garlic, minced
1 1/2 tbsp taco seasoning
1 cup shredded Mexican cheese blend
- For the Dough
1 lb pizza dough (store-bought or homemade)
2 tbsp olive oil
- For Dipping (Optional)
Salsa
Guacamole
Queso dip
Sour cream
Directions
- Prepare the Beef Filling
- Heat a skillet over medium heat. Add diced onions and sauté for 2-3 minutes.
- Stir in minced garlic and cook for 30 seconds until fragrant.
- Add ground beef, breaking it apart with a spatula. Cook until browned.
- Mix in taco seasoning and stir well. Drain any excess grease and set aside.
- Prepare the Dough
- Preheat oven to 375°F (190°C) and line a baking sheet with parchment paper.
- Roll out the pizza dough into a large rectangle on a floured surface.
- Cut the dough into strips about 1.5 inches wide using a knife or pizza cutter.
- Assemble the Breadsticks
- Place a spoonful of beef filling in the center of each dough strip.
- Sprinkle shredded cheese over the beef.
- Fold the dough over the filling and pinch the edges to seal.
- Gently roll each breadstick to form a cylindrical shape.
- Arrange them on the baking sheet, leaving space between each.
- Bake the Breadsticks
- Brush each breadstick with olive oil for a crispy, golden texture.
- Bake in the preheated oven for 12-15 minutes, or until golden brown.
- Remove from oven and let them cool for a few minutes.
- Serve and Enjoy!
- Serve warm with salsa, guacamole, queso, or sour cream for dipping.
Taco Flavored Breadsticks FAQs
Can I make these in advance?
Yes! Assemble them ahead of time and refrigerate for up to 24 hours before baking.
Can I freeze these breadsticks?
Yes! You can freeze baked breadsticks for up to 2 months. Reheat in an oven at 350°F for 5-7 minutes.
Can I use a different type of cheese?
Absolutely! Try Monterey Jack, cheddar, or pepper jack for different flavors.
Conclusion
Taco Flavored Breadsticks are the perfect fusion of crispy, golden breadsticks and bold, cheesy taco flavors. With their gooey, seasoned beef and melted cheese filling, these breadsticks make for an irresistible snack, appetizer, or fun twist on taco night.
They’re incredibly easy to make, customizable with your favorite toppings, and great for dipping in salsa, guacamole, or queso. Plus, they store and reheat well, making them a fantastic make-ahead option.
Whether you’re making them for a family gathering, a party, or just to satisfy a cheesy, savory craving, these breadsticks are sure to be a hit. Try them once, and they’ll become a staple in your snack lineup!

