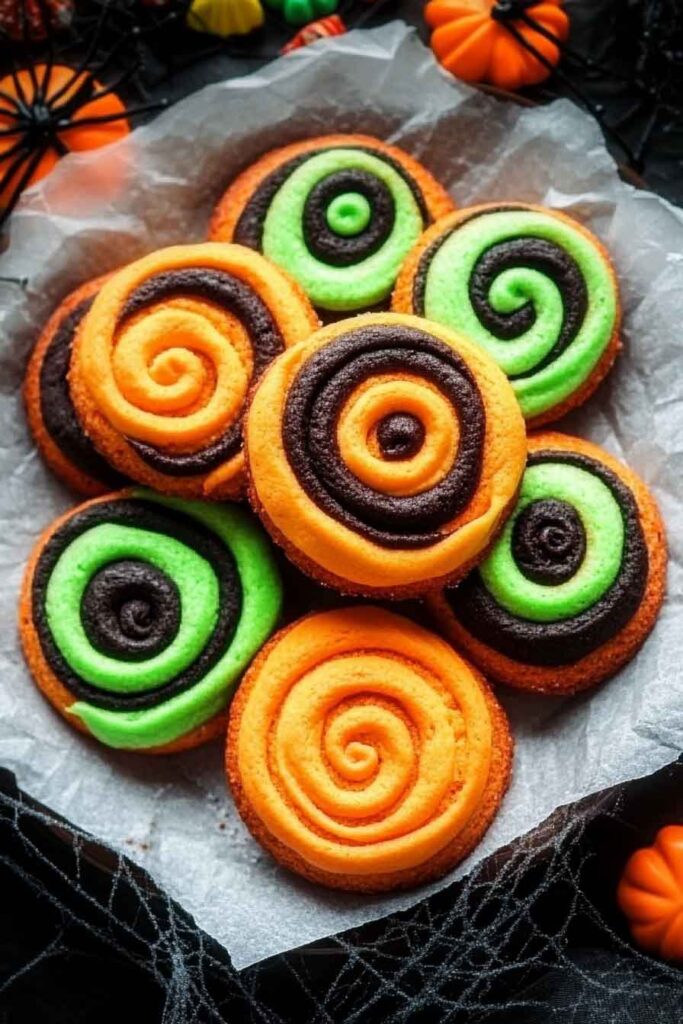
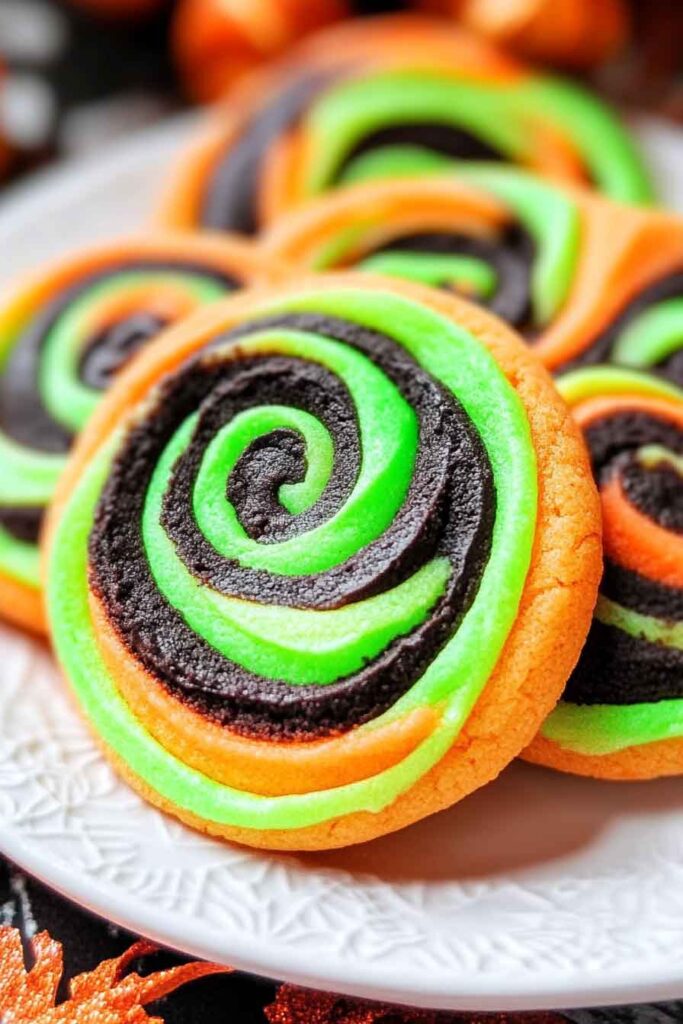
Spooky Swirl Cookies

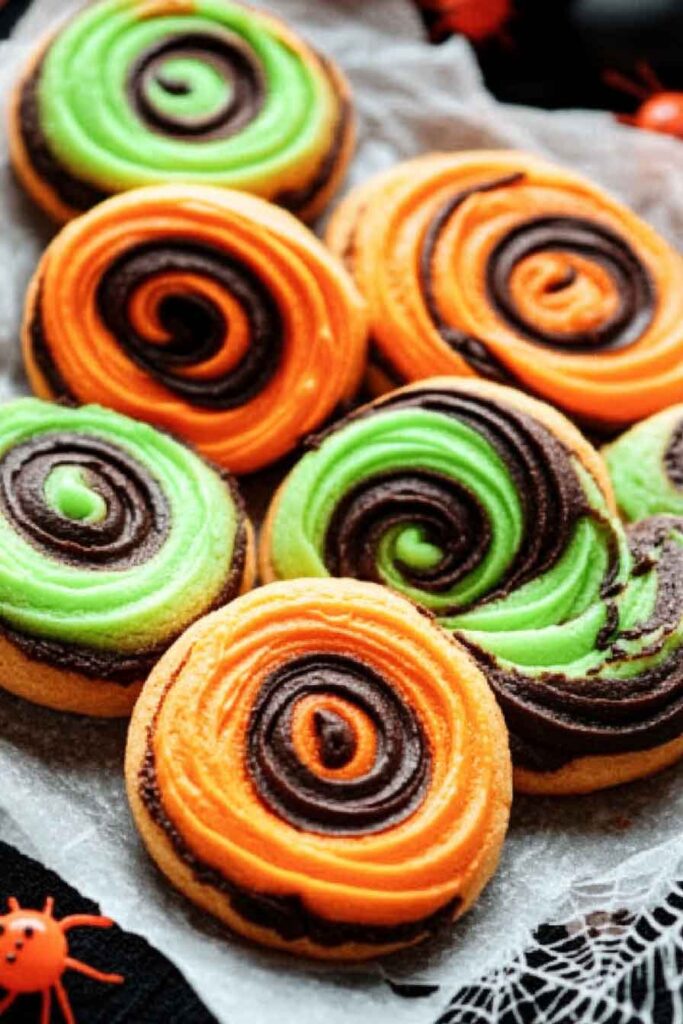
When I first made these Spooky Swirl Cookies, I couldn’t stop smiling. They looked so cool with those bright Halloween colors twisting together. It’s like a fun little magic trick straight from the oven.
The cookies are soft, buttery, and just the right amount of sweet. The swirl pattern makes every batch look different, and that’s what I love most. They’re fun to make with kids or for any Halloween party.
And honestly, they’re way easier than they look. You just roll, slice, and bake—it’s that simple. Every time I make them, people ask how I got that spooky design.
So grab your food coloring and rolling pin. Let’s bake these Spooky Swirl Cookies and bring a little Halloween fun to your kitchen.

Why You’ll Love This Recipe
- Perfect for Halloween: These cookies are an instant hit for Halloween parties and gatherings.
- Visually Fun: The neon swirls in the dough make for eye-catching, festive cookies that scream “spooky season.”
- Soft and Chewy Texture: The blend of cake flour and cornstarch ensures a light and soft cookie with a chewy center.
- Simple Ingredients: You likely already have most of these ingredients in your pantry, making these cookies super easy to whip up!
- Fun for the Whole Family: This is a great baking activity to do with kids or friends—just be ready for some messy, colorful fun!
Required Kitchen Tools
Before we get started, here’s what you’ll need for the Spooky Swirl Cookies:
- Mixing bowls: You’ll need a few for mixing wet ingredients and dry ingredients separately.
- Hand mixer or stand mixer: This is essential for creaming the butter and sugar, ensuring a smooth cookie dough.
- Measuring spoons and cups: Accurate measurements are key to getting that perfect cookie texture.
- Spatula: You’ll need this to scrape down the sides of the bowl.
- Baking sheets: For baking the cookies. You’ll also want parchment paper or silicone baking mats for easy cleanup.
- Cooling rack: Let the cookies cool and set before serving or storing.
- Plastic wrap or an airtight container: To chill the dough and store the cookies once baked.
Ingredients
Here’s what you’ll need to make these spooky and delicious cookies (exact measurements are below):
Dry Ingredients:
- 2 1/2 cups cake flour – Cake flour makes the cookies soft and tender.
- 2 tsp cornstarch – Adds to the softness of the cookies by preventing them from spreading too much during baking.
- 1 1/2 tsp baking powder – Gives the cookies a slight lift and lightness.
- 1/4 tsp salt – Enhances the flavors of the sweet and savory ingredients.
Wet Ingredients:
- 1/2 cup salted butter – At room temperature to create a smooth dough and contribute to that perfect cookie texture.
- 1/4 cup all vegetable shortening – Adds tenderness to the cookies and helps maintain their shape.
- 1 cup granulated sugar – Sweetness to balance the flavor and provide a nice texture.
- 1 large egg – Adds structure and moisture to the dough.
- 1 large egg white – Gives the cookies a light texture.
- 2 tsp vanilla extract – A classic cookie flavor that enhances the sweetness and depth.
Fun Add-ins:
- Neon/Electric Gel Food Coloring – Orange, purple, green, and black to create the swirls that make these cookies so eye-catching.
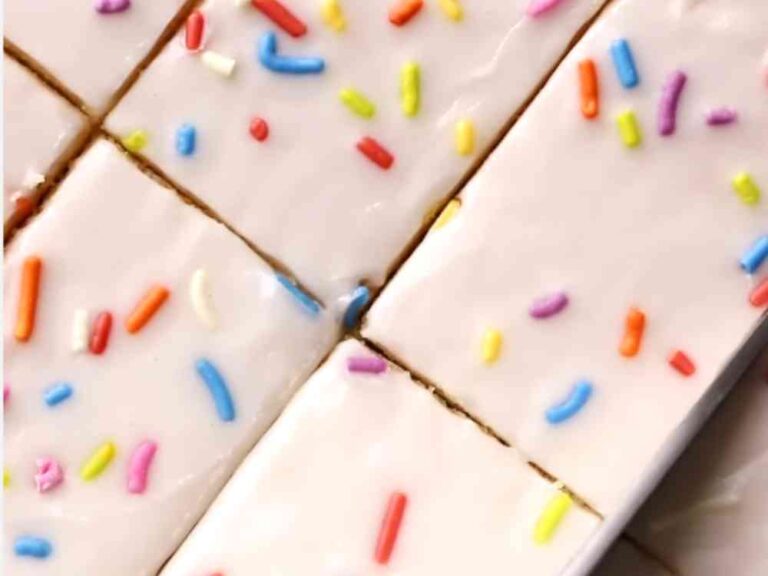
- Nonpareil Sprinkles – Orange, purple, yellow, green, or any combo of Halloween-themed colors for a finishing touch.
Step-by-Step Instructions for Making Spooky Swirl Cookies
1. Whisk the Dry Ingredients
Start by whisking together the dry ingredients in a medium-sized bowl. Combine the cake flour, cornstarch, baking powder, and salt until everything is well mixed. Set this bowl aside, as you’ll add these ingredients to the wet ingredients later.
2. Cream the Wet Ingredients
In a large bowl, use a hand or stand mixer to beat the butter and vegetable shortening until smooth and fluffy. This should take about 2-3 minutes. Add the granulated sugar and continue mixing on medium speed until the mixture is light and creamy.
Once the butter and sugar are properly creamed together, add the egg and egg white, followed by the vanilla extract. Beat until everything is well incorporated.
3. Combine Wet and Dry Ingredients
Slowly add the dry ingredients to the wet mixture, mixing at low speed until everything is just combined. Don’t overmix, as this can lead to tougher cookies.
4. Divide the Dough
Now comes the fun part—dividing the dough into separate portions. Split the dough into 4 equal parts. You’ll use each part for a different color of the spooky swirls.
5. Add Color
Using your neon/electric gel food coloring, add a few drops of each color to the separate portions of dough. Start with a little color and add more until you achieve your desired vibrancy. Work the food coloring into the dough with your hands or a spoon, but be warned: things are going to get a little messy!
The four colors you’ll need are:
- Orange for that classic Halloween pumpkin vibe.
- Purple for that spooky, night-time feel.
- Green for Frankenstein-like fun.
- Black to add that eerie touch to your cookies.
6. Create the Swirls
Once you have your colored doughs ready, it’s time to swirl them together. Take a portion of each color and roll it into logs about 1 inch thick. Place them next to each other and gently press them together. Twist the logs together slightly, then roll the dough into a log shape. You want the colors to remain intact but also swirl a little.
Once you’ve done this for each color, wrap each log of dough in plastic wrap and refrigerate for at least 30 minutes. Chilling the dough helps it firm up and ensures the cookies keep their shape during baking.
7. Preheat the Oven
Preheat your oven to 350°F (177°C) while your dough chills.
8. Slice the Dough
Once chilled, remove the dough from the fridge. Slice the dough into 1/4-inch thick rounds and place them on the prepared baking sheets. Be sure to leave some space between the cookies so they have room to spread as they bake.
9. Bake the Cookies
Bake the cookies in the preheated oven for 10-12 minutes, or until the edges are lightly golden. The centers may look slightly soft, but they’ll firm up as they cool. If you like your cookies softer, aim for the shorter baking time; for a crispier texture, bake a little longer.
10. Cool the Cookies
Allow the cookies to rest on the baking sheet for about 5 minutes before transferring them to a wire rack to cool completely. Once cooled, you can decorate them with nonpareil sprinkles in your favorite Halloween colors to give them that final spooky touch!
Storing Spooky Swirl Cookies
If you somehow manage to have leftovers (which is unlikely because they’re so good), here’s how to store your Spooky Swirl Cookies:
- Room Temperature: Store cookies in an airtight container at room temperature for up to 5 days.
- Freezing: For longer storage, you can freeze the cookies for up to 3 months. Just be sure to wrap them tightly in plastic wrap or foil before placing them in a freezer-safe container.
Serving and Decoration
These Spooky Swirl Cookies are perfect for Halloween-themed events, whether it’s a family gathering, a spooky movie night, or a bake sale. You can serve them as-is or go a step further with some fun decoration. Here are a few ideas:
- Cookie Sandwiches: Spread some orange or purple frosting between two cookies for a fun twist on the traditional cookie.
- Dip in Chocolate: Melt some white or dark chocolate and dip half of each cookie for an extra indulgence.
- Spooky Designs: Use edible markers or frosting to create Halloween-themed designs like ghosts, pumpkins, or spider webs.
Nutrition Information
| Nutrient | Amount per Serving |
|---|---|
| Serving Size | 1 cookie |
| Calories | 165 kcal |
| Total Fat | 8g |
| Saturated Fat | 5g |
| Cholesterol | 25mg |
| Sodium | 65mg |
| Total Carbohydrates | 21g |
| Dietary Fiber | 0.5g |
| Total Sugars | 10g |
| Protein | 2g |
| Calcium | 12mg |
| Iron | 0.5mg |
| Potassium | 35mg |
Nutrition values are approximate and may vary depending on ingredients and serving size.
Conclusion:
Spooky Swirl Cookies are the ultimate Halloween treat—visually striking, delicious, and so much fun to make! The combination of colorful swirls and soft, chewy texture makes them a perfect addition to your Halloween celebration, whether you’re baking with the family or bringing a batch to your next party.
I hope you enjoy baking these spooky delights as much as I do! Don’t forget to share them with friends and family—they’re sure to be a hit at any Halloween gathering. So grab your neon food colors, your baking supplies, and get ready to make some spook-tacular cookies!

Spooky Swirl Cookies
Course: Uncategorized24
cookies15
minutes10
minutes165
kcal30
minutesIngredients
2 1/2 cups cake flour
2 tsp cornstarch
1 1/2 tsp baking powder
1/4 tsp salt
1/2 cup salted butter, at room temperature
1/4 cup all vegetable shortening, at room temperature
1 cup granulated sugar
1 large egg
1 large egg white
2 tsp vanilla extract
Neon/electric gel food coloring (orange, purple, green, and black)
Nonpareil sprinkles (orange, purple, yellow, green, or any combo)
Directions
- Whisk the dry ingredients (cake flour, cornstarch, baking powder, salt) and set aside.
- Cream the wet ingredients (butter, shortening, sugar) until light and fluffy. Add the egg, egg white, and vanilla extract, mixing until smooth.
- Combine wet and dry ingredients until just mixed. Divide dough into four portions.
- Add food coloring to each portion (orange, purple, green, black).
- Roll and swirl the dough into logs, then chill for 30 minutes.
- Preheat oven to 350°F (177°C). Slice dough into 1/4-inch thick rounds and place on baking sheets.
- Bake for 10-12 minutes until edges are golden. Cool for 5 minutes before transferring to a wire rack.
Frequently Asked Questions
Can I use gel food coloring instead of liquid?
Yes, gel food coloring works even better because it gives vibrant color without changing the dough’s texture.
Can I make the cookie dough ahead of time?
Absolutely. You can chill the dough in the fridge for up to 2 days or freeze it for up to a month. Just slice and bake when ready.
What gives these cookies their “swirl” look?
The swirl comes from rolling two colored doughs together, then slicing the log to reveal that spooky spiral pattern.
How do I keep the cookies soft after baking?
Store them in an airtight container with a slice of bread. The moisture from the bread helps keep the cookies soft.
Can I add chocolate chips or sprinkles?
Of course! Mini chocolate chips or Halloween-themed sprinkles add extra fun and texture to your spooky cookies.
Do I need to refrigerate the dough before baking?
Yes, chilling helps the dough firm up so the cookies keep their shape and the swirls stay neat when baked.