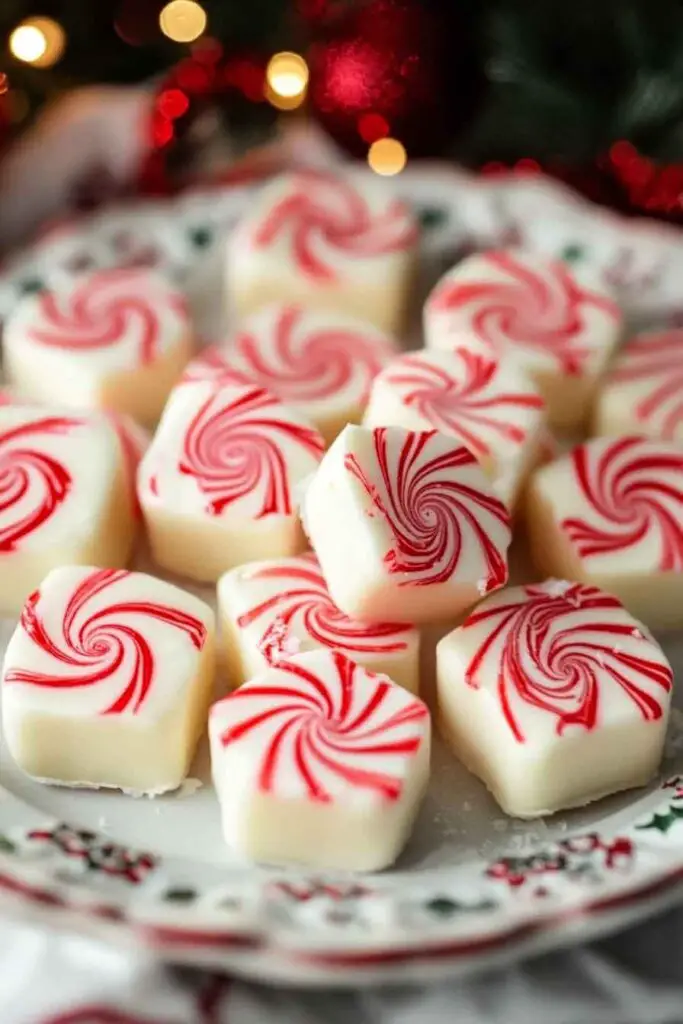
Soft Christmas Peppermints: Old-Fashioned Butter Mints Recipe

You know that sweet little treat that melts in your mouth? Yep, I’m talking about those soft, buttery peppermints we all sneak during the holidays. They’re super easy to make, and honestly, they taste way better homemade.
I’ve been making these every Christmas since I was a kid. The creamy minty flavor is just… perfect. And the pastel colors? So cute on the holiday table.
These mints are soft, melt-y, and full of that cozy old-fashioned charm. You don’t need any fancy tools—just a bowl, a spoon, and a little time. Oh, and maybe a helper to sneak a few while rolling.
Let me show you how I make ‘em from scratch. Just follow along and you’ll have a batch ready in no time. Let’s make your kitchen smell like Christmas!
Why You’ll Love This Recipe
- Reader Favorite: As one reader exclaimed, “These mints taste just like the ones my grandma used to make, but even better!”
- Melt-in-your-Mouth Texture: These mints are incredibly soft and have a perfect creamy texture that literally melts on your tongue.
- Quick and Easy: Ready in just 30 minutes, with minimal prep work and only a few ingredients needed.
- Make-Ahead Friendly: These mints store well and can be made ahead of time for your holiday celebrations.
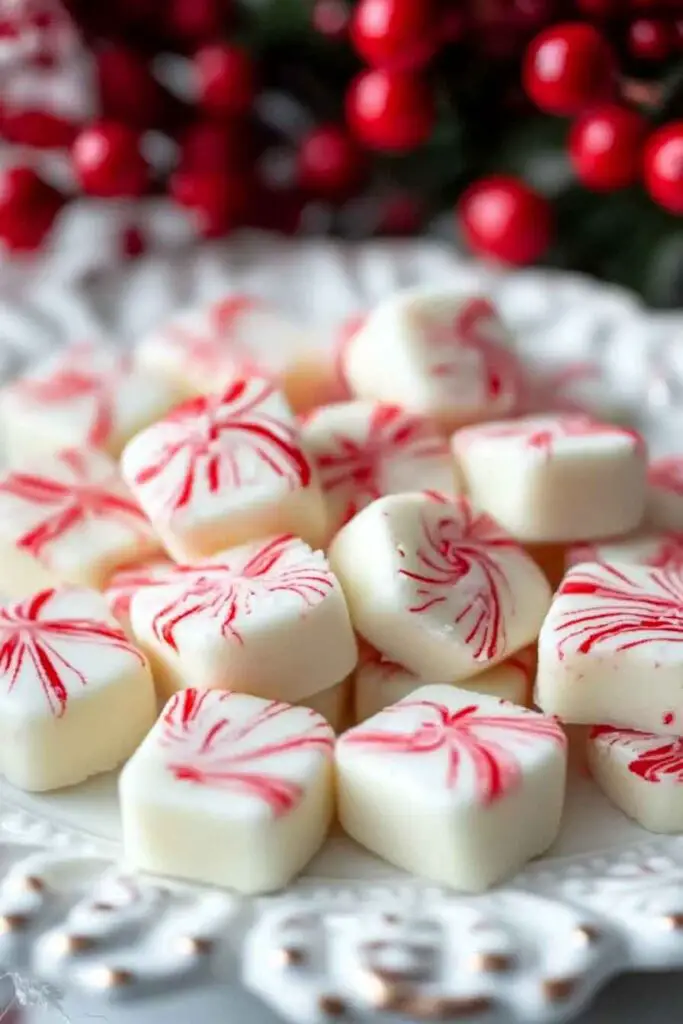
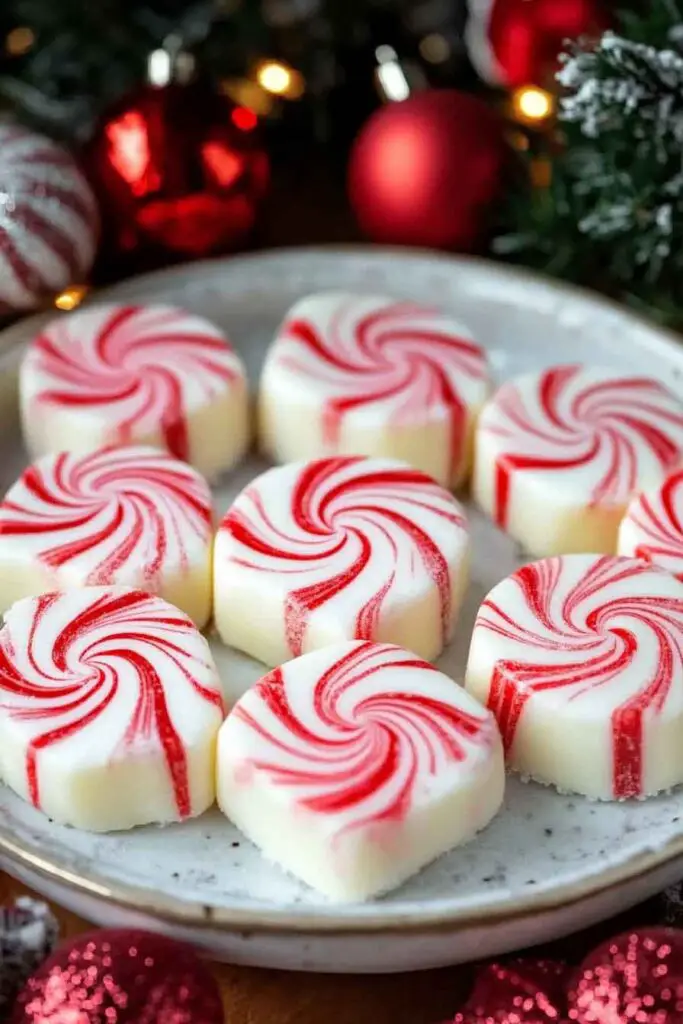
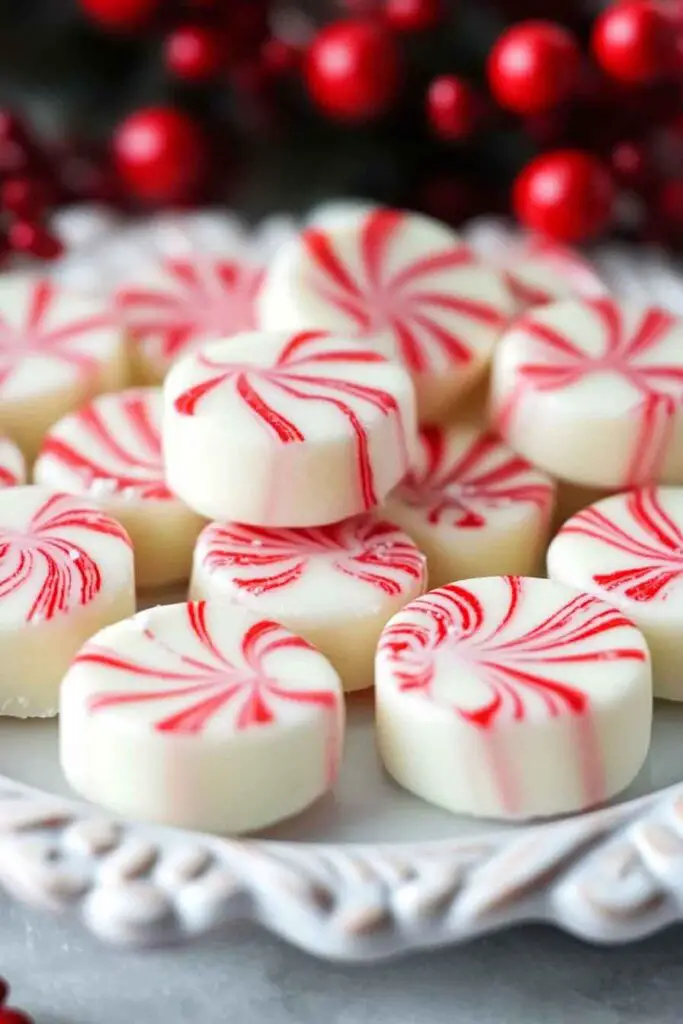
- Perfect Holiday Treat: With their refreshing peppermint flavor and holiday-perfect red color, they’re the ideal sweet treat to share during the festive season.
Required Kitchen Tools
Before we dive into the recipe, here are the tools you’ll need to make these soft Christmas peppermints:
- Mixing Bowls: One medium-sized bowl for mixing the butter, powdered sugar, and cream. You’ll need another small bowl for food coloring.
- Electric Mixer or Hand Whisk: While this recipe doesn’t require heavy-duty mixers, an electric hand mixer or stand mixer can make the job quicker.
- Spatula: For scraping the edges of the bowl and folding in the peppermint extract.
- Cookie Sheet or Baking Tray: You’ll need this to set the mints on after shaping them.
- Parchment Paper or Silicone Mat: To line the cookie sheet, making it easier to remove the mints once they’ve set.
- Measuring Spoons and Cups: Accurate measurements will ensure your mints come out just right.
- Small Squeeze Bottle (Optional): If you want to add extra decoration or fine details to the mints, this tool can be handy.
Ingredients
Here’s what you’ll need to make these delightful mints. The beauty of this recipe is its simplicity:
- Butter (softened): 1/2 cup. Make sure your butter is softened to room temperature for easy mixing.
- Powdered Sugar (sifted): 3 1/2 cups. This gives the mints their smooth and sugary texture.
- Heavy Whipping Cream: 2 tablespoons. The cream helps give these mints their luxurious, smooth consistency.
- Peppermint Extract: 1 1/2 teaspoons (adjust to taste). This is what gives the mints their signature refreshing flavor.
- Red Food Coloring (gel or liquid): A few drops. This adds the perfect holiday color to your mints, making them festive and fun to look at.
Variations for Soft Christmas Peppermints
While the classic peppermint flavor is a crowd favorite, you can always get creative and experiment with different flavorings and decorations. Here are a few ideas:
- Add a Touch of Vanilla: If you want to add a bit of sweetness and complexity to the flavor, you can mix in 1/2 teaspoon of vanilla extract.
- Use Different Food Coloring: Instead of red, try green food coloring for a Christmas tree vibe or even swirl two colors together for a fun marbled effect.
- Chocolate Dipped: After forming your mints, you could dip them in melted chocolate for a delicious peppermint-chocolate combination.
- Lemon Peppermint Twist: Replace some of the peppermint extract with lemon extract for a zesty citrus twist alongside the refreshing mint.
- Add a Crunch: Mix in crushed candy canes for a minty crunch that adds texture to your mints. You can sprinkle crushed pieces on top or fold them into the mint
- mixture.
Step-by-Step Instructions
1. Prepare the Butter Base
Start by softening the butter to room temperature. Using a hand mixer or stand mixer, beat the softened butter until it’s light and fluffy. This should take about 1-2 minutes on medium speed. The butter should be creamy and smooth, without any lumps.
2. Incorporate the Powdered Sugar
Gradually add the sifted powdered sugar, about 1/2 cup at a time, mixing until it’s fully incorporated. You’ll notice the mixture beginning to come together into a thick, soft dough-like consistency. This is the base for the creamy butter mints.
3. Add the Cream and Peppermint Extract
Next, add the heavy whipping cream to the butter and sugar mixture. This helps to soften and smooth the dough, making it easier to shape later. Then, add the peppermint extract and continue mixing. The peppermint will give your mints that classic, refreshing flavor. Taste the mixture at this stage and adjust the peppermint extract if you prefer a stronger or milder flavor.
4. Add Food Coloring
Once your mint mixture is well-blended, add a few drops of red food coloring to achieve that festive Christmas color. Start with just a few drops and mix until you achieve the desired shade of red. You can add more food coloring if you want a deeper hue, but remember, a little goes a long way.
5. Shape the Mints
Now comes the fun part! Using your hands or a small spoon, scoop out small portions of the mint mixture. Roll them into balls and place them on a parchment-lined baking tray or silicone mat. You can also use a small cookie scoop to make them uniform in size. Once shaped, gently press down on each mint to slightly flatten it or leave them as balls, depending on your preference.
6. Allow the Mints to Set
Let the mints sit at room temperature for about 20-30 minutes to firm up. If you’re in a hurry, you can also refrigerate them for faster setting. They’ll firm up enough to maintain their shape, while still being soft enough to melt in your mouth.
Storing Soft Christmas Peppermints
- Room Temperature: If you plan to serve them within a few days, you can store the mints at room temperature in an airtight container. They’ll stay soft and fresh for up to 1 week.
- Refrigeration: If you want to make them ahead of time or store them for a longer period, place them in an airtight container and refrigerate. These mints will last for up to 3 weeks when refrigerated.
- Freezing: You can also freeze these mints for long-term storage. Simply place them in an airtight container or freezer-safe bag, and they’ll last for up to 3 months in the freezer. Let them thaw at room temperature before serving.
Nutrition Facts
Serving Size: 5 pieces (30g)
Servings Per Batch: Approx. 20
| Nutrient | Amount Per Serving |
|---|---|
| Calories | 160 |
| Total Fat | 7g |
| └ Saturated Fat | 4.5g |
| Cholesterol | 20mg |
| Sodium | 5mg |
| Total Carbohydrate | 25g |
| └ Sugars | 24g |
| Protein | 0g |
Conclusion
Soft Christmas Peppermints are an easy and festive holiday treat that everyone will love. The combination of buttery smoothness with refreshing peppermint makes these mints the perfect addition to any holiday celebration. Whether you serve them at a Christmas party, package them up as gifts, or enjoy them with a cup of hot cocoa, these mints are sure to bring a little extra joy to the holiday season.
Soft Christmas Peppermints: Old-Fashioned Butter Mints Recipe
Course: Uncategorized30-40
servings10
minutes160
kcal20-30
minutesIngredients
Butter (softened): 1/2 cup
Powdered Sugar (sifted): 3 1/2 cups
Heavy Whipping Cream: 2 tablespoons
Peppermint Extract: 1 1/2 teaspoons (adjust to taste)
Red Food Coloring (gel or liquid): A few drops
Directions
- Prepare the Butter Base: Beat the softened butter until light and fluffy.
- Incorporate the Powdered Sugar: Gradually add the sifted powdered sugar and mix until combined.
- Add the Cream and Peppermint Extract: Stir in the heavy cream and peppermint extract. Adjust to taste.
- Add Food Coloring: Mix in red food coloring until you achieve your desired shade.
- Shape the Mints: Roll into small balls or flatten them slightly. Place on a parchment-lined tray.
- Allow to Set: Let the mints firm up at room temperature for about 20-30 minutes or refrigerate for quicker results.
- Serve & Enjoy: These mints are ready to be enjoyed!
How to Serve Soft Christmas Peppermints
These buttery mints are perfect for adding a touch of sweetness to your holiday celebrations. Here are some ways to serve and present them:
1. Holiday Dessert Table
Nothing says Christmas like a beautifully arranged dessert table filled with all kinds of sweets, and soft peppermint mints make the perfect addition. Place them in decorative bowls or on a platter surrounded by other holiday treats like cookies, fudge, and chocolate truffles. These mints will add a pop of color and flavor to the spread, and guests can enjoy them as a refreshing bite after indulging in heavier desserts.
2. Gift-Giving
These mints are perfect for homemade gift-giving. Package them in clear cellophane bags or festive tins, and tie with a red or green ribbon for a cute and thoughtful gift. They’re an easy treat to make ahead and share with friends, neighbors, teachers, or coworkers. A batch of homemade peppermint mints shows you care and adds a personal touch to your gift-giving this season.
3. Stocking Stuffers
You can make your holiday stockings even more special by adding a few of these peppermint mints inside. Since they’re small, they fit perfectly into stockings, and their refreshing flavor makes them a delightful treat after a day full of presents and holiday excitement.
4. Serve with Hot Chocolate
There’s something magical about pairing soft Christmas mints with a warm cup of hot chocolate. The creamy, minty flavor complements the rich, smooth cocoa perfectly. Try serving these mints with a hot chocolate bar at your next holiday gathering. Set up an assortment of toppings (marshmallows, whipped cream, chocolate shavings) and let your guests enjoy the sweet treats with their drinks.
5. On the Christmas Dessert Tray
If you’re planning to serve a wide variety of desserts during your holiday meal, include a small bowl of these soft peppermint mints on the dessert tray. They can complement other traditional holiday favorites like gingerbread cookies, sugar cookies, or even pies. The cool and creamy peppermint flavor provides a nice balance to heavier or richer desserts.
6. At a Holiday Party
If you’re hosting a holiday party, these mints can be a great crowd-pleaser. Place them in a decorative bowl near the punch or beverage station for guests to nibble on throughout the event. The refreshing mint flavor is perfect for refreshing your palate between bites of other savory and sweet foods.
7. After Dinner Mint
Serve these mints after a big holiday meal to cleanse the palate and leave your guests with a sweet, refreshing note. These mints are the perfect size for popping in your mouth after dinner, and they’re light enough that they won’t overwhelm your stomach after a hearty feast.
Decorating Ideas for Soft Christmas Peppermints
While these mints are already festive and delightful on their own, there are a few ways you can elevate their appearance and add even more holiday flair.
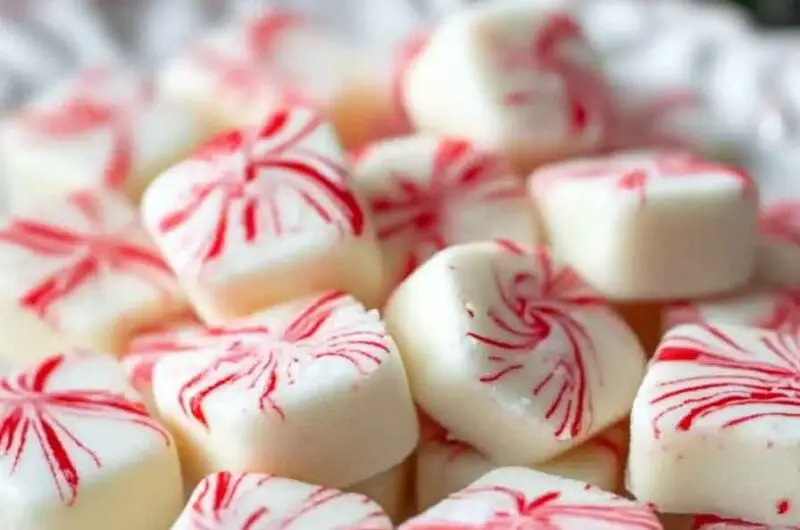
1. Peppermint Swirl Design
Create a classic peppermint swirl look by swirling the red food coloring into the mints after shaping them. Simply place a small drop of food coloring in the center of each mint and gently use a toothpick or skewer to swirl it into the dough, creating a marble effect. This adds a fun and festive touch that mimics the traditional look of candy cane swirls.
2. Sprinkle with Crushed Candy Canes
For a crunchy, minty topping, sprinkle crushed candy cane pieces on top of each mint before they set. The candy cane pieces will stick to the mints as they firm up, creating a lovely holiday garnish. Not only does this add extra texture, but it also gives them an extra peppermint punch.
3. Use Decorative Boxes or Jars
To give your mints an extra touch of elegance, store them in a decorative jar or festive box. This makes them look like a store-bought gift but with the love and care that only homemade treats can offer. You can personalize the containers with holiday-themed ribbons, tags, or labels to match the spirit of the season.
4. Dipped in Chocolate
As a fun variation, you can dip the bottom of each mint in melted white or dark chocolate. This adds a layer of richness to the mints, balancing the sweetness with a slight bitterness from the chocolate. Allow the chocolate to set before serving, and you’ll have an even more decadent treat to enjoy.
5. Sugar Dusting
For a bit of sparkle, dust the mints with a small amount of edible glitter or colored sugar. This can be a simple way to add a festive touch to the mints without overcomplicating the process. The shimmer will give them a winter wonderland feel, making them even more appealing for holiday celebrations.
Storing Soft Christmas Peppermints
To ensure your mints stay fresh and maintain their melt-in-your-mouth texture, proper storage is essential. Here are some guidelines for storing them:
1. Room Temperature Storage
If you plan to enjoy the mints within a few days, simply store them at room temperature. Place them in an airtight container to prevent them from drying out. They should last for up to 1 week when stored properly at room temperature. You can also use wax paper between layers of mints to keep them from sticking together.
2. Refrigeration
If you need to store the mints for a longer period or if the weather is particularly warm, refrigerating them will keep them fresh. Place them in an airtight container and store in the fridge for up to 3 weeks. When you’re ready to serve them, you can take them out of the fridge to bring them back to room temperature before serving.
3. Freezing
For long-term storage, freezing is the way to go. Simply arrange the mints on a baking sheet in a single layer and freeze for 1-2 hours. Once frozen, transfer them to an airtight container or freezer bag. These mints can be stored in the freezer for up to 3 months. When you’re ready to enjoy them, let them thaw at room temperature for 20-30 minutes before serving.
Tips for Success
- Room Temperature Butter: Make sure your butter is at room temperature to ensure smooth and even mixing. Cold butter will make it difficult to achieve the right texture.
- Adjust the Peppermint Flavor: If you prefer a stronger peppermint flavor, feel free to add an extra 1/4 teaspoon of peppermint extract.
- Don’t Overmix: Be careful not to overwork the dough. Once the powdered sugar is fully incorporated, stop mixing to avoid a dry texture.
- Consistency: If your dough is too soft to shape, you can chill it in the refrigerator for about 15 minutes before shaping. If it’s too stiff, add a tiny bit more cream to soften it up.
Troubleshooting Soft Christmas Peppermints
Even though this recipe is simple, it’s always good to anticipate possible issues and know how to solve them. Here are some common problems and how to fix them:
1. The Mints Are Too Sticky to Shape
If your mint dough feels too sticky or soft to shape, it’s likely that your butter was too warm, or you’ve added too much cream. Here’s what to do:
- Solution: Chill the dough in the refrigerator for 15-20 minutes. This will help firm it up and make it easier to shape. If the dough still feels too soft after chilling, you can add a little more powdered sugar (about 1/4 cup at a time) to thicken it up.
2. The Mints Aren’t Firming Up
If your mints aren’t setting and holding their shape after about 30 minutes, this could be due to excess moisture or not enough powdered sugar.
- Solution: If this happens, place the mints in the fridge to help them set faster. They should firm up within 30 minutes in the fridge. Alternatively, try adding a small amount of powdered sugar, a tablespoon at a time, to help dry out the mixture. Be careful not to overdo it, though, as too much powdered sugar can make the mints dry and crumbly.
3. The Texture is Too Hard
If you find that your mints are too hard and not soft and creamy, the problem may lie in the ratio of powdered sugar to butter or the chilling process.
- Solution: The key to getting the right texture is to ensure you’re using the correct ratio of powdered sugar to butter. Adding too much powdered sugar will make the mints dry and hard. If the mints become too firm after chilling, allow them to rest at room temperature for a few minutes to soften up before serving.
4. Too Much Peppermint Flavor
Peppermint extract can be strong, so if you accidentally add too much and your mints have an overpowering mint flavor, you can try to balance it out.
- Solution: If this happens, mix in a little extra cream and powdered sugar to mellow out the flavor. You could also try adding a drop of vanilla extract to soften the minty taste, but be careful not to overpower the peppermint flavor.
Soft Christmas Peppermints FAQs
Here are some frequently asked questions to help clear up any doubts you may have about making these delightful mints:
Can I make these mints ahead of time?
Absolutely! These mints are great for make-ahead preparations. You can prepare them up to a week in advance, store them in an airtight container at room temperature, or refrigerate them for up to 3 weeks. They also freeze well for up to 3 months, so you can make a large batch in advance for the holiday season.
Can I use a different flavor instead of peppermint?
Yes, you can experiment with different flavor extracts! If you want to change the flavor, you can swap out peppermint for other extracts like spearmint, wintergreen, or even a fruity flavor like lemon or orange. Keep in mind that the amount of extract may vary based on the strength of the flavor you’re using.
What if I don’t have heavy whipping cream?
If you don’t have heavy whipping cream on hand, you can substitute it with half-and-half or even milk. However, using cream will give the mints their signature creamy texture. If using a lower-fat dairy product, you may need to adjust the quantity slightly to get the right consistency.
Can I make these mints without food coloring?
Yes, absolutely! The red food coloring is purely for aesthetic purposes. If you prefer to keep your mints natural, you can leave them plain or use green or blue food coloring for a different festive look. They’ll still taste just as delicious!
Can I use a different type of sugar for these mints?
While powdered sugar is typically the best choice for these soft mints because of its fine texture, you could experiment with alternative sweeteners like powdered erythritol or powdered coconut sugar if you’re looking for a lower-sugar or sugar-free version. Just keep in mind that these substitutes may slightly affect the texture or taste.
Can I add something extra to the mints?
Yes! If you’d like to add a twist, consider mixing in some crushed candy canes or chocolate chips to the mint mixture before shaping them. You could also drizzle the mints with chocolate or dust them with edible glitter to add a special touch.