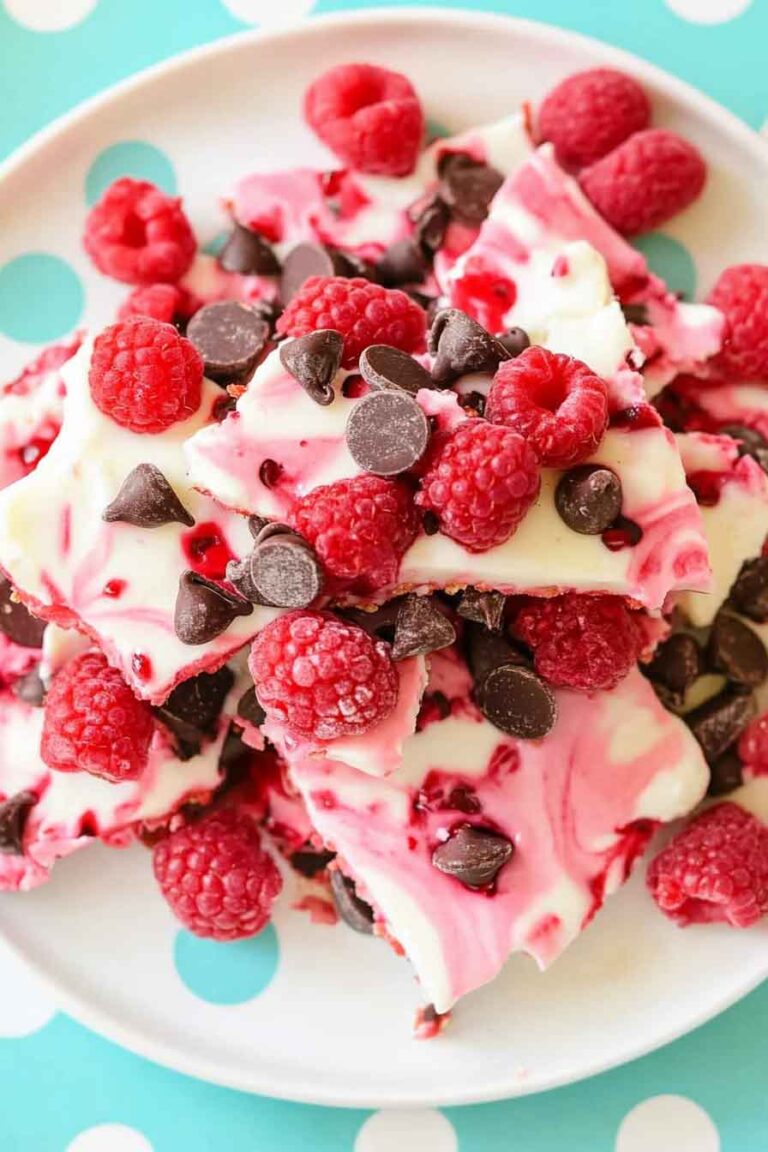
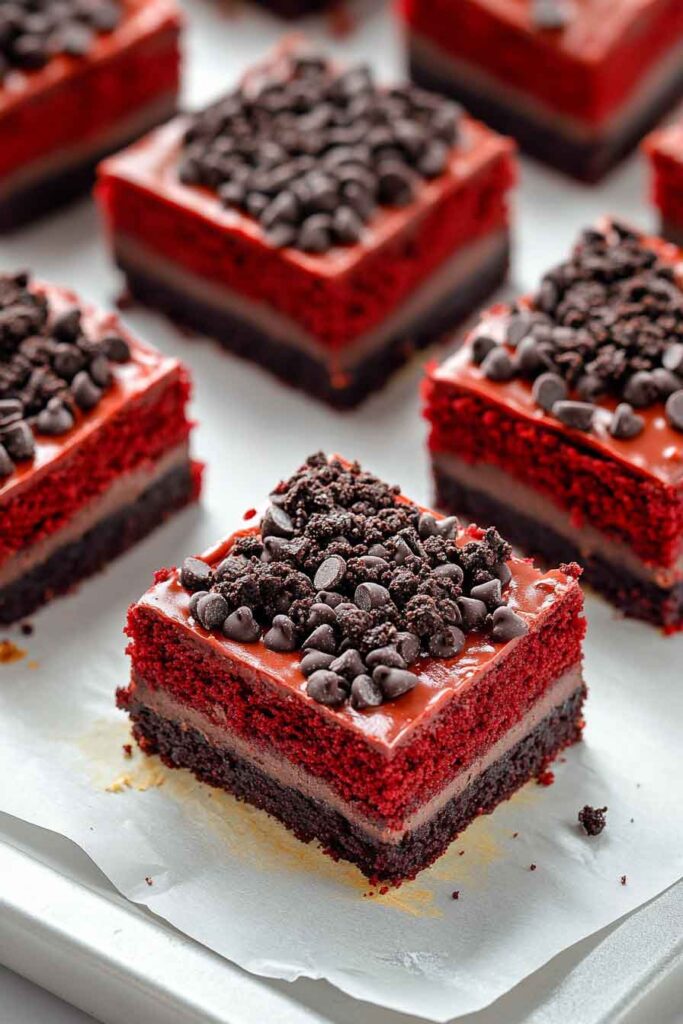
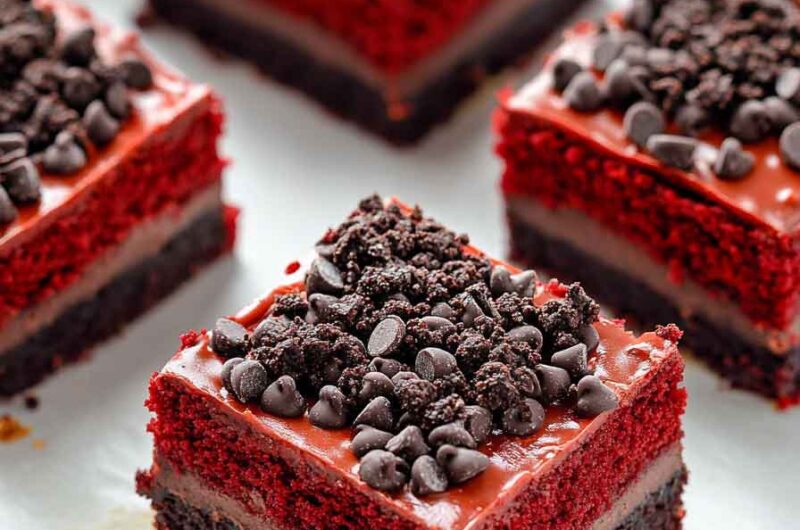
Red Velvet Oreo Truffle Bars Recipe

Wow, have you ever tried a super yummy red velvet treat? I made these Red Velvet Oreo Truffle Bars, and they’re so good! They’re like a sweet, creamy hug in every bite.
So, I mixed red velvet cake with gooey Oreo truffle stuff. The bars are, like, super soft and chocolatey. You’ll love the pretty red color and crunchy bits!
Man, I can’t stop eating these bars! You’ll want to grab one because they’re so sweet and fun. They’re perfect for sharing with friends!
Come on, let’s make these Red Velvet Oreo Truffle Bars! I’ve got an easy recipe for you. Ready to bake something awesome?
Why You’ll Love This Recipe
- Reader Favorite: These Red Velvet Oreo Truffle Bars are always a crowd-pleaser! Just wait until you hear the rave reviews from everyone who tries them—one reader called them “dangerously delicious!”
- Rich and Decadent: The combination of red velvet cake mix, Oreo truffles, and white chocolate creates a dessert experience that’s rich, indulgent, and unforgettable.
- No-Bake Option: With minimal baking required, this is a great treat for those hot summer days or when you’re short on time.
- Perfect for Any Occasion: Whether it’s a birthday, holiday, or just a sweet craving, these bars are perfect for any occasion. They also make a fantastic gift for loved ones.
- Easily Customizable: Feel free to add your favorite mix-ins or topping variations. You can make these bars uniquely your own!
Required Kitchen Tools
Before you get started, make sure you have the following tools in your kitchen:
- Mixing bowls: For preparing both the red velvet batter and the Oreo truffle filling.
- Hand or stand mixer: If you want to save time and energy, a stand mixer will work wonders for mixing.
- 9×9-inch baking pan: A standard baking pan for preparing the red velvet base.
- Parchment paper or non-stick spray: To ensure the bars come out easily after baking.
- Small saucepan: To melt the white chocolate for the topping.
- Spatula: To spread the mixtures evenly in the pan and smooth the top of the truffles.

Ingredients
Here’s everything you need to make these indulgent bars:
For the Red Velvet Cake Base:
- Red Velvet Cake Mix (1 box): This will form the base of your bars and provide that gorgeous red color and classic flavor. If you prefer to make it from scratch, you can, but using a box mix saves time!
- Butter (1/2 cup, melted): Adds richness and moisture to the cake base.
- Egg (1 large): Binds the ingredients together and helps the bars set properly.
For the Oreo Truffle Filling:
- Cream Cheese (8 oz, softened): Cream cheese gives the truffle filling its smooth, creamy texture. It also helps to balance the sweetness.
- Powdered Sugar (1 1/2 cups): Adds sweetness to the filling and helps to thicken it up.
- Oreo Cookies (15-18, crushed): Crushed Oreos add a satisfying crunch and bring in a little extra chocolatey flavor to contrast the richness of the red velvet.
- Vanilla Extract (1 tsp): Adds depth of flavor to the truffle filling.
For the White Chocolate Coating:
- White Chocolate Chips (1 1/2 cups): Melted white chocolate forms a smooth, creamy topping that finishes off these bars with a rich and glossy finish. You can also use white chocolate bars if you prefer to chop them yourself.
Variations for Red Velvet Oreo Truffle Bars
This recipe is versatile, and you can play around with different variations to make it even more exciting. Here are some fun ideas:
- Add Extra Oreos: If you can’t get enough of the Oreo flavor, add more crushed Oreos to the cake base or truffle filling.
- Make It a Layered Dessert: If you want to create a more sophisticated dessert, try layering the Oreo truffle filling and the red velvet cake mix in alternating layers to create a striped effect.
- Swap the White Chocolate: Instead of using white chocolate, you could use milk or dark chocolate to coat the bars for a different flavor profile.
- Add a Sprinkle of Red Velvet Cake Crumbs: For an extra burst of red velvet goodness, crumble up some leftover red velvet cake over the top before the chocolate coating sets.

Step-by-Step Instructions
1. Prepare the Red Velvet Cake Base
Preheat Your Oven and Prepare the Pan:
Preheat your oven to 350°F (175°C) and grease a 9×9-inch baking pan or line it with parchment paper for easy removal later.
Mix the Cake Batter:
In a large bowl, combine the red velvet cake mix, melted butter, and egg. Stir until all ingredients are fully incorporated, and you have a thick, smooth batter. Don’t worry if it’s thicker than a typical cake batter—that’s expected!
Spread the Batter:
Pour the cake batter into your prepared baking pan. Use a spatula to spread it evenly and ensure the batter fills the corners of the pan.
Bake the Base:
Place the pan in the preheated oven and bake for 15-18 minutes or until a toothpick inserted in the center comes out clean or with a few moist crumbs. The cake should be firm but soft.
Cool the Cake:
Once baked, remove the pan from the oven and let the cake cool completely in the pan on a wire rack. It’s essential to allow the cake to cool before adding the truffle filling, so be patient!
2. Prepare the Oreo Truffle Filling
Crush the Oreos:
Place the Oreo cookies in a ziplock bag or food processor and crush them into fine crumbs. You can also leave a few bigger chunks for some texture if you prefer.
Make the Filling:
In a medium-sized mixing bowl, beat the softened cream cheese with powdered sugar and vanilla extract until smooth and creamy. Add the crushed Oreos to the mixture and stir until fully incorporated. The truffle filling should be thick but spreadable.
3. Assemble the Red Velvet Oreo Truffle Bars
Spread the Truffle Filling:
Once the red velvet base has cooled, spread the Oreo truffle filling evenly over the top of the cake layer. Use a spatula to smooth it out, ensuring an even layer of truffle.
Chill the Bars:
Place the pan in the refrigerator and let the bars chill for at least 30 minutes. This helps the truffle filling set and makes it easier to cut into bars later.
4. Coat with White Chocolate
Melt the White Chocolate:
In a small saucepan, melt the white chocolate chips over low heat. Stir frequently to avoid burning the chocolate. Alternatively, you can melt the chocolate in the microwave in 20-second intervals, stirring after each interval until completely melted and smooth.
Pour the White Chocolate:
Once melted, pour the white chocolate over the chilled Oreo truffle layer, smoothing it out with a spatula to cover the entire surface.
Set the Chocolate:
Place the pan back in the refrigerator for an additional 15-20 minutes to let the white chocolate set and harden.

Serving and Decoration
How to Serve Red Velvet Oreo Truffle Bars
Once your bars are set and the white chocolate has hardened, you can slice them into squares or rectangles. These bars are rich and indulgent, so smaller portions are often best. Here are a few ways to serve them:
- As a Party Treat: These bars are perfect for any gathering or celebration, from birthdays to holidays. Place them on a serving tray, and watch them disappear!
- With a Scoop of Ice Cream: If you’re looking to make it extra indulgent, serve these bars with a scoop of vanilla or cream cheese ice cream for a dreamy dessert.
- For Gift Giving: Pack them in a cute box with a ribbon and give them as a homemade treat for friends or family.
Storing Red Velvet Oreo Truffle Bars
- Room Temperature: These bars will stay fresh at room temperature for 2-3 days. Just be sure to store them in an airtight container to keep them from drying out.
- Refrigeration: If you prefer to keep them chilled, store them in the refrigerator for up to 1 week. They taste amazing right out of the fridge!
- Freezing: You can freeze these bars for up to 3 months. Wrap them tightly in plastic wrap or place them in a freezer-safe container. To thaw, leave them in the fridge overnight or let them come to room temperature before serving.
Tips and Tricks for Perfect Red Velvet Oreo Truffle Bars
Making these Red Velvet Oreo Truffle Bars is fairly straightforward, but there are a few tips and tricks you can use to ensure they come out perfectly every time. Let’s break down some insider advice that will make your baking process easier and help you get the most out of this recipe!
1. Use High-Quality Ingredients
The key to making any dessert stand out is using top-notch ingredients. Since these bars are all about indulgence, don’t skimp on quality!
- Red Velvet Cake Mix: While you could make the cake batter from scratch, using a box mix saves time and gives you a consistent flavor and texture. However, choose a high-quality mix that uses real cocoa for that rich red velvet taste.
- Cream Cheese: Opt for full-fat cream cheese, as it provides the richest, creamiest filling. Make sure it’s softened to room temperature for the smoothest consistency when mixing.
- Oreo Cookies: Stick to classic Oreos for the best flavor, but feel free to experiment with different Oreo varieties (such as the golden Oreos) if you’re craving something unique.
2. Don’t Overmix the Cake Batter
When you combine the cake mix with the melted butter and egg, be careful not to overmix. Overmixing the batter can lead to dense bars, and we want a soft, tender texture. Stir just until everything is combined.
3. Let the Cake Cool Completely
This is one of the most important steps! If the red velvet base is even slightly warm when you add the Oreo truffle filling, the filling could melt, ruining the layers. Patience is key here—let the cake cool down completely before moving on to the next step.
4. Make Sure Your Truffle Filling Is Firm
The Oreo truffle filling should be thick enough to hold its shape but smooth enough to spread evenly over the cake. If you find the filling too soft or runny, you can add a little more powdered sugar to help it firm up. Conversely, if it’s too stiff, a small splash of milk or cream can loosen it up.
5. Chill Between Layers
When working with layers like this, chilling in between steps helps everything set perfectly. After you’ve spread the truffle filling, let the bars chill for at least 30 minutes. After applying the white chocolate, refrigerate them again until the chocolate hardens. This ensures that all layers stay intact and hold their shape when you cut into them.
6. Cut Clean, Straight Edges
Once the bars are set and chilled, you’ll want to cut them into perfect squares or rectangles. To get clean cuts, use a sharp knife and run it under warm water between cuts to prevent the chocolate from sticking to the blade. This will ensure your bars look professional and neatly cut every time.
7. Decorating Ideas
If you want to make these bars even more visually stunning, here are a few decorating ideas:
- Drizzle Extra White Chocolate: For a more decadent touch, drizzle extra melted white chocolate over the top of the bars after they’ve been cut. This adds a little extra shine and elegance.
- Top with Crushed Oreos: Sprinkle a few crushed Oreos over the top of the bars before the chocolate hardens for added texture and flavor.
- Add Sprinkles: For a festive touch, especially for holidays or birthdays, add some colorful sprinkles on top before the chocolate sets. It adds fun and color to the treat!
8. Let the Bars Sit Before Serving
Once you cut the bars, they may still feel a little soft and gooey. Let them sit for about 10-15 minutes at room temperature before serving. This allows the white chocolate to set properly and helps the flavors meld together.
Common Mistakes to Avoid
Even though this recipe is pretty foolproof, there are a few common mistakes that can affect the outcome. Here are some things to avoid:
1. Not Letting the Cake Cool Completely
As mentioned earlier, the cake base must be completely cool before adding the truffle filling. Warm cake can cause the filling to melt, ruining the layers.
2. Using Cold Cream Cheese
For a smooth truffle filling, your cream cheese must be softened to room temperature. Cold cream cheese will cause clumps in the mixture, making it difficult to achieve that velvety texture.
3. Overbaking the Cake Base
The red velvet cake base should be soft and slightly moist, not dry and crumbly. Keep an eye on it while baking, and use a toothpick to check for doneness. If it comes out clean but with a few crumbs, the cake is done. If it’s completely dry, it could result in a dry base that doesn’t complement the creamy filling well.
4. Forgetting to Chill the Layers
It can be tempting to rush through the steps, but skipping the chill times can cause the layers to meld together, making them harder to cut and serving them less visually appealing. Trust the process and allow each layer to set in the fridge.
How to Make These Bars Ahead of Time
One of the best parts of these Red Velvet Oreo Truffle Bars is how well they keep! If you’re making them for a party or special occasion, you can prepare them in advance. Here’s how to do it:
Make-Ahead Instructions:
- Red Velvet Cake Base: You can bake the red velvet base a day ahead of time. Let it cool completely, then cover and store it at room temperature until you’re ready to assemble the bars.
- Oreo Truffle Filling: The truffle filling can be made up to 2 days ahead. Store it in an airtight container in the fridge until you’re ready to spread it over the cooled cake base.
- Assembled Bars: Once you’ve assembled the bars and added the white chocolate topping, let them cool and chill as instructed. You can store the assembled bars in the fridge for up to 3 days before serving.
Serving Ideas for Every Occasion
While these Red Velvet Oreo Truffle Bars are delicious on their own, they can also make a stunning centerpiece for many occasions. Here are some ideas for serving them:
- Valentine’s Day: These bars are perfect for the sweetest holiday of the year! The red velvet color makes them a great fit for a romantic celebration, and you can decorate with heart-shaped sprinkles or edible glitter for a special touch.
- Birthdays: Slice them into smaller squares and serve them on a cake platter. They’ll make a statement at your birthday party, and your guests will love the red velvet and Oreo combination.
- Holidays: Make these bars for Christmas, Thanksgiving, or any other holiday. You can even decorate them with festive sprinkles or candy to match the occasion.
- Gift Giving: Package these bars up in a cute box or tin and give them as a thoughtful homemade gift. Who wouldn’t love receiving such a delicious treat?
Storing and Freezing Red Velvet Oreo Truffle Bars
If you happen to have any leftovers (though I doubt you will), here’s how to store them properly to maintain freshness:
- At Room Temperature: Store the bars in an airtight container at room temperature for 2-3 days.
- In the Fridge: Keep them in the fridge for up to 1 week. Just be sure to let them sit at room temperature for a few minutes before serving if you prefer them soft.
- Freezing: You can freeze these bars for up to 3 months. Wrap them tightly in plastic wrap or foil, and then place them in a freezer-safe container. To thaw, simply place them in the fridge overnight.
Red Velvet Oreo Truffle Bars: Nutrition and Conclusion
As we wrap up this recipe, let’s talk about the nutrition of these Red Velvet Oreo Truffle Bars and the overall experience of making them. After all, it’s not just about taste—it’s also about enjoying the process of baking and indulging in the results!
Nutrition Information for Red Velvet Oreo Truffle Bars
While these truffle bars are definitely a decadent treat, it’s always good to know what you’re consuming. Here’s an approximate breakdown of the nutrition per serving based on the ingredients used in this recipe. Please note that the exact nutritional content can vary depending on specific ingredient brands and portion sizes.
Nutrition Per Serving (1 Bar, assuming 16 bars):
| Nutrient | Amount per Serving |
|---|---|
| Calories | 310 kcal |
| Total Fat | 18g |
| Saturated Fat | 9g |
| Cholesterol | 30mg |
| Sodium | 170mg |
| Total Carbohydrates | 37g |
| Dietary Fiber | 1g |
| Sugars | 28g |
| Protein | 3g |
| Vitamin A | 4% of daily value |
| Vitamin C | 0% of daily value |
| Calcium | 4% of daily value |
| Iron | 6% of daily value |
As you can see, these bars are a bit indulgent, especially in terms of calories, fat, and sugar. But hey, they’re a treat, and you don’t have to enjoy them every day. A small square is all you need to satisfy your sweet tooth and indulge in a delightful dessert.
Red Velvet Oreo Truffle Bars Recipe
Course: Uncategorized16
bars15
minutes20
minutes310
kcalIngredients
Red velvet cake mix: 1 box (15.25 oz)
Butter, melted: 1/2 cup
Egg: 1 large
Cream cheese, softened: 8 oz
Powdered sugar: 1 1/2 cups
Vanilla extract: 1 tsp
Oreo cookies, crushed: 10-12 cookies (about 1 1/2 cups)
White chocolate, melted: 1 cup (for topping)
Directions
- Prepare the Red Velvet Cake Base
Preheat your oven to 350°F (177°C). Grease or line a 9×9-inch baking pan with parchment paper. In a large bowl, combine the red velvet cake mix, melted butter, and egg. Stir until smooth and well combined. Pour into the prepared pan and bake for 20-25 minutes or until a toothpick inserted into the center comes out clean. Let it cool completely. - Make the Oreo Truffle Filling
In a bowl, mix together softened cream cheese, powdered sugar, and vanilla extract. Once smooth, fold in the crushed Oreo cookies. Spread this truffle mixture evenly over the cooled cake base. - Top with White Chocolate
Melt the white chocolate in a microwave-safe bowl, stirring every 30 seconds until smooth. Pour the melted white chocolate over the Oreo truffle layer, spreading it evenly. Refrigerate the bars for at least 1-2 hours to allow the layers to set. - Serve and Enjoy
Once the bars are chilled and the white chocolate has hardened, cut them into squares or rectangles. Enjoy your indulgent treat!
Conclusion: Why These Red Velvet Oreo Truffle Bars Will Be Your
Let’s be real, when you combine the rich, velvety flavor of red velvet cake with the creamy, indulgent truffle filling and the crunch of Oreo cookies, there’s no going back. These Red Velvet Oreo Truffle Bars are the perfect dessert for anyone looking to impress at a gathering, or for those days when you simply want a treat that’ll make you feel like royalty.
Why You’ll Love This Recipe:
- Irresistible Flavor: Red velvet, Oreo, and white chocolate—it’s a combination that’s hard to beat. Every bite is an explosion of sweet, creamy, and slightly tangy flavor.
- Super Easy to Make: With just a few simple ingredients and easy steps, you can whip up a batch of these bars in no time. No fancy techniques required!
- Versatile: Perfect for any occasion, from casual get-togethers to festive celebrations, these bars are sure to be a hit.
- Make-Ahead Friendly: You can prep these bars ahead of time and keep them in the fridge or freezer for later enjoyment.
This recipe will not only satisfy your cravings but also make you the star baker at any party. Whether you’re making them for a holiday gathering, a birthday, or just because, these Red Velvet Oreo Truffle Bars will always deliver.