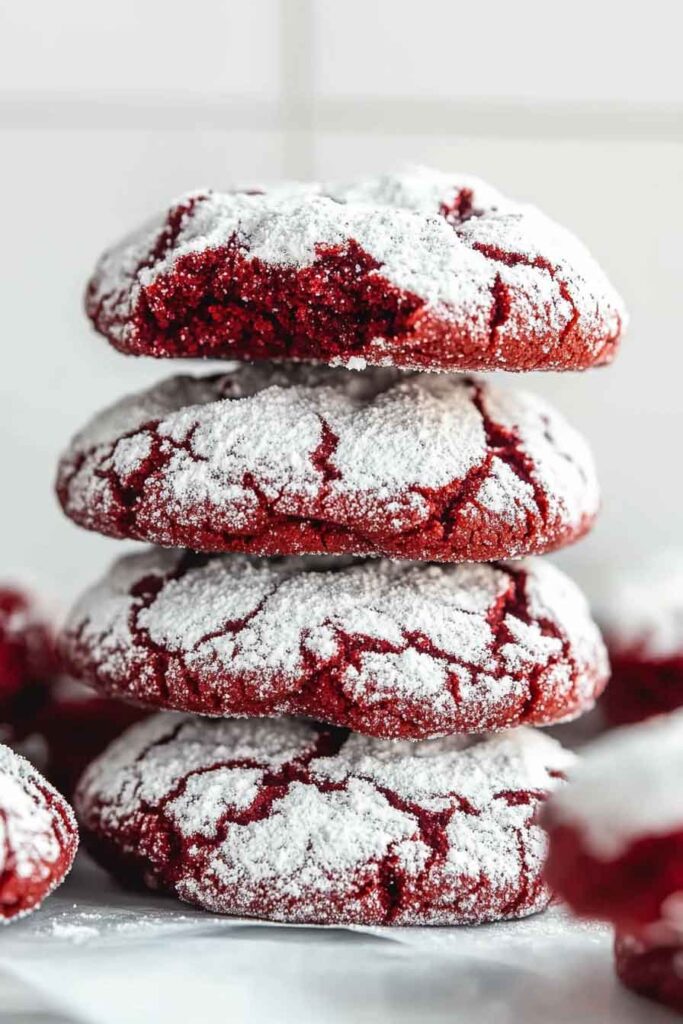
Red Velvet Crinkle Cookies
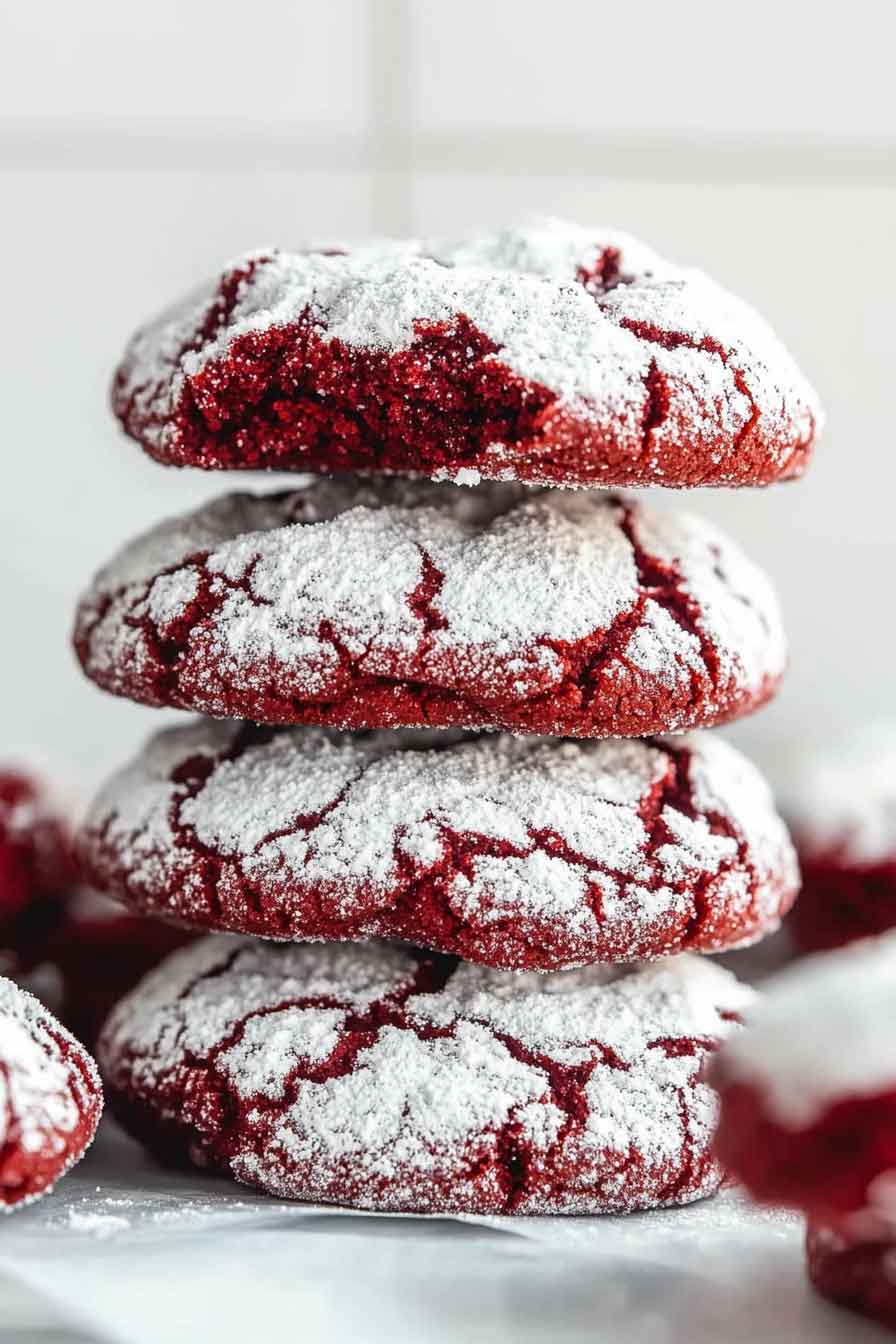
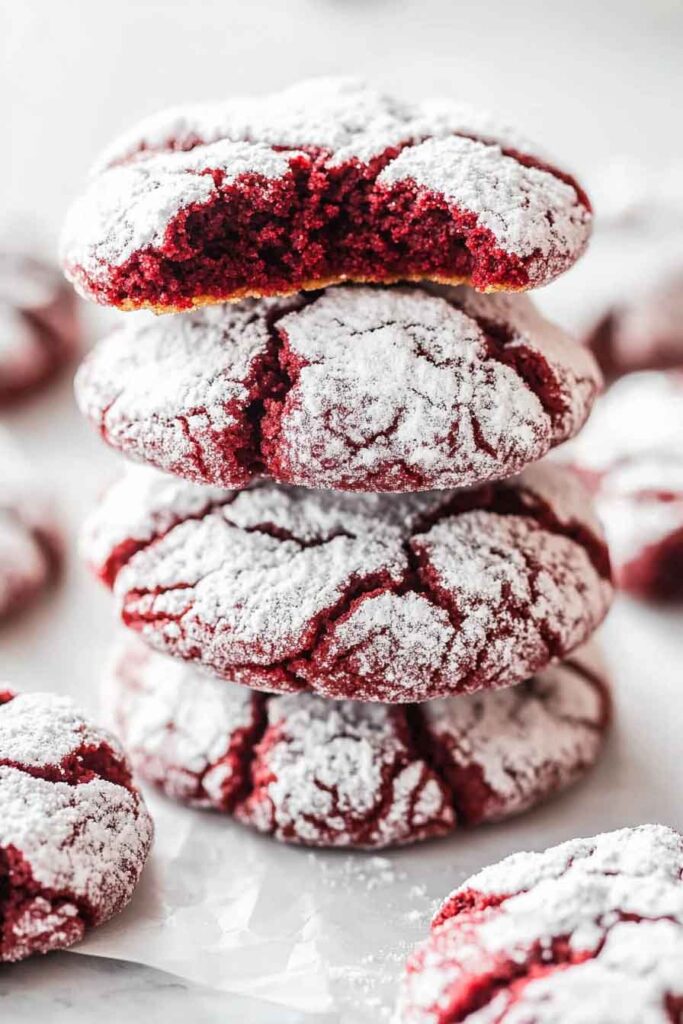
Oh wow, you guys—these Red Velvet Crinkle Cookies are just the cutest! I make them all the time when I want something pretty and yummy. They look like little red pillows dusted with snow.
I love how soft they are inside. Each bite has that sweet cocoa taste and a tiny crackle crunch. And guess what? They’re super easy to whip up.
So come on, let’s bake these together. I promise, your kitchen will smell so good, and your heart will be happy too!
Why You’ll Love This Recipe
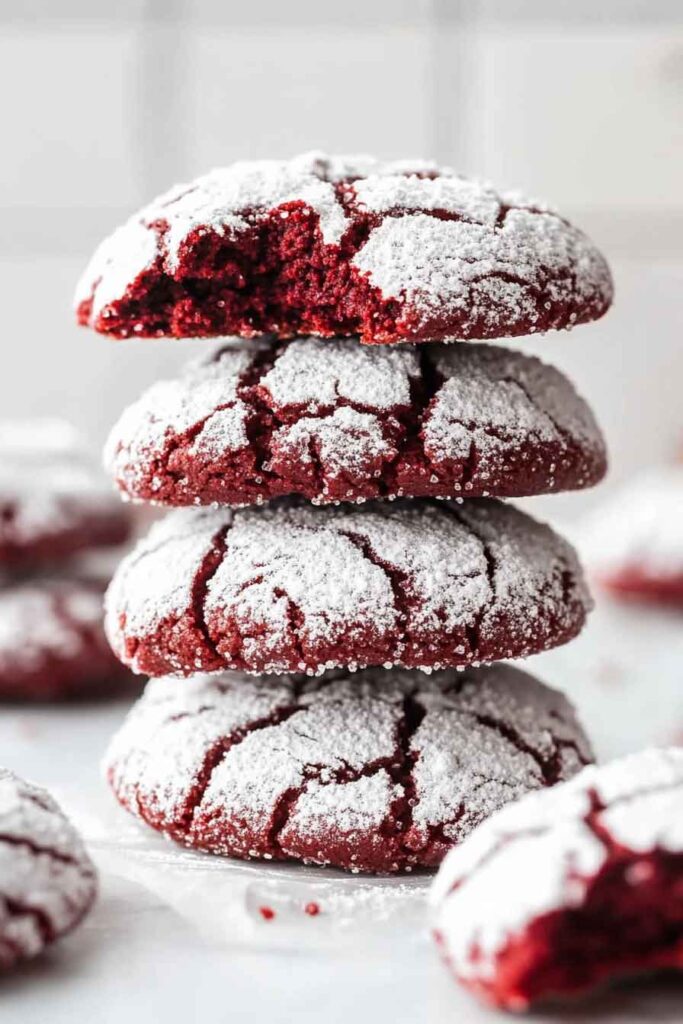
- Perfect for Any Occasion: Whether it’s a Christmas cookie exchange or a Valentine’s Day treat, these red velvet crinkle cookies are an ideal choice. Their vibrant color and crinkle design make them both beautiful and delicious.
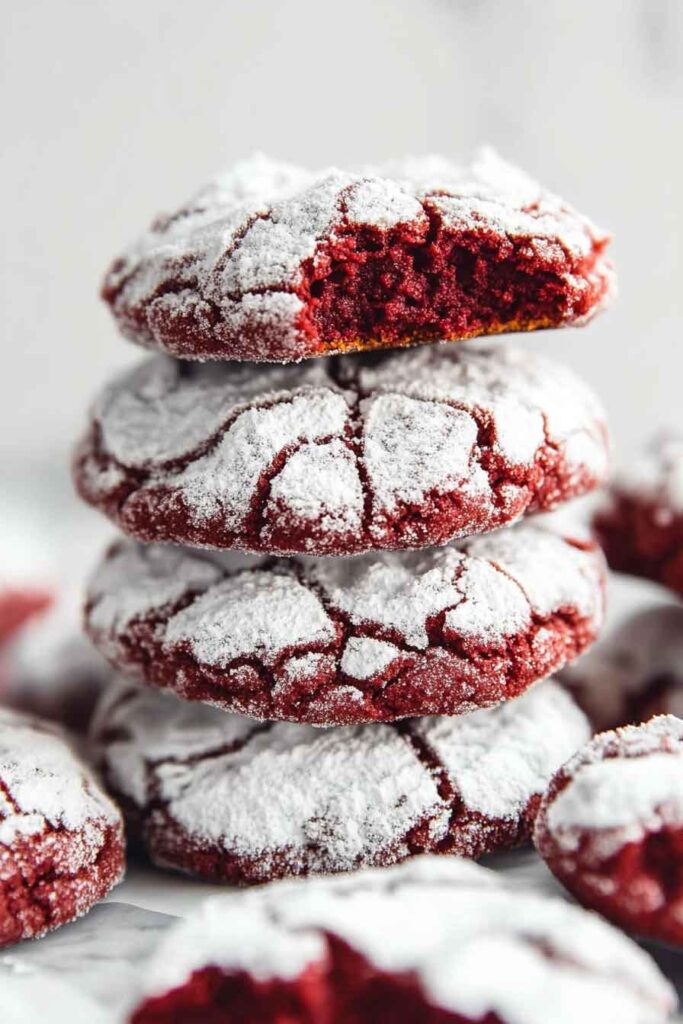
- Soft and Chewy: These cookies have the perfect texture—slightly crisp on the outside and wonderfully soft on the inside. The red velvet flavor combined with a little cream cheese creates a rich, moist cookie that everyone will love.
- Simple Ingredients: With ingredients like all-purpose flour, cocoa powder, sugar, and eggs, these cookies are easy to make, even for beginners.
- Perfect for Gift Giving: The crinkle effect gives them a beautiful, homemade look, perfect for gifting. They’ll make anyone feel special when they receive a batch of these delicious treats.
Required Kitchen Tools
Before you dive into making these beautiful cookies, make sure you have the following tools on hand:
- Mixing Bowls: For combining the dry ingredients and wet ingredients separately.
- Hand or Stand Mixer: This is the easiest way to beat the wet ingredients and make sure everything is well combined.
- Cookie Scoop: To make sure your cookies are uniformly sized.
- Baking Sheets: Line them with parchment paper to ensure your cookies don’t stick and bake evenly.
- Cooling Rack: Once baked, you’ll need a place to let the cookies cool down so they don’t become soggy.
- Measuring Cups & Spoons: For accurate ingredient measurements.
Ingredients
Here’s what you’ll need to make these irresistible red velvet crinkle cookies (exact measurements are in the recipe card at the end of the post):
- All-Purpose Flour: Flour is the base of these cookies, giving them structure. Be sure to measure correctly so the cookies don’t become too dense.
- Unsweetened Cocoa Powder: This adds the subtle chocolate flavor that gives red velvet its unique taste. Don’t use sweetened cocoa powder for the right balance of flavors.
- Baking Powder and Baking Soda: These leavening agents help the cookies puff up just a little bit and give them a chewy texture.
- Fine Sea Salt: A small amount of salt balances the sweetness and enhances the flavor.
- Unsalted Butter: Butter provides the richness and helps the cookies spread properly while baking.
- Light Brown Sugar and Granulated Sugar: Both sugars work together to create a chewy texture and add a hint of caramel-like flavor.
- Large Eggs: Eggs are essential for binding the ingredients together and adding structure to the cookies.
- Milk: Milk gives the dough a smooth, cohesive texture and contributes to the softness of the cookies.
- Vanilla Extract: Adds a warm, sweet flavor that complements the cocoa and cream cheese.
- Red Gel Food Coloring: This is what makes these cookies so eye-catching. Gel food coloring is more concentrated than liquid food coloring, so it won’t alter the dough’s consistency.
- Powdered Sugar: For coating the dough balls before baking. This step creates the crinkly texture and adds a sweet touch to the cookies’ surface.
Step-by-Step Instructions
1. Prepare the Dry Ingredients
First, you’ll need to combine the dry ingredients. In a medium bowl, whisk together:
- 2 ½ cups all-purpose flour
- 2 tablespoons unsweetened cocoa powder
- 1 teaspoon baking powder
- ½ teaspoon baking soda
- ¼ teaspoon fine sea salt
Whisk these ingredients well to ensure they are evenly mixed. This is an important step because it ensures your cookies will rise evenly and have a smooth texture. Set this bowl aside for now.
2. Cream the Butter and Sugar
In a separate large bowl, beat the unsalted butter with both the light brown sugar and granulated sugar using a hand mixer or stand mixer. Beat them together on medium speed for about 2-3 minutes, or until the mixture becomes light and fluffy. This step incorporates air into the dough, which is key to achieving that soft, chewy texture.
3. Add the Eggs and Vanilla
Add in the eggs, one at a time, beating well after each addition. The eggs help bind everything together. After adding the eggs, add in the vanilla extract and continue to beat until smooth.
4. Mix in the Red Gel Food Coloring
Now, add 1 tablespoon of red gel food coloring to the dough. Start mixing slowly so that you don’t splash the red color everywhere. Keep mixing until the dough turns a vibrant red, and make sure the color is evenly distributed throughout the dough. If you want a deeper red hue, you can add a little more food coloring, but be cautious not to add too much.
5. Combine the Wet and Dry Ingredients
Next, gradually add the dry ingredients into the wet mixture, stirring until just combined. Be careful not to overmix the dough, as this can lead to dense cookies. If the dough feels too sticky to work with, you can chill it in the refrigerator for 15-30 minutes, which will make it easier to shape.
6. Roll the Dough into Balls
Once your dough is ready, use a cookie scoop to form dough balls. Roll each ball between your hands to ensure they are round. Then, roll each dough ball generously in powdered sugar, making sure it’s completely coated. The powdered sugar is what creates the signature crinkle effect as the cookies bake.
7. Bake the Cookies
Preheat your oven to 350°F (177°C) and line two baking sheets with parchment paper. Arrange the dough balls on the baking sheets, leaving about 2 inches of space between each one. Bake the cookies for 10-12 minutes or until the edges are set, and the centers are slightly soft.
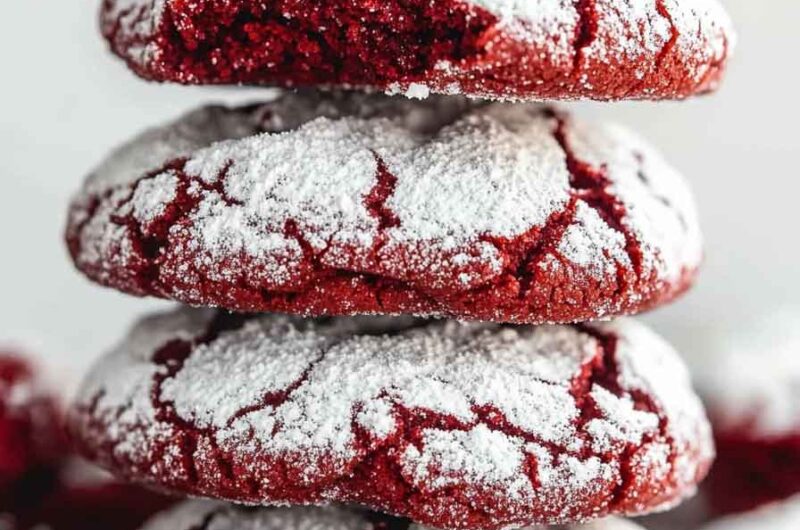
The cookies will puff up as they bake and form cracks on the surface. Don’t worry if they seem a little soft when you take them out of the oven—that’s the perfect texture! Let them cool on the baking sheets for 5 minutes before transferring them to a cooling rack to finish cooling.
Variations for Red Velvet Crinkle Cookies
While the classic red velvet crinkle cookie is already a masterpiece on its own, you can experiment with some variations to make them even more exciting or tailored to your preferences. Here are a few ideas to switch things up:
1. Add White Chocolate Chips
If you love the combination of red velvet and white chocolate, you can easily add some white chocolate chips to the dough. Just fold in about 1 cup of white chocolate chips after combining the wet and dry ingredients. The creamy sweetness of the white chocolate perfectly complements the rich flavor of the red velvet cookies.
2. Use Dark Cocoa Powder for a Richer Flavor
While unsweetened cocoa powder provides a classic flavor, using dark cocoa powder can make your cookies even more decadent. Dark cocoa powder has a deeper, richer taste that pairs beautifully with the tanginess of the cream cheese flavor.
3. Add a Cream Cheese Filling
For an extra special treat, you can stuff the cookies with a creamy filling! To do this, freeze small scoops of cream cheese (about 1 teaspoon each) and then wrap the dough around the frozen cream cheese balls. This will create a gooey, creamy center when the cookies bake, giving you a soft bite with a creamy surprise inside.
4. Make Red Velvet Sandwich Cookies
Turn your red velvet crinkle cookies into sandwich cookies! After baking and cooling the cookies, spread a layer of cream cheese frosting or vanilla buttercream between two cookies to create a decadent sandwich. These make for an indulgent treat perfect for special occasions or as a gift for friends and family.
5. Make Them Gluten-Free
If you’re following a gluten-free diet or have gluten sensitivities, you can swap the all-purpose flour for a gluten-free all-purpose flour blend. Make sure your blend has a good binder, like xanthan gum or guar gum, to ensure the cookies hold together. These cookies still turn out chewy and delicious!
How to Serve Red Velvet Crinkle Cookies
These red velvet crinkle cookies are delicious on their own, but you can also get creative with how you serve them. Here are a few ideas to make your cookies the star of any occasion:
1. Perfect for Holiday Cookie Platters
Red velvet crinkle cookies are a beautiful addition to any holiday cookie platter. Their rich red color and crinkle texture make them stand out among other cookies. Pair them with chocolate chip cookies, snickerdoodles, and sugar cookies for a visually stunning and delicious spread.
2. Serve with a Glass of Milk
There’s something timeless about enjoying cookies with a cold glass of milk. Red velvet crinkle cookies, with their soft and chewy texture, are perfect for dipping. The milk complements the sweetness of the cookies, making each bite even more indulgent.
3. Pair with Hot Cocoa or Coffee
If you’re in the mood for something warm and comforting, serve these cookies with a hot cup of cocoa or a freshly brewed pot of coffee. The rich flavor of the cookies pairs wonderfully with the creaminess of hot cocoa or the boldness of coffee, making them a perfect snack for chilly days.
4. Gift Them to Loved Ones
These cookies make excellent gifts! Pack them up in a decorative box, tie a ribbon around it, and you’ve got a thoughtful and delicious gift for birthdays, holidays, or just because. The vibrant red color makes them especially festive for occasions like Valentine’s Day, Christmas, or anniversaries.
5. Serve as a Dessert for Special Occasions
Whether it’s a birthday party, baby shower, or anniversary celebration, these red velvet crinkle cookies can be served as the main dessert or as part of a dessert buffet. Their festive appearance and delicious flavor will make them a hit at any event.
Storing Red Velvet Crinkle Cookies
If you’re lucky enough to have any leftover red velvet crinkle cookies (though I’m sure they’ll disappear quickly!), you can store them to keep them fresh for several days. Here’s how to store your cookies properly:
At Room Temperature
If you plan on enjoying the cookies within a few days, simply store them in an airtight container at room temperature. They’ll stay fresh for up to 3-4 days. The cookies will keep their soft, chewy texture as long as they are properly sealed in an airtight container.
In the Freezer
Red velvet crinkle cookies freeze well, so if you want to make a batch in advance or save leftovers, freezing them is a great option. Place the cooled cookies in a single layer on a baking sheet and freeze them until solid. Once frozen, transfer the cookies to a freezer-safe container or zip-top bag and store them for up to 2-3 months. To enjoy them, simply thaw the cookies at room temperature for about 30 minutes before serving.
Cookie Dough Freezing
If you want to prepare the dough in advance, you can freeze the dough balls before baking. After rolling the dough into balls and coating them in powdered sugar, place the dough balls on a baking sheet and freeze them until firm. Once frozen, transfer the dough balls to a freezer-safe bag or container and store them for up to 3 months. When you’re ready to bake, just place the frozen dough balls on a baking sheet and bake as directed, adding a minute or two to the baking time.
Red Velvet Crinkle Cookies FAQs
1. Can I make these cookies ahead of time?
Yes! You can make these red velvet crinkle cookies ahead of time in several ways. You can prepare the dough, shape it into balls, and freeze the dough. Then, bake them fresh whenever you want a warm, delicious cookie. Alternatively, you can bake the cookies, let them cool completely, and store them in an airtight container for up to 4 days at room temperature or freeze them for longer storage.
2. Can I use liquid food coloring instead of gel?
While gel food coloring is ideal for creating a vibrant red color without changing the dough’s consistency, you can use liquid food coloring if you don’t have gel on hand. However, keep in mind that you may need to use a bit more liquid food coloring to achieve the desired red hue, and the dough may become slightly wetter as a result. Gel food coloring is more concentrated and helps keep the dough thick and easy to work with.
3. Can I use cream cheese frosting instead of powdered sugar?
You can definitely swap the powdered sugar coating for cream cheese frosting if you prefer a different texture and taste. However, the powdered sugar creates the signature crinkle effect on top of the cookies, which adds to their visual appeal. If you opt for frosting, keep in mind that you may lose that iconic crinkled look but gain an extra layer of delicious cream cheese flavor.
4. How do I know when the cookies are done baking?
When baking these cookies, it’s important not to overbake them, as you want them to remain soft and chewy. Look for the edges to be set and lightly golden. The center may still look soft, but they will firm up as they cool. If you press the center gently, it should bounce back slightly, indicating that the cookies are ready.
5. Can I add nuts to these cookies?
Yes, you can! If you love the crunch of nuts, consider adding some chopped walnuts, pecans, or even macadamia nuts to the dough. Just fold them in after combining the wet and dry ingredients. The nuts will add texture and a delicious flavor that complements the richness of the red velvet cookie.
6. Can I make these cookies with less sugar?
While sugar contributes to the chewy texture and sweetness of these cookies, you can reduce the sugar slightly if you prefer. Keep in mind that reducing the sugar too much may impact the texture and flavor, so I recommend cutting it by no more than ¼ cup. You can also experiment with alternatives like coconut sugar or stevia, though the texture might be a little different.
Nutrition Facts (per cookie)
| Nutrient | Amount |
|---|---|
| Calories | 95 kcal |
| Carbohydrates | 13 g |
| Protein | 1.5 g |
| Fat | 4 g |
| Saturated Fat | 2.5 g |
| Cholesterol | 20 mg |
| Sodium | 55 mg |
| Fiber | 0.4 g |
| Sugars | 8 g |
Red Velvet Crinkle Cookies
Course: Uncategorized24
cookies15
minutes10
minutes95
kcalIngredients
All-purpose flour: 2 ½ cups
Unsweetened cocoa powder: 2 tablespoons
Baking powder: 1 teaspoon
Baking soda: ½ teaspoon
Fine sea salt: ¼ teaspoon
Unsalted butter: ½ cup (softened)
Light brown sugar: ½ cup
Granulated sugar: ½ cup
Large eggs: 2
Vanilla extract: 1 teaspoon
Red gel food coloring: 1 tablespoon
Powdered sugar: for coating
Directions
- Prepare the Dry Ingredients: In a medium bowl, whisk together the flour, cocoa powder, baking powder, baking soda, and salt. Set aside.
- Cream the Butter and Sugar: In a large bowl, cream the butter, light brown sugar, and granulated sugar together using a hand or stand mixer until light and fluffy.
- Add the Eggs and Vanilla: Beat in the eggs, one at a time, then add the vanilla extract.
- Mix in the Food Coloring: Add the red gel food coloring and mix until evenly distributed.
- Combine Wet and Dry Ingredients: Gradually add the dry ingredients to the wet mixture and mix until just combined.
- Roll the Dough: Roll the dough into 1-inch balls, then coat them generously in powdered sugar.
- Bake the Cookies: Preheat the oven to 350°F (177°C). Place the dough balls on a baking sheet lined with parchment paper, spacing them 2 inches apart. Bake for 10-12 minutes or until the edges are set. Let the cookies cool for 5 minutes on the baking sheet, then transfer them to a cooling rack.
Conclusion
These Red Velvet Crinkle Cookies are the perfect treat for anyone who loves a soft, chewy cookie with a rich flavor and a touch of elegance. The stunning red hue and crinkled exterior make them a favorite for holidays, special occasions, or any time you want to impress guests with something a little extra special. Whether you’re baking for a party, a gift, or just a treat for yourself, these cookies are sure to delight!
They are simple to make but look like they’ve come straight from a professional bakery, thanks to their eye-catching appearance and melt-in-your-mouth texture. With options to personalize the recipe to your taste, these cookies are a versatile and must-try addition to your baking repertoire. Happy baking!