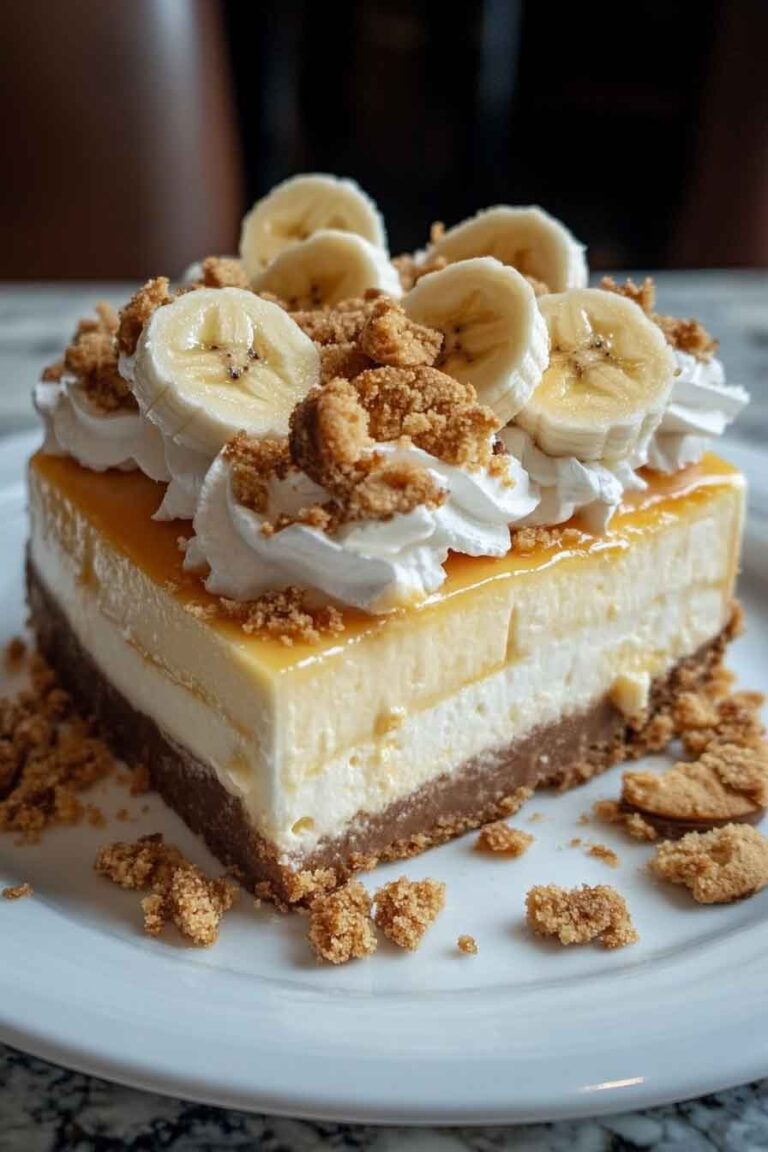
Pink Velvet Raspberry Cheesecake
Hey, guess what? I just tried the prettiest cheesecake ever. It’s pink velvet with raspberries, and it was love at first bite.
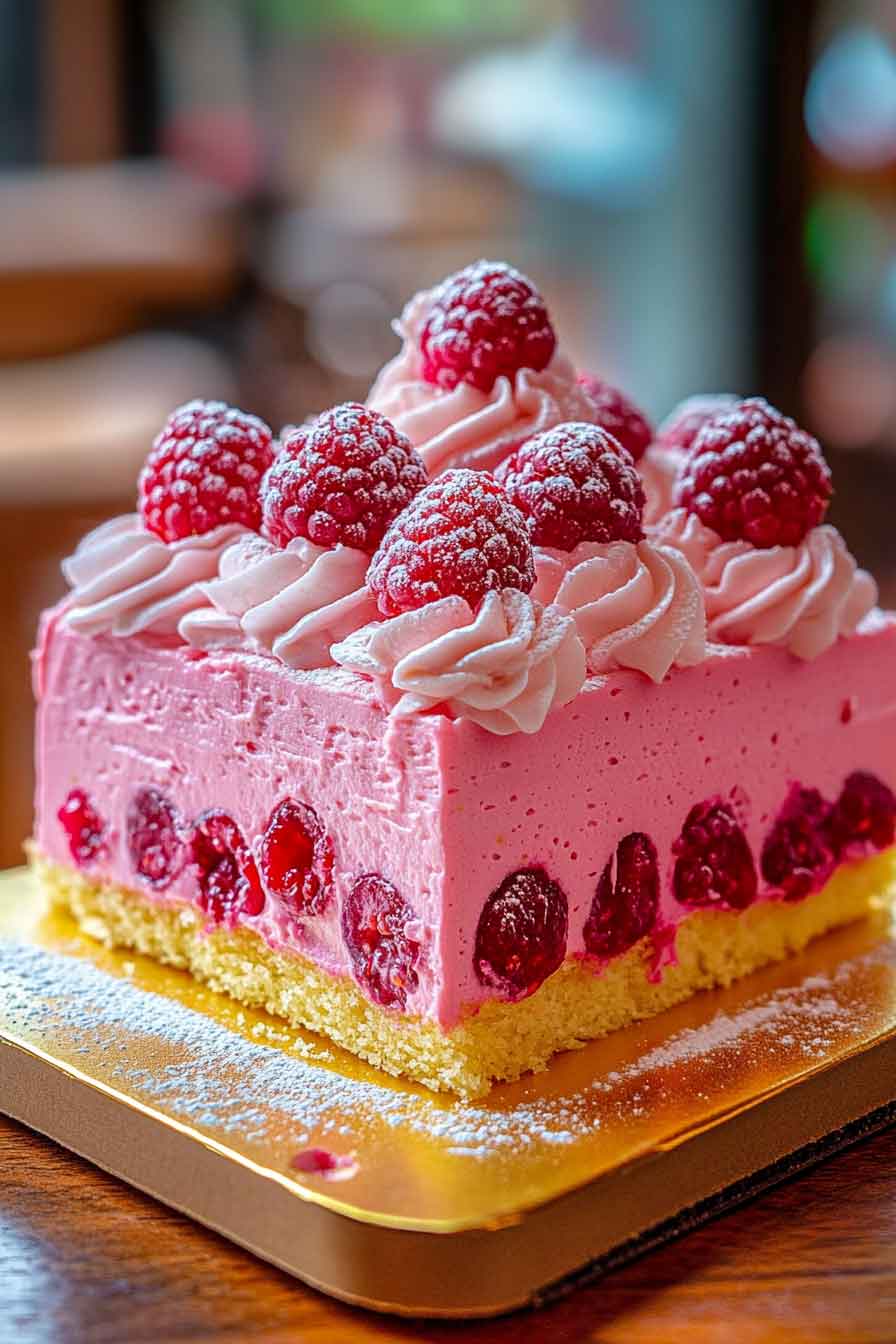
It’s soft, creamy, and oh-so-yummy. The pink color is super fun, and the raspberries make it sweet and fresh. I couldn’t stop after just one slice!
I’ll tell you how easy it is to make this cheesecake at home. You’ll love the creamy texture and the burst of raspberry flavor. Trust me, it’s a total hit at parties!
Wanna make it with me? Let’s grab our ingredients and get started. You’re gonna love it!

Why You’ll Love This Recipe
- Perfect for Special Occasions: With its vibrant pink color, this cheesecake is the perfect showstopper for birthdays, anniversaries, or any celebration.
- Unique Flavor Combination: The tartness of raspberries pairs beautifully with the rich, creamy cheesecake and the buttery Oreo crust.
- Stunning Drip Effect: The white chocolate drip adds a luxurious touch and creates an Instagram-worthy dessert.
- Customizable Decorations: Add pink velvet cake crumbs, fresh raspberries, whipped cream, and sprinkles for a personal touch.
- Deliciously Creamy Texture: The cream cheese and sour cream filling create a velvety-smooth texture that’s simply irresistible.
Required Kitchen Tools
To make the Pink Velvet Raspberry Cheesecake, you’ll need the following kitchen tools:
- 9-inch Springform Pan: This is essential for getting the perfect cheesecake shape and ensuring easy removal once it’s baked.
- Hand Mixer or Stand Mixer: For mixing the cheesecake filling to a smooth, lump-free texture.
- Oven: Preheated to 325°F (163°C) for baking the cheesecake.
- Double Boiler or Microwave: To melt the white chocolate for the drip effect.
- Food Processor or Rolling Pin: For crushing the Oreo cookies to make the crust.
- Piping Bag (Optional): For decorating with whipped cream or other decorations.
- Measuring Cups and Spoons: For precise ingredient measurements.

Ingredients
Now, let’s go over the ingredients you’ll need to create this indulgent dessert. This recipe is split into four parts: the crust, the cheesecake filling, the white chocolate drip, and the decorations. I’ll list the exact amounts below so you can follow along with ease.
For the Crust:
- Oreo crumbs: 2 cups (You can crush the Oreos yourself or use pre-made crumbs)
- Unsalted butter (melted): 1/4 cup
For the Cheesecake Filling:
- Cream cheese (softened): 3 (8 oz) packages
- Granulated sugar: 1 cup
- Sour cream: 1/2 cup
- Vanilla extract: 1 teaspoon
- Large eggs: 3 (at room temperature)
- Raspberry puree: 1 cup (Use fresh or thawed frozen raspberries, pureed and strained)
- Pink food coloring (optional): 1-2 drops for that signature pink hue
- Crushed Oreos: 1/4 cup (for mixing into the cheesecake batter)
For the Drip:
- White chocolate chips: 1 cup
- Heavy cream: 1/4 cup
For Decoration:
- Whipped cream: Fresh or homemade
- Fresh raspberries: A handful for garnish
- Pink velvet cake crumbs (optional): For an extra touch of pink
- Sprinkles (optional): To add a fun, festive look

Step-by-Step Instructions
Part 1: Making the Oreo Crust
1. Prepare the Oreo Crust
The crust is the foundation of your Pink Velvet Raspberry Cheesecake, and it’s super easy to make. Here’s how:
- Crush the Oreos: If you don’t have pre-made Oreo crumbs, take about 15 Oreo cookies and crush them into fine crumbs. You can use a food processor for this, or place them in a plastic bag and crush them with a rolling pin until they are finely ground.
- Combine with Butter: In a medium bowl, mix the Oreo crumbs with melted butter. Stir until the crumbs are evenly coated.
- Press into Pan: Grease a 9-inch springform pan with butter or cooking spray. Pour the Oreo mixture into the pan and press it down firmly to create an even layer. Use the back of a spoon or the bottom of a glass to compact the crumbs.
- Chill the Crust: Place the pan in the refrigerator to chill while you prepare the cheesecake filling. This will help set the crust and make it easier to handle when you add the filling.
2. Bake the Crust
Preheat your oven to 325°F (163°C). Bake the crust for 10 minutes, then remove it from the oven and let it cool completely while you prepare the cheesecake filling. This ensures that the crust holds its shape and doesn’t become soggy.
Part 2: Preparing the Cheesecake Filling
1. Mix the Cream Cheese and Sugar
In a large mixing bowl, beat the softened cream cheese with a hand mixer or stand mixer on medium speed until smooth and creamy. This should take about 2-3 minutes.
Once the cream cheese is smooth, add the granulated sugar and continue beating until the mixture is light and fluffy, about another 2-3 minutes.
2. Add Sour Cream, Vanilla, and Eggs
Next, add the sour cream and vanilla extract to the mixture and beat until smooth. This helps add creaminess to the cheesecake filling.
Then, add the eggs one at a time, mixing after each addition. Be sure to scrape down the sides of the bowl to ensure everything is well combined.
3. Add the Raspberry Puree and Pink Food Coloring
Now, it’s time to infuse the cheesecake with raspberry flavor and that stunning pink hue.
Add the raspberry puree to the mixture, followed by a few drops of pink food coloring (if desired). The food coloring will give your cheesecake that signature pink velvet look. Mix until everything is well incorporated.
4. Stir in Crushed Oreos
Fold in the crushed Oreos to give the cheesecake filling a bit of texture and flavor. This also helps tie the filling together with the Oreo crust.
5. Pour the Filling into the Crust
Once your cheesecake filling is ready, carefully pour it into the cooled Oreo crust. Smooth the top with a spatula to create an even layer.

Part 2: Baking and Adding the White Chocolate Drip
1. Bake the Cheesecake
Now that your cheesecake filling is prepped and poured into the Oreo crust, it’s time to bake. Follow these steps to ensure your cheesecake bakes perfectly:
- Prepare the Oven: Preheat your oven to 325°F (163°C). Make sure the oven is fully preheated before placing the cheesecake inside.
- Bake the Cheesecake: Place the cheesecake pan on the middle rack of your oven. Bake for about 50-60 minutes. The edges of the cheesecake should be set, but the center will still slightly jiggle when you gently shake the pan.
- Cool Slowly: After baking, turn off the oven and leave the cheesecake in the oven with the door slightly ajar for about 1 hour. This gradual cooling helps prevent cracks on the surface.
- Chill the Cheesecake: Once the cheesecake has cooled to room temperature, cover it with plastic wrap and refrigerate it for at least 4 hours, or preferably overnight. This allows the cheesecake to set properly and makes it easier to slice.
Part 3: Creating the White Chocolate Drip and Decorating
1. Prepare the White Chocolate Drip
The white chocolate drip is the showstopper of this Pink Velvet Raspberry Cheesecake. Here’s how to make it:
- Melt the White Chocolate: In a microwave-safe bowl or using a double boiler, melt the white chocolate chips with the heavy cream. If using a microwave, heat in 30-second intervals, stirring in between, until the chocolate is smooth and fully melted. Be careful not to overheat it.
- Check Consistency: The mixture should be smooth and pourable, but not too runny. If it’s too thick, add a little more cream, a teaspoon at a time, to loosen it up. If it’s too thin, let it cool for a few minutes until it thickens up.
- Test the Drip: Before applying the drip to the cheesecake, test it on a spoon or a piece of parchment paper. It should drip slowly but not too rapidly.
2. Add the White Chocolate Drip
- Transfer to Piping Bag: Pour the melted white chocolate into a piping bag or a plastic sandwich bag with the tip cut off for more control.
- Drip the White Chocolate: Gently pipe the white chocolate around the edges of the cheesecake, allowing it to drip down the sides. You can also apply a thin layer of white chocolate on top of the cheesecake for a smooth, glossy finish.
- Spread the Remaining Drip: If you have leftover white chocolate, spread it over the top of the cheesecake using an offset spatula to create a smooth finish. The glossy drip will harden as it cools.
3. Decorate the Cheesecake
The decoration is what takes this Pink Velvet Raspberry Cheesecake from great to spectacular. Here’s how to top it off:
- Whipped Cream: Pipe or dollop fresh whipped cream around the edges of the cheesecake or on top in small mounds for a fluffy, creamy contrast. You can use a piping bag with a star tip for a beautiful design.
- Fresh Raspberries: Place fresh raspberries on top of the cheesecake for a burst of color and tartness. They’ll complement the raspberry puree in the filling beautifully.
- Pink Velvet Cake Crumbs (Optional): For an extra touch, sprinkle some pink velvet cake crumbs on top of the cheesecake. These can be made by crumbling a slice of homemade or store-bought pink velvet cake. This adds both flavor and texture.
- Sprinkles (Optional): If you’re feeling extra festive, add a sprinkle of edible pink sprinkles or glitter on top for a fun, celebratory look.

Part 4: Serving and Storing the Pink Velvet Raspberry Cheesecake
1. How to Serve the Pink Velvet Raspberry Cheesecake
This Pink Velvet Raspberry Cheesecake is a showstopper, and it will be the centerpiece of any dessert spread. Here’s how to serve it:
- Serve Cold: Cheesecake is best served chilled. Once decorated, slice the cheesecake into 12-16 pieces, depending on how large you want the slices to be.
- Pair with Coffee or Tea: This cheesecake pairs beautifully with a cup of coffee, tea, or even a glass of dessert wine like a Moscato.
- Serve with Extra Raspberry Sauce: If you want to take it up a notch, drizzle extra raspberry puree or a berry compote on the plate for an extra touch of flavor.
2. How to Store Pink Velvet Raspberry Cheesecake
Storing your cheesecake properly ensures that it stays fresh for days, so you can enjoy it over time. Here’s how to store your Pink Velvet Raspberry Cheesecake:
- Refrigeration: Store any leftovers in the refrigerator, covered with plastic wrap or in an airtight container. It will keep for up to 5 days.
- Freezing: If you want to store the cheesecake for a longer period, you can freeze it. Wrap the cheesecake tightly in plastic wrap and then foil to prevent freezer burn. It will keep in the freezer for up to 3 months. When ready to eat, let it thaw in the fridge overnight.
3. How to Cut and Serve Perfect Slices
Cutting a cheesecake can be tricky because of its creamy texture, but here’s how to do it cleanly:
- Use a Hot Knife: Before cutting the cheesecake, dip a sharp knife in hot water, then wipe it dry. This will give you clean slices and prevent the filling from sticking to the knife.
- Clean the Knife After Each Slice: Wipe the knife clean after each cut to maintain smooth, beautiful slices.
Pink Velvet Raspberry Cheesecake – Nutrition Facts (Per Serving)
- Calories: 350–430 kcal
- Total Fat: 22–30 g
- Carbohydrates: 30–35 g
- Protein: 6 g
- Serving Size: 1 slice (1/12 of a 9-inch cheesecake)
Note: Nutritional values may vary based on specific ingredients and preparation methods

Pink Velvet Raspberry Cheesecake
Course: Uncategorized12-16
slices45
minutes50
minutes350–430
kcalIngredients
- For the Crust:
2 cups Oreo crumbs
1/4 cup unsalted butter, melted
- For the Cheesecake:
3 (8 oz) packages cream cheese, softened
1 cup granulated sugar
1/2 cup sour cream
1 teaspoon vanilla extract
3 large eggs
1 cup raspberry puree
1-2 drops pink food coloring (optional)
1/4 cup crushed Oreos
- For the Drip:
1 cup white chocolate chips
1/4 cup heavy cream
- For Decoration:
Fresh whipped cream
Fresh raspberries
Pink velvet cake crumbs (optional)
Sprinkles (optional)
Directions
- Prepare the Crust: Crush Oreos, mix with melted butter, and press into a springform pan. Bake for 10 minutes and cool.
- Make the Filling: Beat cream cheese and sugar, add sour cream, vanilla, eggs, raspberry puree, and food coloring. Fold in crushed Oreos.
- Bake the Cheesecake: Pour filling into the crust and bake for 50-60 minutes. Cool in the oven, then chill for 4 hours or overnight.
- Prepare the Drip: Melt white chocolate chips with heavy cream, and test the consistency before dripping onto the cheesecake.
- Decorate: Add whipped cream, raspberries, cake crumbs, and sprinkles.
- Serve and Enjoy: Slice and serve chilled.
Pink Velvet Raspberry Cheesecake FAQs
1. Can I make this cheesecake ahead of time?
Yes! In fact, Pink Velvet Raspberry Cheesecake is best when made ahead of time. After baking and cooling, store it in the refrigerator for 4 hours or overnight before adding the white chocolate drip and decorations. The cheesecake sets beautifully, and the flavors meld together, making it even more delicious the next day.
2. Can I use frozen raspberries?
Absolutely! If fresh raspberries aren’t available, you can use frozen raspberries to make the raspberry puree. Simply thaw and strain the raspberries before using them in the cheesecake. The taste will be just as fresh and vibrant!
3. Can I make a gluten-free version of this cheesecake?
Yes! To make a gluten-free Pink Velvet Raspberry Cheesecake, use gluten-free Oreos or another gluten-free cookie for the crust. Ensure all other ingredients, including the raspberry puree and decorations, are gluten-free as well.
4. Can I freeze this cheesecake?
Yes, this cheesecake freezes wonderfully! After the cheesecake has cooled and set in the refrigerator, wrap it tightly in plastic wrap and aluminum foil. Freeze it for up to 3 months. To serve, let it thaw in the fridge overnight before decorating and slicing.
5. How can I adjust the sweetness of the cheesecake?
If you prefer a less sweet cheesecake, reduce the amount of granulated sugar by about 1/4 cup. You can also use a sugar substitute such as stevia or monk fruit, but keep in mind that this may alter the texture slightly. If you want to balance the tartness of the raspberries, you could also increase the amount of sour cream slightly to add more creaminess.
6. How do I know when my cheesecake is done baking?
When baking a cheesecake, the edges should be set, and the center should still jiggle slightly. To be sure, you can use a food thermometer. The internal temperature of the cheesecake should reach 150°F (66°C). This indicates that the cheesecake is cooked through without being overdone.
7. Can I add other fruits to the cheesecake?
Yes, you can customize the cheesecake to suit your preferences. For instance, you can add blueberries, strawberries, or blackberries in place of raspberries or as an additional topping. Just make sure to adjust the puree amount accordingly if using a different fruit.
8. How can I achieve a smooth and crack-free cheesecake?
To prevent cracks in your cheesecake, bake it in a water bath. Wrap the springform pan with aluminum foil to prevent water from leaking in. Place the pan in a larger baking dish, and fill the outer dish with hot water until it reaches halfway up the side of the cheesecake pan. This helps the cheesecake bake evenly, avoiding sudden temperature changes that cause cracks.
Final Thoughts on Pink Velvet Raspberry Cheesecake
Whether it’s for a special celebration or a casual get-together, this Pink Velvet Raspberry Cheesecake is sure to make an impression. Its creamy filling, decadent Oreo crust, and beautiful pink velvet color make it a true showstopper. Plus, the tangy sweetness of the raspberries perfectly complements the richness of the cheesecake, while the white chocolate drip and fresh raspberries elevate the entire dessert.
The best part is that this cheesecake can be customized to fit your preferences. Want it even sweeter? Add more sugar. Prefer a different fruit? Swap out the raspberry puree for strawberry or blueberry. The options are endless!
I hope you enjoy making this delicious dessert as much as I do. It’s perfect for impressing guests, treating yourself, or celebrating with loved ones. Don’t forget to take a few pictures because this Pink Velvet Raspberry Cheesecake is not only delicious but also incredibly Instagram-worthy!