

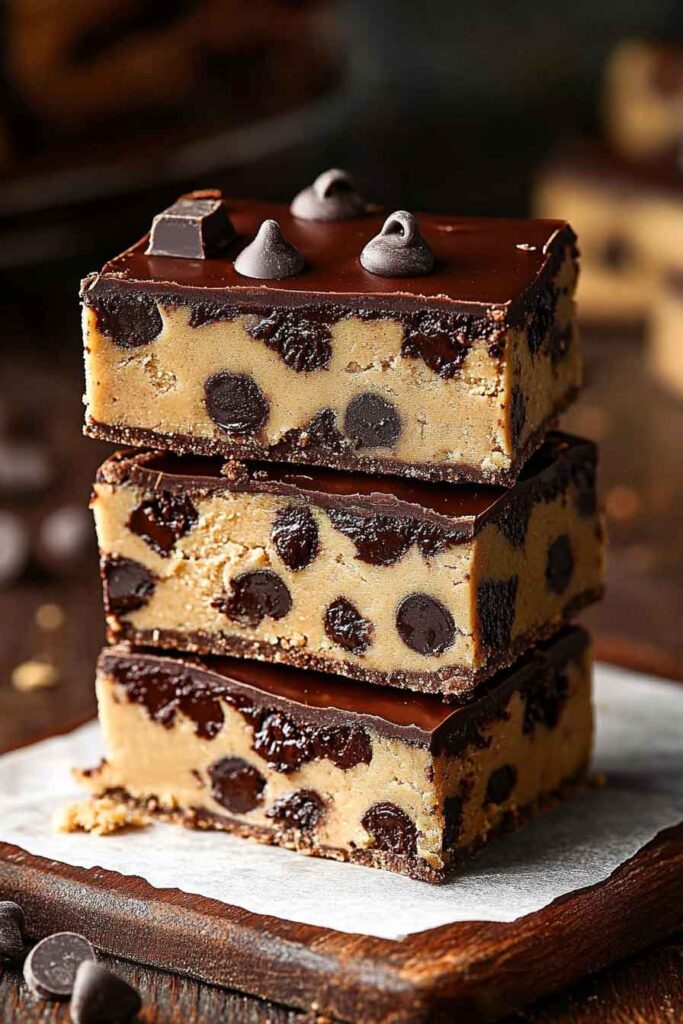
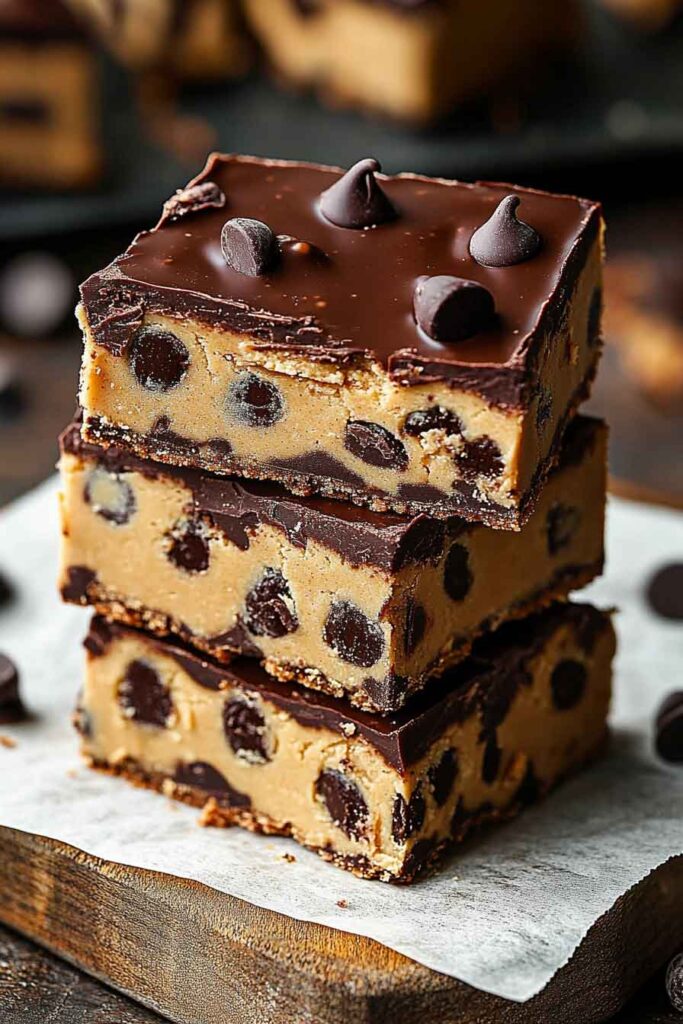
Oh wow, I just made peanut butter cookie dough bars, and they are so yummy! They’re soft, chewy, and full of peanut butter flavor. It’s like eating cookie dough, but even better!
What I love about these bars is how easy they are to make. You don’t even have to bake them! The cookie dough part is safe to eat and tastes amazing.
If you like peanut butter and cookie dough, you’ll love these. They’re perfect for a quick snack or even dessert. Trust me, you’ll want to make a batch right now!
Want to make some together? Grab your peanut butter and let’s whip up these easy, no-bake bars!

Why You’ll Love This Recipe
- No-Bake Delight: This recipe is incredibly simple and doesn’t require turning on the oven. It’s perfect for a hassle-free dessert!
- Peanut Butter Lovers Dream: A rich, creamy peanut butter base that melts in your mouth with every bite.
- Quick and Easy: Ready in under 30 minutes with minimal prep time.
- Perfect for Meal Prep: You can make a large batch of these bars and store them for snacks throughout the week.
- Customizable: Whether you prefer extra chocolate chips, or a crunchy texture, you can easily customize these bars to suit your taste.
Required Kitchen Tools
Before we dive into the ingredients, make sure you have the following kitchen tools ready for an easy and smooth preparation process:
- Mixing Bowl: To combine your cookie dough ingredients.
- Spatula or Wooden Spoon: For stirring the dough and frosting.
- 9×9-inch Baking Pan: To press the dough and frosting layers into.
- Parchment Paper (Optional): For easier cleanup and removal of the bars from the pan.
- Microwave-Safe Bowl: For melting the chocolate chips for the frosting.
Ingredients
Here’s what you’ll need to make these delicious no-bake Peanut Butter Cookie Dough Bars (exact measurements are in the recipe card below):
For the Cookie Dough:
- Unsalted Butter (softened): Provides moisture and a smooth texture to the dough.
- Light Brown Sugar (packed): Adds sweetness and a rich flavor to the dough.
- Pure Vanilla Extract: A dash of vanilla enhances the overall flavor.
- Creamy Peanut Butter: The star ingredient, which brings that nutty, smooth richness to the dough.
- All-Purpose Flour: Forms the base of the dough and gives structure.
- Sweetened Condensed Milk (14 ounces): Adds sweetness and makes the dough irresistibly creamy.
- Mini Chocolate Chip Morsels: For a little chocolatey crunch in every bite!
For the Frosting:
- Creamy Peanut Butter: The frosting layer is also peanut butter-based, creating a seamless peanut butter flavor throughout the bars.
- Semi-Sweet Chocolate Chip Morsels: For the rich, glossy chocolate topping that brings everything together.
Variations for Peanut Butter Cookie Dough Bars
- Add More Chocolate Chips: If you’re a chocolate lover, feel free to double the amount of mini chocolate chips in the dough or even add a drizzle of melted chocolate on top.
- Add a Crunchy Texture: You can substitute the creamy peanut butter for crunchy peanut butter if you like a bit of texture in your cookie dough.
- Make It Vegan: Use vegan butter, dairy-free condensed milk, and dairy-free chocolate chips for a vegan version of these bars.
- Top with Crushed Nuts: Add a sprinkle of crushed peanuts, almonds, or any nut of your choice on top of the frosting for an extra layer of flavor and texture.
- Use Dark Chocolate: If you prefer a richer, less sweet flavor, swap out the semi-sweet chocolate chips for dark chocolate chips.
Step-by-Step Instructions
Making these Peanut Butter Cookie Dough Bars is as easy as 1-2-3! Here’s how to make these mouthwatering bars in just a few simple steps.
1. Make the Cookie Dough Base
Start by preparing the cookie dough layer. In a medium-sized mixing bowl, cream together the softened unsalted butter and light brown sugar until light and fluffy. The butter should be soft to the touch, but not melted. Add the peanut butter and vanilla extract to the mixture and beat until smooth and well combined.
Once the wet ingredients are combined, slowly add the all-purpose flour and sweetened condensed milk. Mix everything together until the dough reaches a thick, cookie dough-like consistency. You can use a spatula to scrape the sides of the bowl to make sure all the ingredients are incorporated. Finally, fold in the mini chocolate chip morsels to add that perfect balance of peanut butter and chocolate in each bite.
2. Press the Cookie Dough into the Pan
Once your cookie dough is ready, line a 9×9-inch baking pan with parchment paper. Press the cookie dough mixture into the bottom of the pan, spreading it evenly across the surface. Use the back of a spoon or your hands to press it down so the dough forms a compact, even layer. Be sure to spread it all the way to the edges of the pan for a uniform base.
Once the dough is pressed down, refrigerate the pan for about 10-15 minutes to allow the dough to firm up a bit before adding the frosting layer.
3. Make the Peanut Butter Chocolate Frosting
In a microwave-safe bowl, melt the semi-sweet chocolate chip morsels in 30-second intervals, stirring between each. Once the chocolate is fully melted, add in the creamy peanut butter and stir until smooth and well combined. The result will be a glossy, thick frosting.
4. Spread the Frosting
Remove the cookie dough base from the fridge. Using a spatula or butter knife, spread the peanut butter and chocolate frosting evenly over the top of the dough layer. Try to cover the entire surface for a decadent finish. The combination of creamy peanut butter and rich chocolate will give these bars that irresistible topping that makes them truly unique.
5. Refrigerate and Set
Once the frosting is evenly spread, place the pan back in the refrigerator and let the bars set for at least 2 hours. This step allows the frosting to firm up, and it helps the bars hold their shape when you cut them.
6. Slice and Serve
Once the bars have set, remove them from the fridge and lift the parchment paper to remove the bars from the pan. Transfer the bars to a cutting board and slice them into squares or rectangles, depending on how big or small you want each portion. Enjoy the perfect balance of peanut butter cookie dough and chocolate frosting with each bite!
How to Serve Peanut Butter Cookie Dough Bars
These bars are a perfect standalone dessert or snack. However, you can also serve them in different ways:
- On a Dessert Platter: Place them on a platter with other sweet treats for a delicious dessert spread at a party or gathering.
- With a Glass of Milk: Pair these bars with a cold glass of milk for a classic combination of peanut butter and chocolate.
- As a Snack: Keep a batch of these bars in the fridge for a quick and satisfying snack throughout the week.
- As a Party Treat: Slice them into small squares and serve them at birthday parties, barbecues, or any special occasion.
Storing Peanut Butter Cookie Dough Bars
If you have leftovers (which is rare!), storing these bars is super simple:
- In the Refrigerator: Keep the bars in an airtight container in the fridge for up to 5-7 days. The bars will stay fresh and the frosting will remain firm.
- Freezing: If you want to store them for a longer period, wrap individual bars in plastic wrap and freeze them for up to 2-3 months. Thaw them at room temperature for 10-15 minutes before serving.
Nutrition Information
Here’s a general breakdown of the nutrition for one bar (based on the ingredients used):
| Nutrient | Amount |
|---|---|
| Calories | 210 |
| Total Fat | 12g |
| Saturated Fat | 4g |
| Cholesterol | 15mg |
| Sodium | 100mg |
| Total Carbohydrates | 24g |
| Dietary Fiber | 1g |
| Sugars | 19g |
| Protein | 3g |
(Note: Nutritional values are approximate and may vary based on exact portion sizes and ingredient brands used.)
Part 2: Tips and Tricks for Perfect Peanut Butter Cookie Dough Bars
Creating the perfect batch of Peanut Butter Cookie Dough Bars may seem simple, but there are a few tips and tricks that can elevate your bars to a whole new level. These small adjustments will ensure that your treats turn out with the perfect texture, flavor, and appearance every time you make them. Whether you’re a seasoned baker or a beginner, these tips will help make your experience even more enjoyable and your results more impressive.
1. Use Softened Butter, Not Melted
When making the cookie dough base, it’s important to use softened butter rather than melted butter. Softened butter will cream more easily with the sugar, leading to a smooth dough with the perfect texture. If your butter is too hard, it won’t mix well with the sugar and peanut butter, resulting in a lumpy dough. If your butter is too soft or melted, the dough will turn out too runny and not hold its shape when pressed into the pan.
To soften your butter quickly, cut it into smaller pieces and leave it at room temperature for about 10-15 minutes before starting. This way, your butter will be soft enough to mix smoothly but still maintain its structure.
2. Don’t Overmix the Dough
When incorporating the flour and condensed milk into the dough, be sure to mix only until combined. Overmixing can cause the dough to become dense and dry. Since we’re using sweetened condensed milk, which is already quite creamy and sweet, it’s important to avoid overworking the dough so it retains a smooth, thick consistency without becoming too crumbly.
If you accidentally overmix the dough, don’t worry too much — it will still turn out delicious, but the texture may be slightly different than if you had mixed more gently.
3. Adjust the Sweetness
The balance between peanut butter and sweetness is crucial in this recipe. If you like your bars on the sweeter side, you can increase the amount of sweetened condensed milk or add a little more brown sugar. Keep in mind, though, that the chocolate frosting adds a layer of sweetness too, so don’t go overboard with the sugar.
On the other hand, if you prefer less sweetness, you can reduce the sugar or even use a sugar substitute like stevia, monk fruit, or a sugar-free condensed milk. Just be sure to check the proportions on any substitutions, as they may affect the consistency or flavor slightly.
4. Experiment with Peanut Butter Variations
While creamy peanut butter is typically the star ingredient in this recipe, feel free to experiment with other types of peanut butter. You can use crunchy peanut butter for a more textured cookie dough base or natural peanut butter for a more earthy, slightly less sweet flavor. If you want to add a hint of extra flavor, you can even try peanut butter with honey or cinnamon varieties.
Just keep in mind that natural peanut butter tends to have a runnier consistency, so you might need to adjust the flour or condensed milk slightly to maintain the desired dough texture.
5. Chill the Dough Before Layering the Frosting
While the recipe calls for refrigerating the dough briefly before adding the frosting, you can also chill the dough for longer — even up to 30 minutes or an hour — if you have the time. Chilling helps the dough firm up, making it easier to spread the frosting without disturbing the base. The longer the dough chills, the more structured and easier it will be to cut into perfect squares once everything is set.
6. Use Parchment Paper for Easy Removal
Using parchment paper to line the baking pan isn’t just for aesthetics. It helps the bars easily lift out of the pan without sticking. When you pull the parchment paper from the pan, the bars will lift effortlessly, making cutting them into perfect squares much easier.
You can also use wax paper or plastic wrap for a similar effect, but parchment paper is the best option because it can withstand higher temperatures and doesn’t stick to the bars. This will ensure clean edges when you cut the bars.
7. Make Sure the Frosting is Smooth and Creamy
The frosting layer should have a smooth, silky texture. To achieve this, make sure your semi-sweet chocolate chips are fully melted. If you find that the chocolate becomes a bit too thick while melting, you can add a small amount (1-2 teaspoons) of vegetable oil or peanut butter to loosen it up. Stir thoroughly to achieve the perfect consistency before spreading it on top of the cookie dough.
Don’t rush the melting process. Heat the chocolate in intervals, stirring each time. This ensures the chocolate doesn’t burn or seize up. Once the chocolate and peanut butter are combined, the frosting will be smooth and ready to spread on top of the cookie dough base.
8. Add a Decorative Touch with Toppings
For a fun, decorative finish, top the bars with a sprinkle of chopped peanuts or a handful of mini chocolate chips after spreading the frosting. You could even add a few more swirls of peanut butter by gently drizzling it on top of the frosting for an extra swirl effect. These small additions can elevate the look of your bars, making them extra special for guests or parties.
If you want to get extra creative, you could also drizzle a little caramel or melted chocolate over the top for an added layer of indulgence. Just make sure that the frosting has set for a few minutes before adding any toppings to prevent them from melting into the frosting.
9. Serve Chilled for Best Results
While you can serve these Peanut Butter Cookie Dough Bars at room temperature, they hold up best when served chilled. The frosting layer will remain firm and the bars will stay intact when you cut them, ensuring a neat and clean presentation. Chill them in the fridge for 15-20 minutes before serving if you want them to be firm, or serve them directly after cutting if you prefer a softer, more gooey texture.
10. Make These Bars Ahead of Time
One of the best things about this recipe is how easy it is to make ahead. These bars actually taste even better the next day, once the flavors have had time to meld together. You can prepare the dough and frosting layers in advance, store them in the fridge, and then assemble and chill them the night before you plan to serve them.
Part 3: Troubleshooting and FAQs for Peanut Butter Cookie Dough Bars
Even though this recipe is simple, there are a few common issues that might arise when making Peanut Butter Cookie Dough Bars. Whether you’re a beginner or an experienced baker, it’s always helpful to know what to do in case something goes wrong. In this section, I’ll address some of the most common questions and issues, along with troubleshooting tips to ensure that your bars turn out perfectly every time.
1. My Cookie Dough is Too Soft – What Did I Do Wrong?
If your cookie dough turns out too soft, there are a few possible reasons why this might happen:
- Too Much Condensed Milk: Sweetened condensed milk adds moisture, so if you used more than the recipe calls for, it could make the dough too soft. If this happens, add a little more flour to the dough to help it firm up.
- Overmixing: Overmixing the dough can cause the butter to soften too much, making it hard to set. Make sure you’re only mixing the dough until it’s just combined.
- Too Warm Butter: If the butter was too soft or slightly melted when you began mixing, it can cause the dough to be too runny. Use softened butter (but not melted!) for the best consistency.
To fix a soft dough, chill it for about 20 minutes in the fridge before pressing it into the pan. If it’s still too soft to handle, add a bit more flour (1 tablespoon at a time) until you reach the right consistency.
2. The Frosting Isn’t Spreading Smoothly – How Do I Fix That?
Sometimes, the frosting layer can be a little tricky if it’s too thick or stiff. Here’s what you can do if this happens:
- Melt the Frosting Again: If the frosting has cooled too much and become difficult to spread, simply pop it back in the microwave for 10-15 seconds, stirring every few seconds until it becomes smooth and easy to work with.
- Add a Little Liquid: If you find the frosting is too thick, you can add a tiny bit of peanut butter or vegetable oil (about 1 teaspoon at a time) to loosen it up. This will help it spread more evenly without changing the flavor.
- Use a Spatula: If your frosting seems to be sticking to the spatula or knife as you spread it, you can dip the spatula in a little warm water before using it again. This will help the frosting glide more smoothly over the surface of the dough.
3. The Bars Are Too Crumbly When I Cut Them – How Can I Make Them More Firm?
If your Peanut Butter Cookie Dough Bars fall apart when you try to cut them, it’s usually a sign that the dough or frosting didn’t set properly. Here are a few tips to help prevent this:
- Chill the Bars Longer: Ensure that you’re chilling the bars long enough before cutting them. The dough and frosting layers need time to firm up and hold together. If you’ve only chilled them for an hour, try refrigerating them for a few more hours or overnight for better results.
- Use Parchment Paper: If you haven’t already, line your baking pan with parchment paper. This not only helps with easy removal, but it also helps keep the bars intact when you lift them out and slice them.
- Cut with a Warm Knife: For clean cuts, try warming your knife under hot water and wiping it dry before slicing. This helps the knife glide through the bars more easily and prevents the frosting from sticking to the blade.
4. The Bars Are Too Sweet – How Can I Tone Down the Sweetness?
While these bars are meant to be a sweet treat, you can definitely adjust the sweetness if it’s too much for your taste. Here’s what you can do:
- Reduce the Condensed Milk: If you find the bars too sweet, try reducing the amount of sweetened condensed milk slightly. You can cut back by 1-2 tablespoons and replace it with a little more peanut butter to maintain the creamy texture.
- Use Dark Chocolate for the Frosting: Instead of using semi-sweet chocolate chips for the frosting, try using dark chocolate for a more bitter contrast. This will balance out the sweetness of the cookie dough and give you a richer flavor.
- Use Natural Peanut Butter: If you’re using peanut butter with added sugar, switch to natural peanut butter. It’s less sweet and can help tone down the overall sweetness of the bars.
5. Can I Make These Bars in Advance?
Yes, absolutely! In fact, making these bars in advance is a great idea because it allows the flavors to meld and the bars to firm up in the fridge. Here’s how to store and make them ahead of time:
- Make Ahead: You can prepare the entire batch of cookie dough and frosting, then refrigerate it until you’re ready to assemble the bars. Once you assemble the bars, let them chill in the fridge for at least 2 hours or overnight to set.
- Storage: If you have leftovers, store them in an airtight container in the fridge for up to a week. They can also be frozen for up to 2-3 months. Wrap individual bars in plastic wrap and place them in a freezer-safe container. When you’re ready to eat, thaw them for 15-20 minutes before serving.
6. Can I Freeze Peanut Butter Cookie Dough Bars?
Yes, these bars freeze beautifully! To freeze them:
- Slice the Bars First: Once the bars have cooled and firmed up in the fridge, slice them into individual portions.
- Wrap in Plastic Wrap: Wrap each slice tightly in plastic wrap to prevent freezer burn.
- Place in an Airtight Container: After wrapping, place the bars in a freezer-safe container or resealable bag for extra protection.
- Freeze for Up to 3 Months: These bars can be stored in the freezer for up to 3 months.
- Thaw Before Serving: When you’re ready to enjoy them, thaw the bars at room temperature for about 10-15 minutes, or place them in the fridge to thaw overnight.
7. How Do I Know When the Frosting is Set?
The frosting should have a firm and glossy finish when set. If you lightly press on the frosting, it should feel firm to the touch and not leave an indentation. You’ll also notice that it holds its shape when you slice the bars. If it still feels soft or sticky, give it another 20-30 minutes in the fridge to set fully.

Peanut Butter Cookie Dough Bars
Course: Uncategorized16
bars15
minutes210
kcal2
hoursIngredients
- For the Cookie Dough:
Unsalted butter (softened): 1/2 cup
Light brown sugar (packed): 1/2 cup
Pure vanilla extract: 1 teaspoon
Creamy peanut butter: 1 cup
All-purpose flour: 2 cups
Sweetened condensed milk (14 ounces): 1 can
Mini chocolate chip morsels: 1/2 cup
- For the Frosting:
Creamy peanut butter: 1/2 cup
Semi-sweet chocolate chip morsels: 1 cup
Directions
- Make the Cookie Dough Base: In a mixing bowl, beat together the softened butter and light brown sugar until fluffy. Add the peanut butter and vanilla extract and continue to mix until smooth. Stir in the flour and condensed milk until just combined. Fold in mini chocolate chips.
- Press the Dough into the Pan: Line a 9×9-inch baking pan with parchment paper and press the dough mixture evenly into the pan. Refrigerate for at least 15 minutes.
- Make the Frosting: In a microwave-safe bowl, melt the chocolate chips in 30-second intervals, stirring in between. Once melted, stir in the creamy peanut butter until smooth.
- Spread the Frosting: Once the cookie dough has chilled, spread the frosting evenly on top of the dough.
- Chill and Serve: Refrigerate the bars for at least 2 hours to allow them to set. Slice and serve chilled.
Conclusion
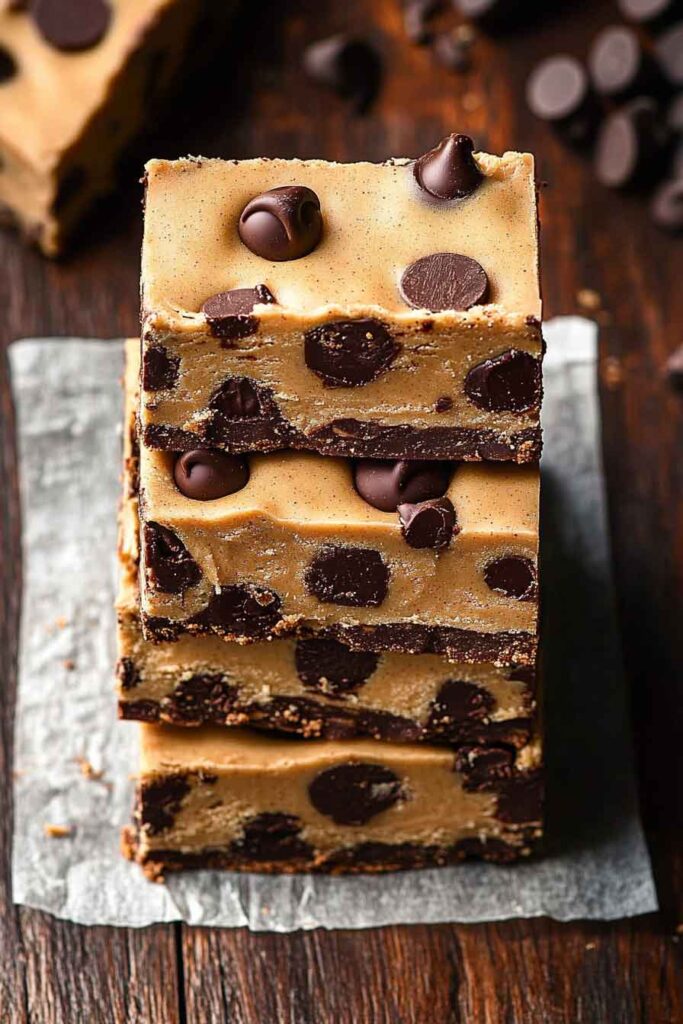
Peanut Butter Cookie Dough Bars are truly a treat for peanut butter lovers, combining rich, creamy peanut butter cookie dough with a decadent chocolate-peanut butter frosting. These bars are a delightful no-bake dessert that’s incredibly simple to make, yet indulgent enough to satisfy any sweet tooth. Whether you’re preparing a batch for a family get-together, a party, or simply as a weekend snack, these bars are guaranteed to impress.
The flexibility of this recipe makes it easy to personalize—whether you prefer extra peanut butter, a little more sweetness, or a thicker chocolate frosting, the possibilities are endless. With a few easy adjustments, you can make these bars to suit your taste and enjoy a perfect balance of peanut butter and chocolate in every bite.
Not only are these bars quick and easy to prepare, but they also store well in the fridge and freezer, making them the perfect make-ahead dessert. With their rich, creamy texture and irresistible combination of flavors, Peanut Butter Cookie Dough Bars are sure to become a go-to treat for any occasion.