Peanut Butter Chocolate Lava Cakes

Oh wow, have you ever tried something as gooey and sweet as peanut butter chocolate lava cakes? These little cakes are just so rich and creamy! I couldn’t believe how easy they were to make.
The best part? They come out of the oven with warm, melty chocolate and peanut butter inside. It’s like magic! I tried one bite and I was hooked.
I love how the chocolate and peanut butter mix together. It’s so yummy and fun to eat. Every bite feels like a surprise!
Let me show you how to make them! Trust me, you’ll want to bake these little lava cakes right away.
Why You’ll Love This Recipe
- Decadent and Irresistible: The combination of gooey chocolate and peanut butter in every bite is heavenly.
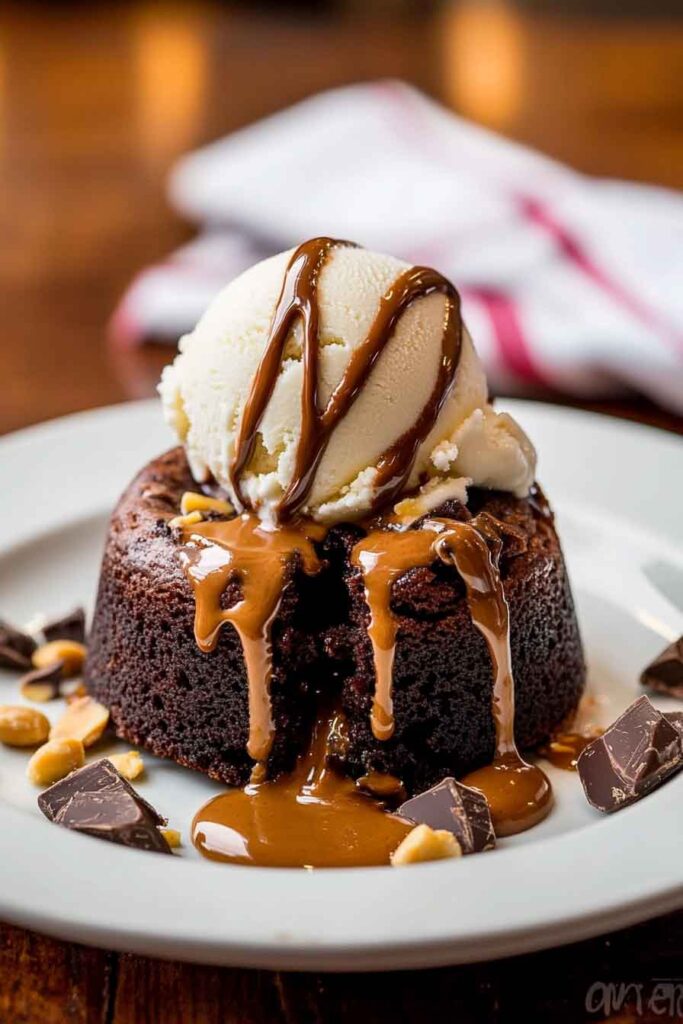
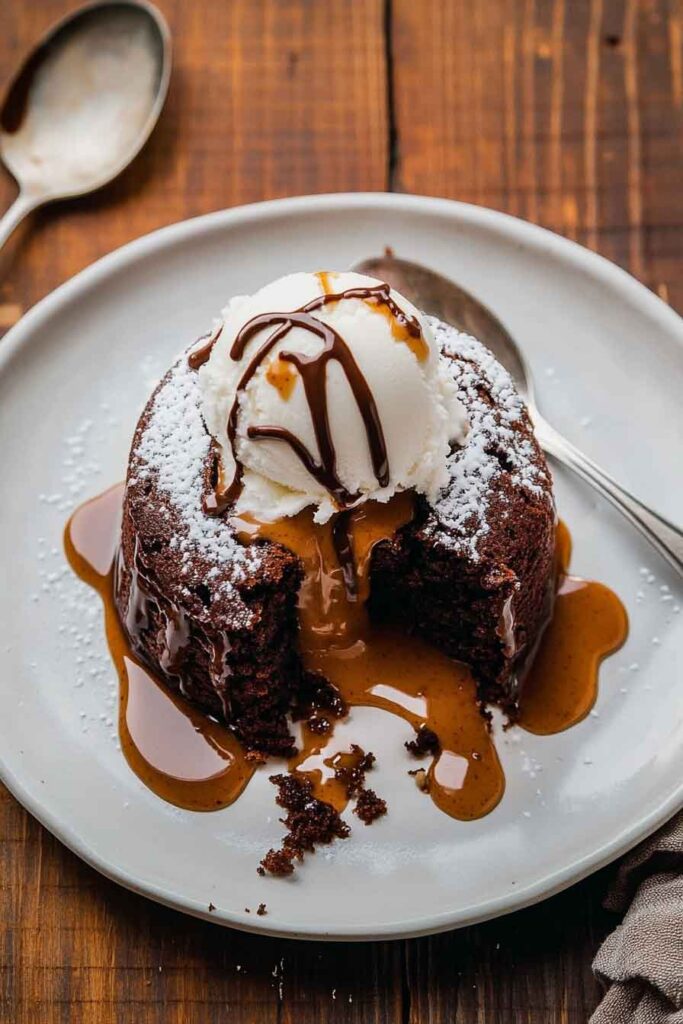
- Perfectly Gooey Center: When you cut into the lava cake, the molten peanut butter and chocolate center oozes out in the most satisfying way.
- Simple Ingredients: With just a few basic ingredients, you can make this showstopper dessert at home.
- Perfect for Special Occasions: These individual cakes make a luxurious dessert for date nights, dinner parties, or holidays.
- Quick to Make: Ready in under 30 minutes, these lava cakes are surprisingly quick to prepare.
Required Kitchen Tools
To make these peanut butter chocolate lava cakes, you’ll need the following tools:
- Ramekins (4-ounce size): The small, oven-safe dishes where the lava cakes will bake.
- Double Boiler (or Microwave-safe Bowl): To melt the chocolate and butter together.
- Hand Mixer or Stand Mixer: For whipping up the batter to perfection.
- Spatula: To scrape down the sides of the bowl and fold in the ingredients.
- Baking Sheet: For placing the ramekins to ensure even baking.
Ingredients
Here’s a breakdown of what you’ll need to make these indulgent cakes (exact measurements are listed in the recipe card below):
- Semi-Sweet Chocolate (high quality, such as Ghirardelli or Lindt): The base for the lava cake’s gooey center and rich flavor.
- Unsalted Butter: Creates a silky smooth texture in the cake batter and aids in melting the chocolate.
- All-Purpose Flour (spooned and leveled): Helps bind the ingredients together, creating the structure of the cake.
- Confectioners’ Sugar: Adds sweetness and lightness to the batter.
- Salt: A pinch of salt enhances the flavor of the chocolate and balances the sweetness.
- Large Eggs and Egg Yolks: These provide structure and moisture, ensuring the cake rises perfectly and has the perfect texture.
- Creamy Peanut Butter (about 2 teaspoons per cake): The star of the lava center, creating a luscious peanut butter lava filling.
- Optional for Serving: Vanilla ice cream, melted peanut butter, and/or chocolate syrup for extra indulgence.
Why Peanut Butter and Chocolate?
The pairing of peanut butter and chocolate is a timeless classic. The richness of chocolate, with its deep, slightly bitter notes, perfectly complements the creamy, nutty, and slightly salty taste of peanut butter. Together, they form a perfect duo, and when you bake them together in a lava cake, the result is nothing short of divine. The gooey molten center brings the two ingredients together in a perfect, mouthwatering experience.
In this recipe, the combination of creamy peanut butter in the center and a soft, rich chocolate cake surrounding it makes for a dessert that will delight everyone at your dinner table. But the best part is the experience of breaking into the cake and watching the molten peanut butter and chocolate flow out.
Variations for Peanut Butter Chocolate Lava Cakes
While this recipe is already pretty perfect, you can make some fun variations to customize it based on your tastes or preferences.
- Use Dark Chocolate: If you love a more intense chocolate flavor, swap semi-sweet chocolate for dark chocolate. This creates a richer, less sweet cake.
- Add Chopped Nuts: If you love a bit of crunch, consider adding chopped peanuts or walnuts to the batter for texture and an extra burst of flavor.
- Try Milk Chocolate: For a sweeter version, swap semi-sweet chocolate with milk chocolate, which will create a more indulgent dessert.
- Add a Dash of Espresso Powder: A pinch of espresso powder will deepen the flavor of the chocolate, enhancing the overall richness of the lava cake.
- Make it Vegan: Use plant-based butter, dairy-free chocolate, and flax eggs to make these lava cakes vegan-friendly while still maintaining the delicious, gooey center.
Step-by-Step Instructions
1. Preheat the Oven and Prepare Ramekins
Start by preheating your oven to 425°F (220°C). This high temperature ensures that the cakes bake quickly, creating a crisp exterior and molten center. Grease four 4-ounce ramekins with butter and lightly dust with flour. This helps the cakes come out of the ramekins easily once they’re baked.
2. Melt the Chocolate and Butter
In a double boiler or microwave-safe bowl, melt together the semi-sweet chocolate and unsalted butter. If using the microwave, melt the ingredients in 20-second intervals, stirring each time until fully melted and smooth. The melted chocolate and butter mixture should be silky and glossy.
3. Mix the Dry Ingredients
In a medium bowl, whisk together the all-purpose flour, powdered sugar, and salt. This helps to combine the dry ingredients before mixing them with the wet ingredients.
4. Whisk the Eggs and Egg Yolks
In a separate bowl, beat the eggs and egg yolks together using a hand mixer or whisk until slightly frothy and combined. This will add richness and moisture to the cake batter.
5. Combine Wet and Dry Ingredients
Slowly pour the melted chocolate and butter mixture into the egg mixture, stirring gently to combine. Then, fold in the dry ingredients (flour, powdered sugar, and salt) until the batter is smooth. The batter should be thick but pourable, with a glossy sheen.
6. Fill Ramekins with Batter
Evenly divide the batter between the prepared ramekins, filling each about two-thirds of the way full. Make a small indent in the center of each ramekin with a spoon or your finger to create space for the peanut butter filling.
7. Add the Peanut Butter Filling
Place about 2 teaspoons of creamy peanut butter into the center of each cake batter-filled ramekin. Gently press the peanut butter into the batter, but don’t mix it in – you want the peanut butter to remain in the center so that it becomes the molten “lava” when baked.
8. Bake the Lava Cakes
Bake the cakes in the preheated oven for 10-12 minutes, or until the edges are set but the centers are still soft and slightly jiggly. Keep a close eye on them to prevent overbaking – you want the centers to stay molten for that signature lava effect.
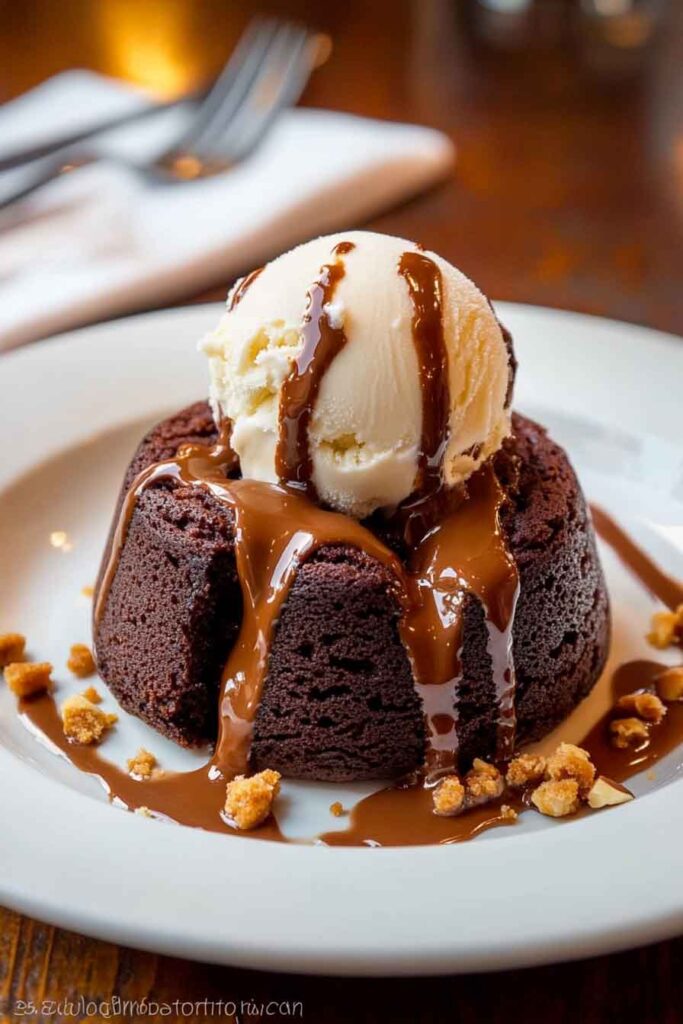
9. Serve and Enjoy
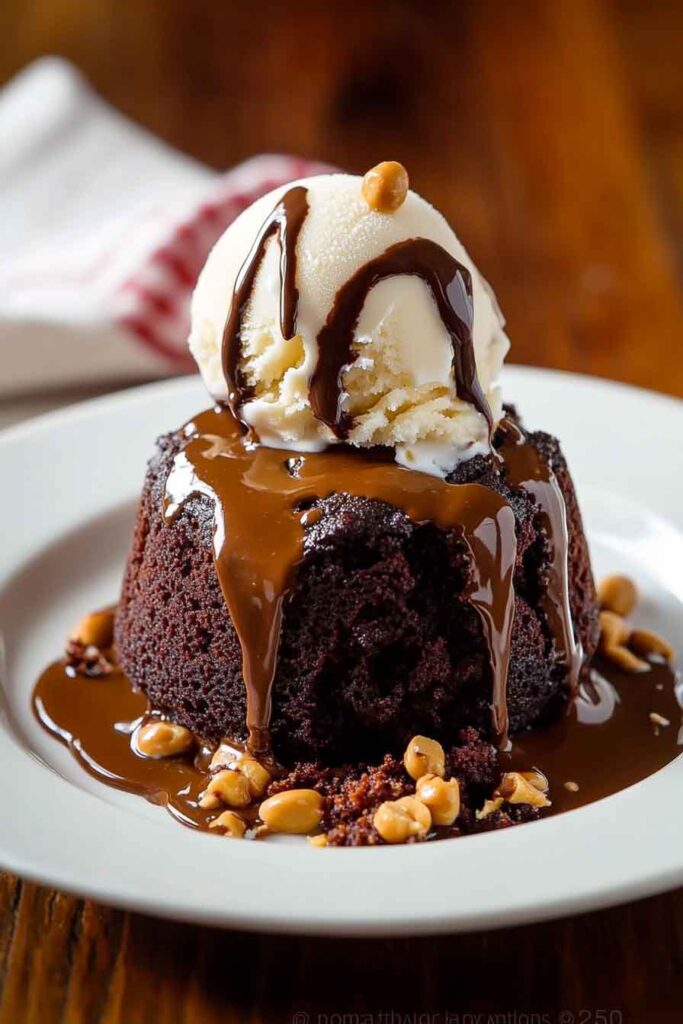
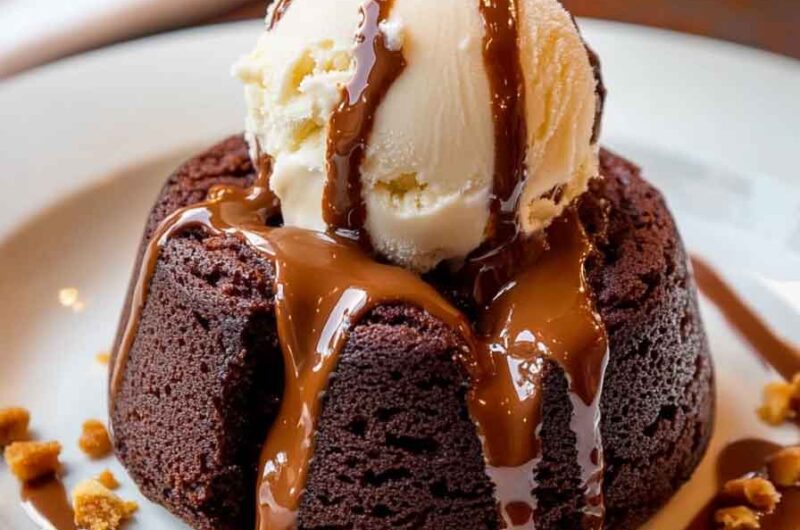
Allow the cakes to cool in the ramekins for 1-2 minutes before carefully running a knife around the edges to loosen the cakes. Invert each ramekin onto a plate and gently lift it off to reveal the perfectly baked lava cakes. You can top the cakes with a scoop of vanilla ice cream, drizzle with melted peanut butter or chocolate syrup, and enjoy the ultimate dessert experience.
How to Serve Peanut Butter Chocolate Lava Cakes
These lava cakes are perfect on their own, but there are plenty of ways to make them even more indulgent. Here are some ideas for serving:
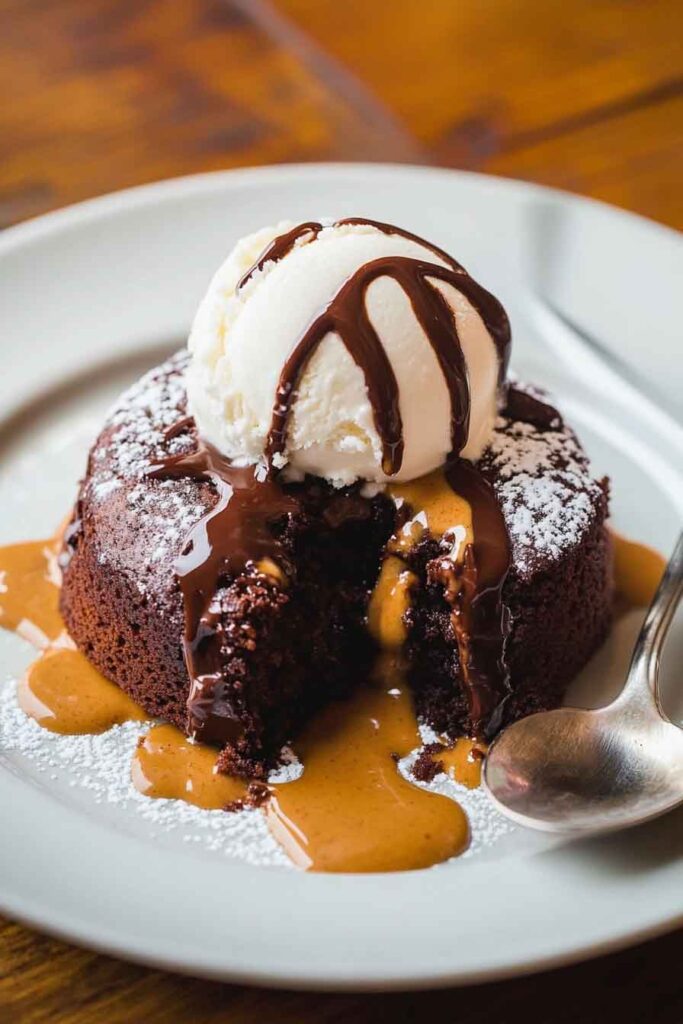
- With Ice Cream: Top with a scoop of vanilla ice cream to balance the warm, rich lava cake with a cool, creamy contrast.
- Chocolate or Peanut Butter Syrup: Drizzle melted peanut butter or chocolate syrup on top for an extra layer of flavor and decadence.
- With Whipped Cream: A dollop of freshly whipped cream adds a light, airy touch to the rich, molten cake.
- With Fresh Berries: Serve with a side of fresh raspberries or strawberries for a fruity contrast to the rich chocolate and peanut butter.
Storing and Reheating Peanut Butter Chocolate Lava Cakes
These molten cakes are best enjoyed fresh, but they can be stored and reheated if you have leftovers or want to prepare them ahead of time. Here’s how to keep them fresh and reheat them for that perfect gooey texture.
Storing Peanut Butter Chocolate Lava Cakes
- Unbaked Lava Cakes: If you want to make these ahead of time, you can prepare the lava cakes through step 7, before baking. Cover the ramekins with plastic wrap or aluminum foil and store them in the refrigerator for up to 24 hours. When you’re ready to bake, simply preheat the oven and bake them as directed, adding 1-2 minutes to the baking time to account for the cold batter.
- Baked Lava Cakes: After baking, if you have leftover lava cakes, allow them to cool completely in the ramekins, then store them in the refrigerator for up to 2 days. To keep them fresh, tightly cover the ramekins with plastic wrap or place them in an airtight container.
Reheating Lava Cakes
If you’ve made these ahead of time and want to reheat them while preserving the molten center, follow these steps:
- Reheating Unbaked Lava Cakes: If you prepared the lava cakes in advance but didn’t bake them yet, simply bake them according to the original instructions, adding 1-2 extra minutes for chilled batter.
- Reheating Baked Lava Cakes: For leftover lava cakes that have already been baked, here’s the best method to reheat them:
- Preheat your oven to 350°F (175°C).
- Place the baked lava cakes (still in their ramekins) on a baking sheet.
- Cover the ramekins loosely with aluminum foil to help retain moisture.
- Heat for 8-10 minutes, or until the cakes are heated through and the peanut butter and chocolate center starts to soften and melt again.
Peanut Butter Chocolate Lava Cakes FAQs
Can I freeze peanut butter chocolate lava cakes?
Yes, you can freeze these cakes both before and after baking. If freezing before baking, prepare the cakes in the ramekins, wrap them tightly with plastic wrap and aluminum foil, and freeze for up to 2 months. When ready to bake, don’t thaw the cakes, just bake them from frozen at the usual temperature, adding a couple of extra minutes to the baking time. If freezing baked lava cakes, let them cool completely, then wrap them tightly in plastic wrap and foil, and store them in the freezer for up to 1 month. Reheat as directed above when you’re ready to enjoy.
Can I make these lava cakes without peanut butter?
Absolutely! If you’re not a fan of peanut butter, you can replace it with any other filling you prefer, such as Nutella, caramel, or even a mixture of chocolate chips for an extra indulgent center. Just make sure the filling is thick enough to stay in the center while baking.
Why do my lava cakes not have a gooey center?
If your lava cakes are coming out without the molten center, there could be a few reasons:
- Overbaking: The key to the gooey center is baking the cakes just enough. If you bake them too long, the center will cook through, and the molten texture will be lost.
- Temperature of the Oven: Ensure that your oven is preheated correctly. A too-hot or unevenly heated oven could cause the cakes to bake too quickly on the outside while leaving the center undercooked.
- Ramekin Size: If your ramekins are larger than 4 ounces, the cakes may need more time to bake through, which could cause the center to set. Stick to smaller ramekins for the best molten results.
How do I know when my lava cakes are done?
Lava cakes are done when the edges are set, and the center is still soft and slightly jiggly. If you insert a toothpick into the cake, it should come out clean from the edges, but it should have some cake batter on it from the center. The key is to bake the cakes just enough to cook the outer edges while leaving the center gooey.
Nutritional Information (per serving)
While these lava cakes are undoubtedly indulgent, they are meant to be enjoyed in moderation as a special treat. Here’s an estimate of the nutritional information for one serving (1 lava cake):
| Nutrient | Amount per Serving |
|---|---|
| Calories | 450-500 kcal |
| Total Fat | 30-35 g |
| Saturated Fat | 15-18 g |
| Cholesterol | 105-115 mg |
| Sodium | 200-250 mg |
| Total Carbohydrates | 50-55 g |
| Dietary Fiber | 2-3 g |
| Sugars | 40-45 g |
| Protein | 6-8 g |
Peanut Butter Chocolate Lava Cakes
Course: Uncategorized4
cakes15
minutes10
minutes450-500 kcal
kcalIngredients
Semi-sweet chocolate: 4 oz (about 1/2 cup)
Unsalted butter: 1/4 cup
All-purpose flour (spooned & leveled): 1/4 cup
Confectioners’ sugar: 1/4 cup
Salt: 1/4 tsp
Large eggs: 2
Large egg yolks: 2
Creamy peanut butter: 8 tsp (about 2 teaspoons per cake)
Optional for serving: ice cream, melted peanut butter, and/or chocolate syrup
Directions
- Preheat the oven to 425°F (220°C) and grease and flour four 4-ounce ramekins.
- Melt chocolate and butter together in a double boiler or microwave.
- Whisk together flour, confectioners’ sugar, and salt in a medium bowl.
- In a separate bowl, beat eggs and egg yolks until frothy.
- Combine the melted chocolate and eggs, then fold in dry ingredients.
- Divide the batter between ramekins, then add 2 teaspoons of peanut butter to the center of each.
- Bake for 10-12 minutes, until the edges are set, but the centers are jiggly.
- Allow to cool slightly, then invert onto plates and serve with ice cream or syrup if desired.
Final Touches and Tips for Perfecting Peanut Butter Chocolate Lava Cakes
Making these Peanut Butter Chocolate Lava Cakes is a simple yet luxurious experience, and it’s all about the small details that elevate this dessert from delicious to unforgettable. To ensure your lava cakes turn out perfectly every time, here are some final touches and tips to keep in mind.
Tips for Making Perfect Lava Cakes
- Use High-Quality Chocolate:
The chocolate is the star of this dessert, so choose a high-quality semi-sweet or dark chocolate for the best flavor. I recommend using a brand like Ghirardelli or Lindt. Higher quality chocolate will give you a smoother, richer molten center and a more satisfying taste overall. - Don’t Overbake:
The key to these lava cakes is getting the perfect gooey center. Keep an eye on the baking time, and remember that the edges should be set, but the center should still jiggle. If you overbake them, you’ll lose the molten magic, so start checking at 10 minutes and don’t bake longer than 12 minutes. - Room Temperature Eggs:
Make sure your eggs are at room temperature before mixing them into the batter. Room temperature eggs will blend better with the melted chocolate and butter, resulting in a smoother, more uniform batter. - Grease the Ramekins Well:
You want to ensure that your lava cakes slide out of the ramekins easily after baking. Be sure to grease the ramekins with butter and lightly dust them with flour. If you want to be extra careful, you can also use cocoa powder instead of flour, which will prevent any white spots on the outside of your cakes. - Test with a Toothpick:
To check if your lava cakes are done, insert a toothpick into the edges of the cake. If it comes out clean, the cake is done. However, when inserted into the center, it should have a bit of gooey batter on it. If the toothpick comes out completely clean from the center, your lava cake is overcooked. - Let the Cakes Rest:
Allow the lava cakes to rest in the ramekins for 1-2 minutes after baking. This allows the cake to firm up slightly and makes it easier to release from the ramekin without falling apart. - Serve Immediately:
Lava cakes are best served immediately after baking when the molten center is at its peak of gooeyness. Don’t wait too long to serve them, as the center will continue to set as they cool.
Why You Should Make These Lava Cakes
There are a few reasons why Peanut Butter Chocolate Lava Cakes are such a great dessert choice:
- They’re Impressive:
These cakes have a restaurant-quality appearance, making them perfect for impressing guests or celebrating special occasions like Valentine’s Day, birthdays, or an anniversary. The dramatic moment when you cut into the cake and reveal the gooey center is always a crowd-pleaser. - They’re Easy to Customize:
As mentioned earlier, you can easily swap out the peanut butter filling for other options like Nutella or caramel, making these lava cakes adaptable to different tastes and dietary needs. You can also serve them with various toppings like whipped cream, berries, or even a sprinkle of sea salt for an extra touch. - They’re Indulgent but Simple:
These lava cakes are incredibly indulgent, yet they’re surprisingly simple to make. You don’t need any special equipment, and you can have them on the table in under 30 minutes. They offer a perfect balance of rich chocolate and creamy peanut butter, delivering the ultimate dessert experience without requiring hours of preparation.
Serving Suggestions
As you finalize your lava cakes, don’t forget to consider the perfect accompaniments. Here are a few ideas to elevate the overall dessert experience:
- Vanilla Ice Cream:
Vanilla ice cream is a classic choice to serve with lava cakes. The cold, creamy texture balances out the warmth and richness of the cake, creating a delightful contrast. You can even sprinkle a bit of cinnamon or chocolate chips on top for extra flavor. - Chocolate or Peanut Butter Syrup:
Drizzling warm chocolate or peanut butter syrup over the lava cakes not only adds flavor but also makes the presentation look even more enticing. The syrup will also complement the molten center, making each bite even more satisfying. - Fresh Fruit:
Adding fresh raspberries, strawberries, or even a few banana slices to the plate will cut through the richness of the lava cake and provide a refreshing contrast. The acidity of the fruit pairs beautifully with the sweetness of the chocolate and peanut butter. - Whipped Cream:
A light dollop of freshly whipped cream on top of the lava cakes adds a touch of elegance and makes the dessert feel extra special. If you want to get fancy, you can flavor the whipped cream with a touch of vanilla extract or even a splash of bourbon for a grown-up twist. - Sprinkle with Sea Salt:
For those who enjoy a sweet and salty combination, sprinkling a tiny pinch of sea salt over the top of the lava cakes before serving will bring out the flavors of the chocolate and peanut butter even more. It’s a simple touch that takes this dessert to the next level.
Conclusion
Peanut Butter Chocolate Lava Cakes are the perfect dessert for anyone who craves a decadent, gooey treat. With a rich, chocolatey exterior and a molten peanut butter center, this dessert will satisfy any sweet tooth and create a memorable experience for anyone lucky enough to enjoy it. Whether you’re making them for a special occasion or just to treat yourself, these lava cakes are sure to impress and delight.
By following the simple steps outlined in this post and using high-quality ingredients, you can create a truly spectacular dessert that will be the star of any meal. So, grab your ramekins, preheat your oven, and get ready to indulge in the ultimate dessert experience with these irresistible Peanut Butter Chocolate Lava Cakes!