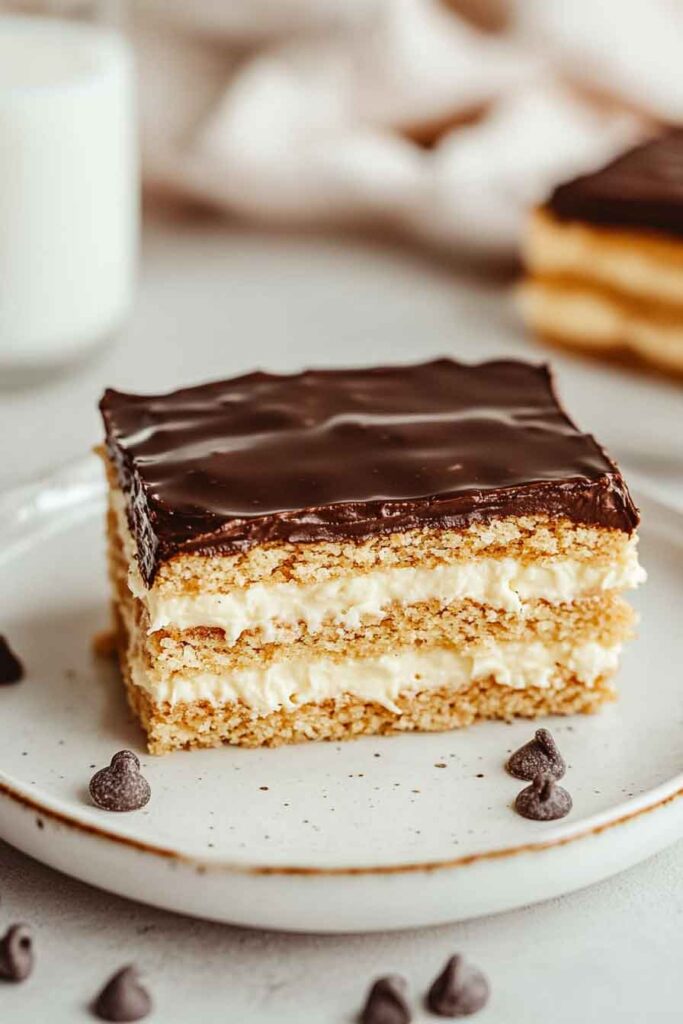
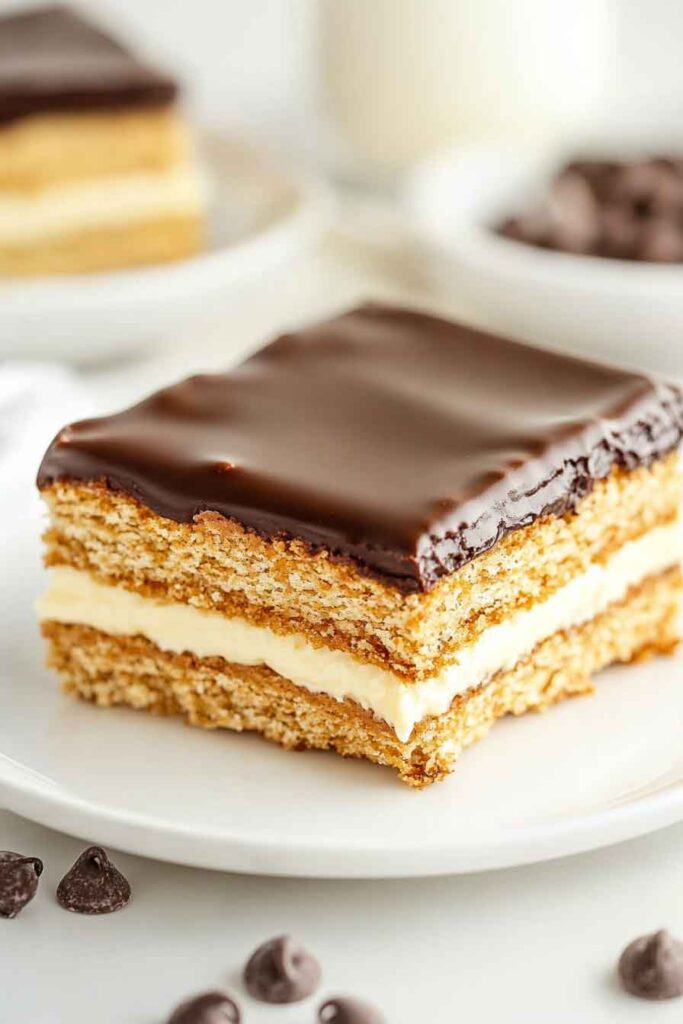
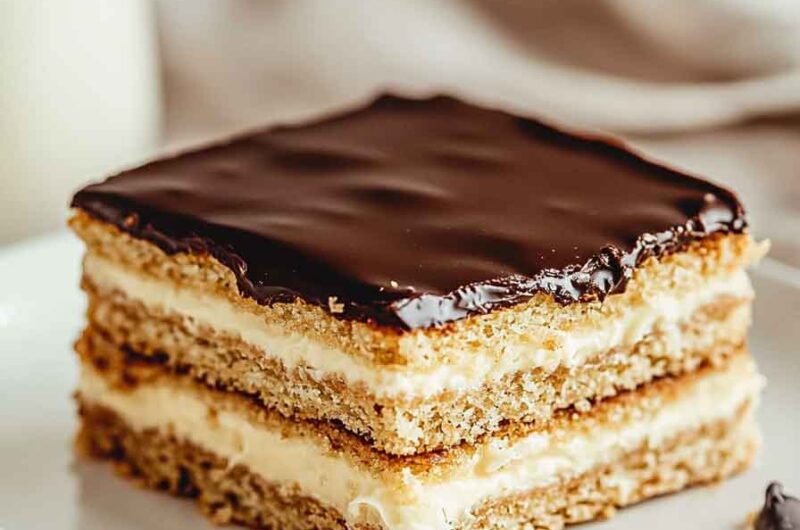
No Bake Eclair Cake
Hey, have you ever wanted a cake that’s crazy easy and tastes like a dream? I tried making this No Bake Eclair Cake, and oh wow, it’s honestly so good. You don’t even need an oven!
It’s creamy, sweet, and full of that yummy vanilla flavor. Every time I make it, everyone just can’t wait for a bite. Seriously, it’s always a big hit at our house.
So, if you want a quick dessert that feels special, this is the one. Let’s jump in and make this No Bake Eclair Cake together!

Why You’ll Love This Recipe
- No-Bake Delight: Skip the oven and enjoy a refreshing dessert that’s ready in just a few hours.
- Creamy Layers: With a rich pudding base and whipped topping, this cake delivers the perfect creamy bite in every piece.
- Chocolatey Goodness: A smooth, glossy chocolate topping makes every bite of this dessert even better.
- Simple Ingredients: Only a handful of pantry staples are needed to create this mouthwatering dessert.
- Perfect for All Occasions: Whether you’re hosting a celebration or just craving a sweet treat, this eclair cake is versatile and always hits the spot.
- Make-Ahead Friendly: Prepare it the night before, and let it set in the fridge for the perfect texture.
Required Kitchen Tools
Before we get started, make sure you have the following tools on hand to make this eclair cake a breeze to assemble:
- 9×13-inch baking dish: This is where you’ll layer the cake, and it’s the perfect size to fit all the ingredients.
- Mixing bowls: You’ll need a couple of bowls to mix the pudding filling and the chocolate glaze.
- Whisk or electric mixer: For easy mixing, especially if you’re whipping up the filling and whipped topping.
- Spatula: This will help you spread the layers evenly for a beautiful presentation.
- Refrigerator: To chill and set the eclair cake until it’s firm and ready to serve.
Ingredients
This cake is made up of just a few ingredients, but it’s the combination that creates that perfect eclair-inspired flavor. Here’s everything you need:
For the Pudding Filling:
- Instant Vanilla Pudding Mix: You’ll need two packages of instant vanilla pudding mix to form the rich, creamy filling. This is the heart of the dessert!
- Milk: The milk helps bring the pudding mix to life and creates that velvety texture. You can use whole milk for an extra creamy result.
- Whipped Topping: A container of thawed whipped topping (like Cool Whip) will give the pudding a light and fluffy consistency.
For the Layers:
- Chocolate Graham Crackers: These are the base of the dessert, providing a texture that mimics the eclair pastry and soaks up the creamy pudding in between.
- Milk (for soaking the graham crackers): You’ll dip the graham crackers in milk to soften them before layering them in the baking dish.
For the Chocolate Glaze:
- Unsweetened Cocoa Powder: This gives the glaze its rich, chocolatey flavor without adding extra sweetness.
- White Sugar: Balances out the bitterness of the cocoa powder and gives the glaze its smooth, sweet finish.
- Butter: For a silky, smooth texture and that delicious buttery richness in the glaze.
- Vanilla Extract: Just a splash adds a warm, comforting note to the glaze and brings everything together.
Step-by-Step Instructions
1. Prepare the Pudding Filling
Start by preparing the instant vanilla pudding mix. In a large bowl, whisk together the pudding mix and cold milk. Follow the instructions on the box, but make sure to whisk it for the full 2 minutes until it thickens. Once it’s thickened, fold in the thawed whipped topping. This will lighten up the filling and give it that perfect creamy texture. Set this aside for now.
2. Layer the Graham Crackers
Now, take your graham crackers and dip each one into milk for just a few seconds, making sure they’re lightly soaked but not soggy. Place the dipped crackers in the bottom of your 9×13-inch baking dish to form the first layer. Try to cover the entire bottom of the dish with the crackers, breaking them as needed to fit the space.
3. Add the Pudding Filling
Once you’ve placed the first layer of graham crackers, spread half of your prepared pudding filling evenly over the crackers. Use a spatula to smooth it out so the pudding is spread across the crackers in an even layer.
4. Repeat with Another Layer of Graham Crackers
Dip more graham crackers into milk and arrange them over the pudding filling. Again, cover the pudding completely with graham crackers, just like you did for the first layer.
5. Add the Remaining Pudding Filling
Spread the remaining pudding mixture over the second layer of graham crackers. This layer should be thick and smooth, so take your time to spread it evenly.
6. Prepare the Chocolate Glaze
To make the chocolate topping, melt the butter in a small saucepan over medium heat. Add the unsweetened cocoa powder, white sugar, and milk. Stir constantly as it melts and combines into a smooth glaze. Once the sugar dissolves and everything is mixed together, remove the saucepan from the heat. Stir in the vanilla extract for added flavor.
7. Top the Cake with Chocolate Glaze
Pour the chocolate glaze over the top layer of pudding. Use your spatula to spread it evenly, covering the entire surface with a glossy layer of chocolate goodness.
8. Chill the Cake
This is where the magic happens! After you’ve added the chocolate glaze, cover the dish with plastic wrap or foil and refrigerate the cake. It needs to chill for at least 4 hours to allow the layers to set and the flavors to meld. If you have time, overnight chilling will yield the best results—this allows the graham crackers to soften even further, making each slice extra creamy and firm.
How to Serve No Bake Eclair Cake
This cake is a perfect make-ahead dessert and can be served on a variety of occasions. Whether you’re hosting a family gathering, a holiday celebration, or just craving something sweet, here’s how to serve it:
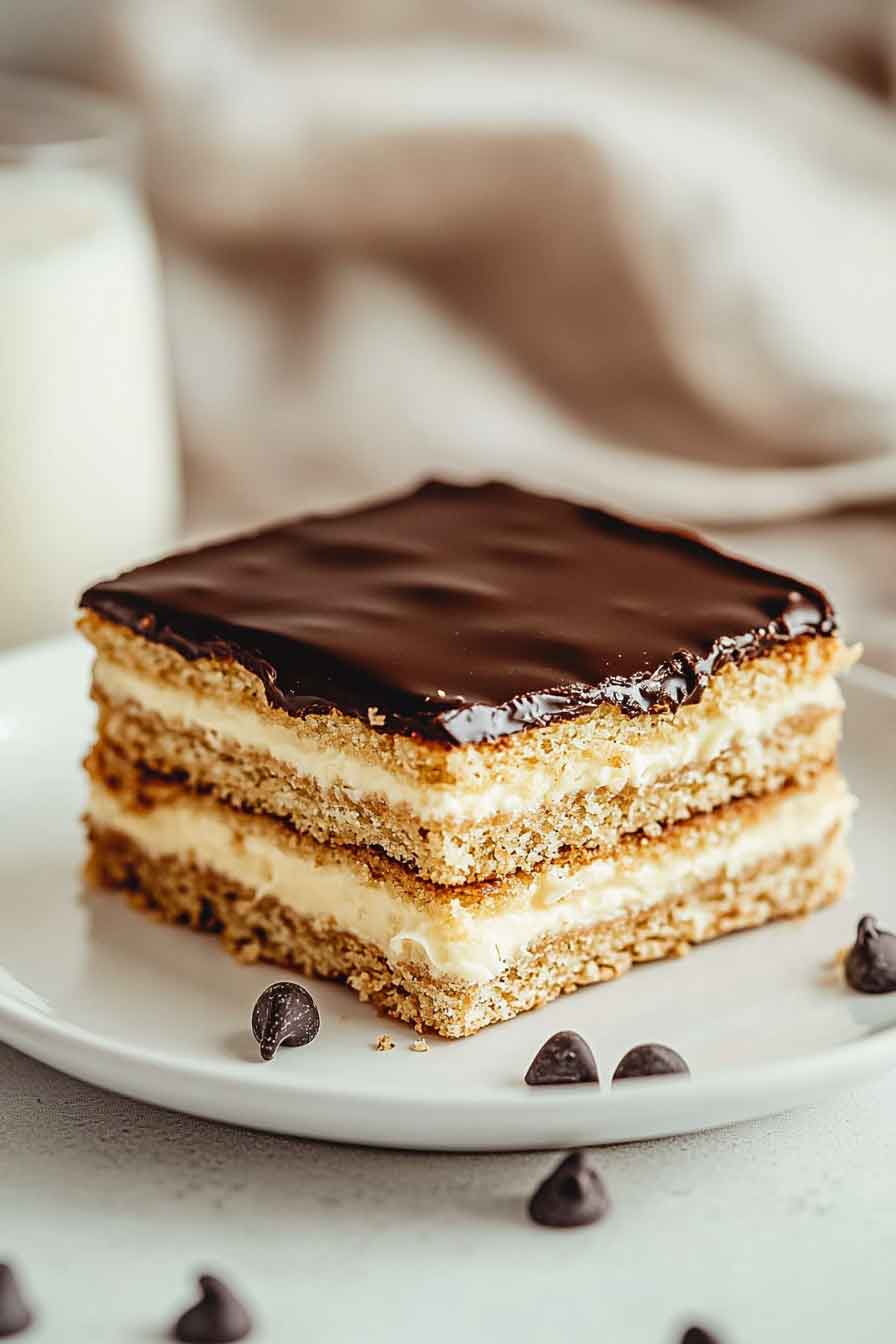
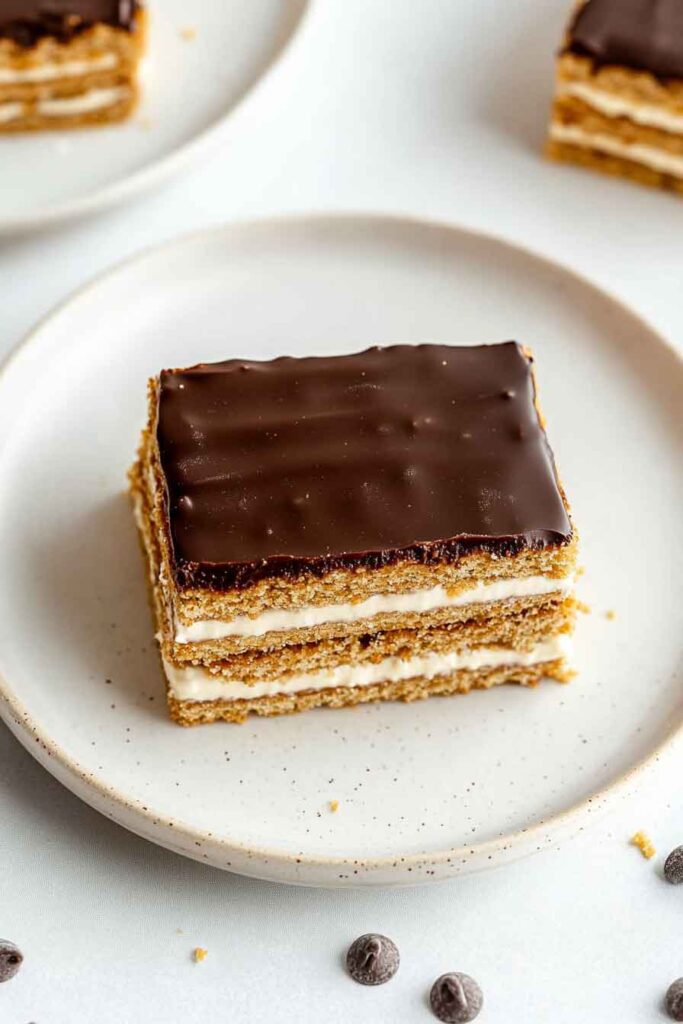
1. Slice and Serve
Once the cake has chilled and set, it’s ready to serve! Use a sharp knife to cut it into squares or rectangles. Since the graham crackers are softened after chilling, it should be easy to cut through without too much effort. Each piece will showcase the three distinct layers: the soft graham cracker base, the creamy pudding filling, and the smooth, glossy chocolate topping.
2. Garnish (Optional)
For an extra touch of elegance, you can garnish each slice with a dollop of whipped cream or a sprinkle of shaved chocolate. If you’re feeling extra indulgent, try adding fresh berries on top—strawberries or raspberries pair beautifully with the creamy layers. This will not only add a pop of color but also a hint of tartness that complements the sweet richness of the cake.
Variations for No Bake Eclair Cake
While the classic version of this cake is already fantastic, feel free to get creative! Here are a few fun variations to try:
- Fruit Filling: Swap out the vanilla pudding for a fruit-flavored pudding, such as banana or butterscotch. You can even layer in fresh fruit like sliced bananas or strawberries between the pudding layers.
- Flavored Graham Crackers: Use chocolate or cinnamon graham crackers instead of the regular kind for a fun twist on the flavor profile.
- Peanut Butter Chocolate Eclair Cake: Add a peanut butter layer between the pudding and graham crackers for a decadent peanut butter-chocolate combo that’s sure to please.
- Add Nuts: For some texture, sprinkle crushed nuts like pecans, walnuts, or almonds on top of the chocolate glaze before chilling the cake.
- Caramelized Layer: Add a layer of caramel sauce over the pudding filling before adding the chocolate glaze for an even sweeter treat.
Storing No Bake Eclair Cake
Since this cake requires refrigeration, it’s easy to store leftovers for future enjoyment:
- In the Fridge: Keep the cake covered in the refrigerator for up to 3 days. After it’s been chilled, the layers will set nicely, and the flavors will continue to develop.
- Freezing: While it’s best served fresh, you can freeze this cake if needed. To freeze, cover the cake tightly with plastic wrap and foil, and freeze for up to 1 month. Thaw it in the fridge overnight before serving.
Nutrition (per serving)
Here’s a quick breakdown of the nutritional information for each serving of No Bake Eclair Cake (based on 12 servings per cake):
| Nutrient | Amount |
|---|---|
| Calories | 340 kcal |
| Protein | 4g |
| Carbohydrates | 43g |
| Fat | 18g |
| Saturated Fat | 10g |
| Cholesterol | 35mg |
| Sodium | 160mg |
| Fiber | 1g |
| Sugar | 28g |
| Vitamin A | 4% of the DV |
| Vitamin C | 0% of the DV |
| Calcium | 6% of the DV |
| Iron | 4% of the DV |
Note: These values are approximate and may vary based on specific ingredient brands used.
FAQs for No Bake Eclair Cake
1. Can I use sugar-free pudding mix for this recipe?
Yes! You can absolutely use sugar-free instant vanilla pudding mix to make this dessert a little lighter. The texture and flavor will still be delicious, and it’s a great option for those watching their sugar intake.
2. How long can I leave the cake in the fridge?
For best results, chill the cake for at least 4 hours to allow the layers to set properly. If you can wait, chilling it overnight will result in a firmer, more flavorful dessert. However, you should consume the cake within 3 days for the best taste and texture.
3. Can I make this cake gluten-free?
Yes! To make this No Bake Eclair Cake gluten-free, simply use gluten-free graham crackers in place of regular graham crackers. The rest of the ingredients are naturally gluten-free, so you’re good to go!
4. How do I make the chocolate glaze even shinier?
To get a glossy, shinier finish on the chocolate glaze, try adding a teaspoon of corn syrup when you mix in the butter, cocoa powder, and sugar. This gives the glaze an extra sheen, making it even more visually appealing.
5. What if I don’t have instant vanilla pudding mix?
While instant vanilla pudding mix is key to this recipe, if you don’t have it, you can make a similar filling from scratch. You’d need to cook a homemade vanilla pudding mixture using milk, sugar, cornstarch, egg yolks, and vanilla extract. Once it thickens, let it cool before mixing in whipped topping.
6. Can I freeze this No Bake Eclair Cake?
Yes, you can freeze this cake! If you have leftovers or want to make it ahead of time, wrap the cake tightly with plastic wrap and aluminum foil. You can freeze it for up to 1 month. When ready to serve, thaw it in the fridge overnight for best results.
7. What are some other topping ideas for this dessert?
In addition to whipped cream or shaved chocolate, here are some more fun toppings you can add:
- Fresh Berries: Strawberries, raspberries, or blueberries add a refreshing touch to balance the sweetness of the cake.
- Crushed Nuts: Crushed almonds, pecans, or walnuts provide a crunchy contrast to the smooth filling.
- Coconut Flakes: Shredded coconut gives the cake an extra layer of texture and flavor.
- Caramel Drizzle: A drizzle of caramel sauce can bring out a rich sweetness that pairs wonderfully with the chocolate.
No Bake Eclair Cake
Course: Uncategorized12
servings20
minutes340
kcal4
hoursIngredients
- For the Pudding Filling
2 packages (3.4 oz each) instant vanilla pudding mix
4 cups milk (whole milk works best)
1 container (8 oz) frozen whipped topping, thawed
- For the Layers:
1 package (14.4 oz) chocolate graham crackers
1 cup milk (for soaking the graham crackers)
- For the Chocolate Glaze:
1/4 cup unsweetened cocoa powder
1/2 cup white sugar
1/4 cup butter
1/4 cup milk
1 tsp vanilla extract
Directions
- Prepare the Pudding Filling:
- In a large mixing bowl, whisk together the vanilla pudding mix and milk. Stir for about 2 minutes until it thickens.
- Fold in the thawed whipped topping and set aside.
- Prepare the Layers:
- Dip each graham cracker in milk for a few seconds, then place them in the bottom of a 9×13-inch baking dish, covering the entire bottom.
- Layer the Pudding:
- Spread half of the pudding filling over the first layer of graham crackers, smoothing it out with a spatula.
- Add a second layer of graham crackers on top of the pudding.
- Add the Remaining Pudding:
- Spread the remaining pudding filling evenly over the second layer of graham crackers.
- Prepare the Chocolate Glaze:
- In a small saucepan, melt the butter over medium heat. Add cocoa powder, sugar, and milk, stirring constantly until smooth.
- Remove from heat and stir in the vanilla extract.
- Top the Cake with Chocolate Glaze:
- Pour the chocolate glaze over the top of the cake and spread it evenly with a spatula.
- Chill:
- Cover the dish with plastic wrap and refrigerate for at least 4 hours, or overnight for best results.
- Serve and Enjoy:
- Slice into squares and serve! Garnish with whipped cream, chocolate shavings, or fresh berries for an extra touch.
Final Thoughts
This No Bake Eclair Cake is the epitome of easy, no-fuss dessert perfection. It’s quick to make, requires minimal effort, and delivers maximum flavor. The layers of creamy pudding, soft graham crackers, and luscious chocolate glaze make it an irresistible treat that will have everyone asking for the recipe. Whether you’re making it for a special occasion or just because, this dessert will never disappoint.
So, next time you’re in the mood for something decadent but easy to prepare, give this eclair cake a try. Trust me, it will quickly become a favorite in your dessert repertoire!