Mummy Cookies

Oh wow, these cookies made me smile. I made mummy cookies, and they look so cute. They feel fun right away.
They are soft and sweet inside. I took a bite and said, hmm, so good. The icing makes them extra fun.
And, like, I wanted to eat more fast. They are hard to stop eating. I kept reaching for one more.
So yeah, let’s bake them now. They are easy, I promise. You’ll love making them too.
Why You’ll Love This Recipe
- Perfect for Halloween: These cookies are ideal for Halloween parties, classroom treats, or any spooky gathering.
- Fun and Creative: Decorating these cookies is a fun activity for kids and adults alike.
- Chocolaty Goodness: These cookies are packed with rich, black cocoa powder that gives them a deep chocolate flavor, balanced perfectly with the creamy mummy decorations.
- Soft & Chewy: With a delicious combination of coconut oil and a mix of sugars, these cookies come out soft and chewy every time.
- Vegan-Friendly Option: Easily make these cookies vegan by using plant-based milk and vegan candy eyeballs.
Required Kitchen Tools
Here’s what you’ll need for this recipe:
- Mixing Bowls: For combining the wet and dry ingredients.
- Electric Mixer or Whisk: To cream together the coconut oil and sugars until smooth.
- Cookie Scooper or Tablespoon: To form even dough balls for baking.
- Parchment Paper: For lining the baking sheets to prevent sticking.
- Wire Rack: For cooling the cookies after baking.
- Microwave or Small Pot: For melting the coconut oil and making the icing.
- Piping Bag or Plastic Sandwich Bag: To drizzle the mummy icing onto the cookies.
- Measuring Cups & Spoons: For accurate ingredient measurements.
Ingredients
Cookies:
- 1 1/2 cups (188 grams) all-purpose flour (see notes below)
- 1/2 cup (58 grams) black cocoa powder (I recommend The Cocoa Trader brand for a deep, rich flavor)
- 1 tablespoon baking powder (I recommend aluminum-free baking powder for the best taste)
- 1/2 teaspoon salt
- 7 1/2 tablespoons (105 grams) refined coconut oil (slightly softened but not melted)
- 1/2 cup (100 grams) granulated sugar
- 1/2 cup (100 grams) light brown sugar (packed)
- 1/4 cup (60 ml) water
- 4 teaspoons vanilla extract (use pure vanilla extract for the best flavor)
Mummy Decorations:
- 3/4 cup (90 grams) powdered sugar
- 1 1/2 to 2 teaspoons milk of your choice (plant-based for a vegan version)
- 1/4 teaspoon vanilla extract
- Candy eyeballs (use vegan eyeballs if needed)
Step-by-Step Instructions
1. Preheat Your Oven and Prepare the Baking Sheets
Before you start mixing your ingredients, preheat your oven to 350°F (177°C). Line two baking sheets with parchment paper, making sure they are spaced out evenly. This will prevent the cookies from sticking to the sheets and give them a nice even bake.
2. Whisk Dry Ingredients Together
In a medium bowl, whisk together the flour, black cocoa powder, baking powder, and salt. The black cocoa powder gives these cookies their dark, chocolatey color and intense flavor, which is perfect for a Halloween treat.
3. Cream Coconut Oil and Sugars
In a large mixing bowl, add the refined coconut oil, granulated sugar, and light brown sugar. Use a hand mixer or stand mixer to beat everything together until smooth and fluffy. This should take about 2-3 minutes on medium speed.
The coconut oil will help give the cookies a chewy texture, while the sugars will add the sweetness. The refined coconut oil is essential here because it doesn’t have the strong coconut flavor that would interfere with the chocolatey taste of the cookies.
4. Add Water and Vanilla
Once the sugar and coconut oil mixture is light and fluffy, add the water and vanilla extract. Beat again until everything is fully incorporated.
5. Combine Wet and Dry Ingredients
Slowly add the dry ingredients into the wet mixture. Mix on low speed until just combined. Don’t overmix, or you might end up with tough cookies.
The dough will be soft, so if it’s too sticky, you can refrigerate it for 15-20 minutes to make it easier to handle.
6. Form the Cookie Dough
Use a cookie scoop or tablespoon to form dough balls. Place each dough ball on the prepared baking sheets, leaving about 2 inches of space between them. Gently flatten the dough balls slightly to help them spread evenly as they bake.
7. Bake the Cookies
Bake the cookies in the preheated oven for 10-12 minutes or until the edges are lightly golden. The centers will look slightly soft, but they’ll firm up as they cool. Don’t worry if the centers appear a bit soft; this is what gives the cookies their chewy texture.
Once baked, let the cookies cool on the baking sheet for 5 minutes before transferring them to a wire rack to cool completely.
8. Prepare the Mummy Icing
While the cookies cool, prepare the mummy icing. In a small bowl, whisk together the powdered sugar, milk, and vanilla extract until smooth. If the icing is too thick, add a little more milk until it reaches a piping consistency.
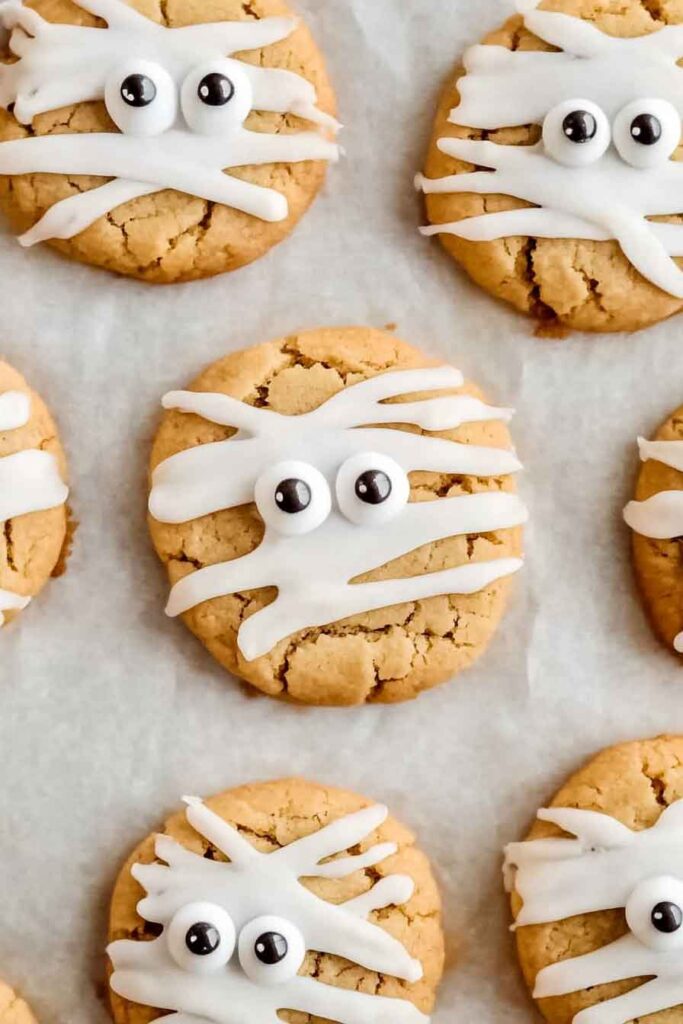
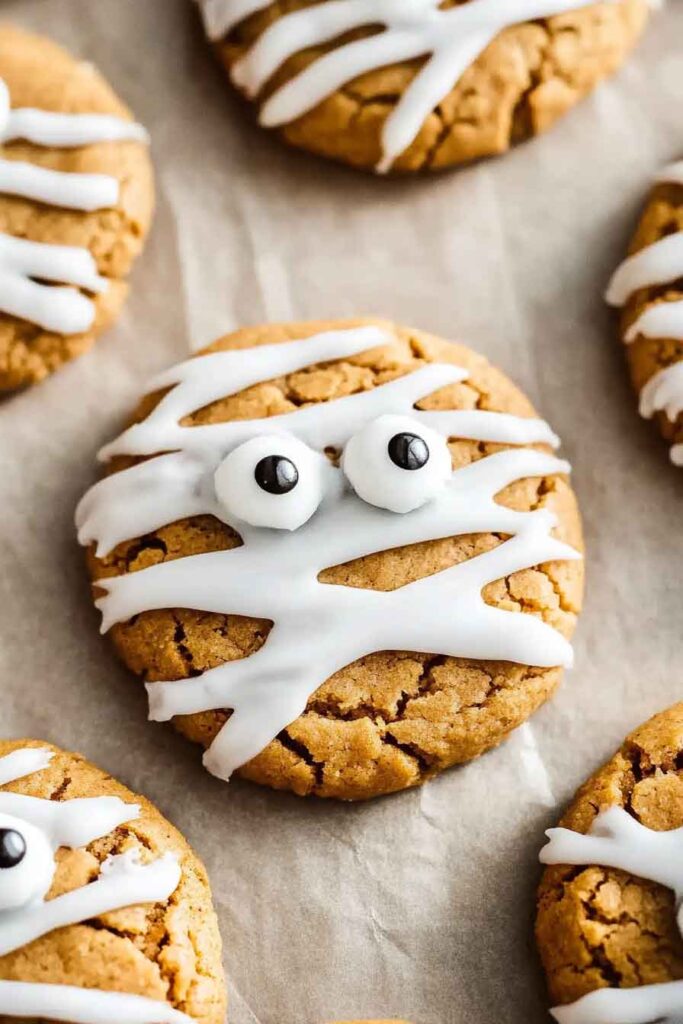
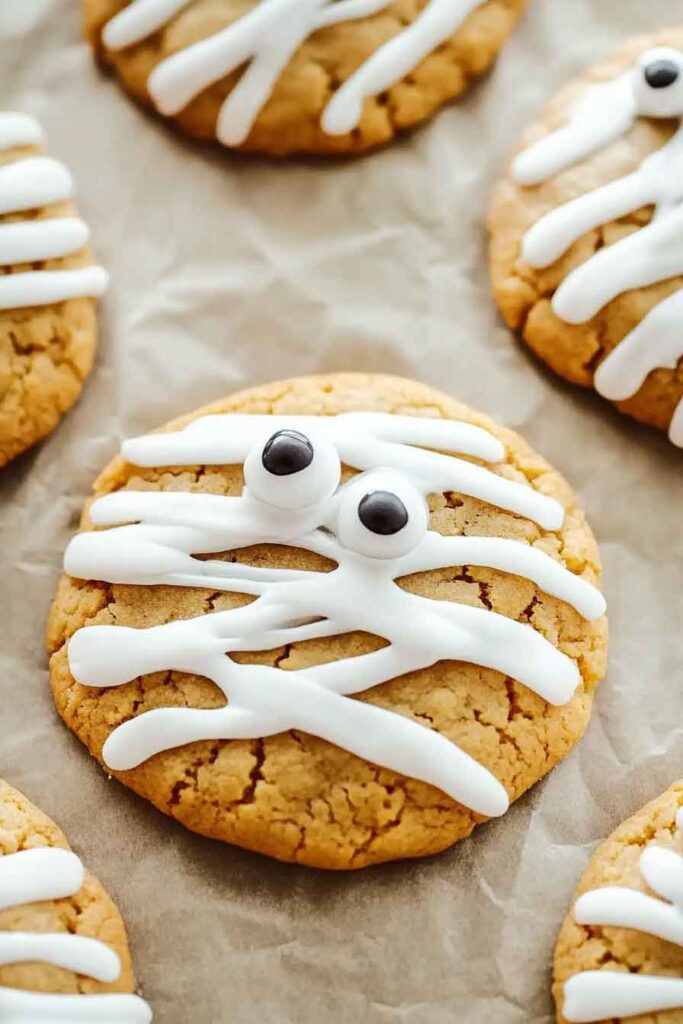
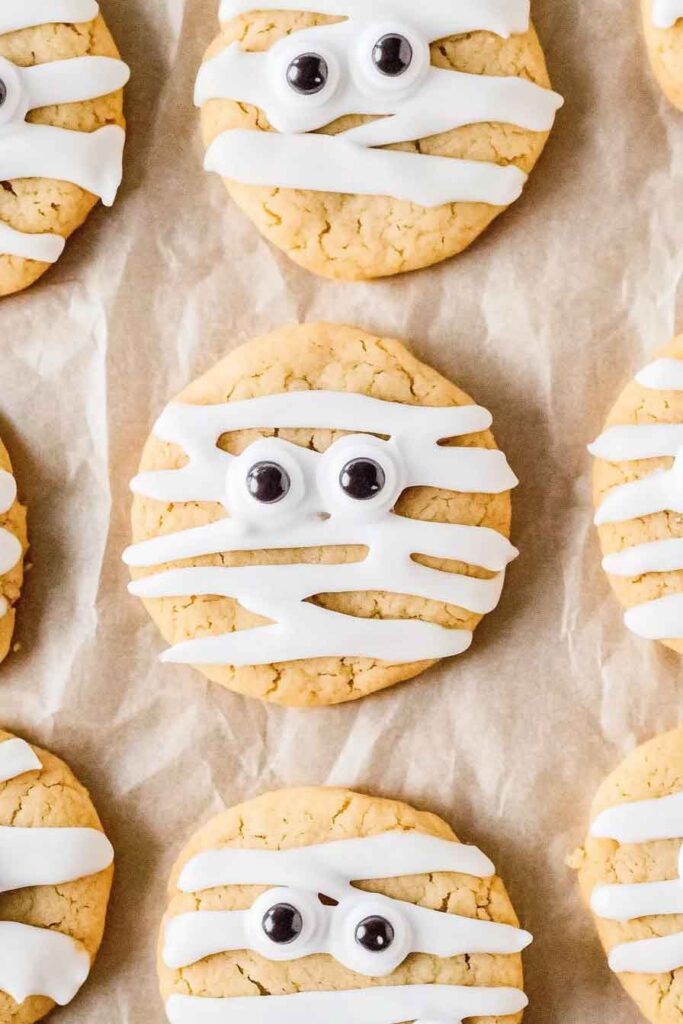
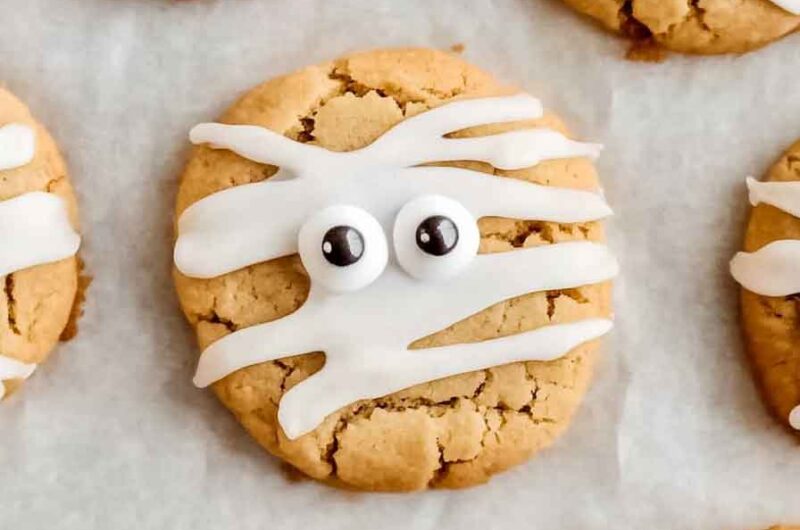
9. Decorate the Cookies
Once the cookies have cooled completely, it’s time to decorate them! Place the icing into a piping bag (or a plastic sandwich bag with a small hole cut at the corner). Drizzle the icing over the cookies in a crisscross pattern, resembling the bandages on a mummy.
10. Add the Candy Eyeballs
Place two candy eyeballs on each cookie while the icing is still wet, making sure they are spaced appropriately for the best “mummy” effect.
Variations for Mummy Cookies
While the classic mummy design is always a hit, here are a few variations you can try:
- Add Chocolate Chips: Mix in 1/2 cup of mini chocolate chips to the dough before baking for extra chocolatey goodness.
- Make Them Vegan: Use plant-based milk (like almond milk or coconut milk) and vegan candy eyeballs to make these cookies completely vegan-friendly.
- Gluten-Free Version: Use a gluten-free flour blend to make these cookies gluten-free while still keeping that chewy texture.
- Add a Touch of Spice: Spice things up with a dash of cinnamon or pumpkin spice in the dough for a fall-inspired twist.
How to Serve Mummy Cookies
These spooky cookies are perfect for serving at Halloween parties or as part of a themed dessert table. Here are a few ideas for how to serve them:
- At a Halloween Party: Serve these cookies alongside other Halloween-themed treats like ghost cupcakes, witch’s brew punch, and pumpkin-shaped cookies.
- For Trick-or-Treating: Wrap individual cookies in clear plastic bags tied with orange or black ribbons to give out as special treats for the kids.
- As a Fun Baking Activity: Let kids help decorate the cookies by drizzling the icing and placing the candy eyeballs. It’s a fun and creative way to get them involved in the kitchen.
Storing Mummy Cookies
If you have any leftover Mummy Cookies (though that’s unlikely!), here’s how to store them:
- At Room Temperature: Keep the cookies in an airtight container at room temperature for up to 3-4 days. They will remain soft and chewy.
- In the Freezer: If you want to make a batch in advance, store the undecorated cookies in an airtight container or freezer bag in the freezer for up to 3 months. When you’re ready to serve them, simply thaw them at room temperature and decorate with the icing and eyeballs.
Nutrition Information (per cookie)
| Nutrient | Amount |
|---|---|
| Calories | 180 kcal |
| Total Fat | 8 g |
| Saturated Fat | 7 g |
| Carbohydrates | 27 g |
| Fiber | 1 g |
| Sugars | 18 g |
| Protein | 1 g |
| Sodium | 85 mg |
(Note: Nutritional information may vary based on specific ingredients used.)
Conclusion
These Mummy Cookies are a fun, creative, and delicious way to celebrate Halloween. They’re easy to make, perfect for both kids and adults, and can be customized in countless ways. Whether you’re preparing them for a Halloween party, a classroom treat, or simply to enjoy with your family, they are sure to be a hit. With the rich chocolate flavor and adorable mummy design, these cookies are the perfect way to add a little spooky sweetness to your day!
Mummy Cookies
Course: Uncategorized18-20
cookies15
minutes10
minutes180
kcal30
minutesIngredients
1 1/2 cups all-purpose flour
1/2 cup black cocoa powder
1 tablespoon baking powder
1/2 teaspoon salt
7 1/2 tablespoons refined coconut oil (slightly softened)
1/2 cup granulated sugar
1/2 cup light brown sugar
1/4 cup water
4 teaspoons vanilla extract
3/4 cup powdered sugar
1 1/2 to 2 teaspoons milk (of choice)
1/4 teaspoon vanilla extract
Candy eyeballs
Directions
- Preheat oven to 350°F (177°C). Line two baking sheets with parchment paper.
- Whisk together flour, cocoa powder, baking powder, and salt in a medium bowl.
- Cream coconut oil, granulated sugar, and brown sugar together until smooth. Add water and vanilla and mix until combined.
- Slowly add the dry ingredients to the wet mixture. Mix until just combined.
- Form dough balls and place on baking sheets, flatten slightly.
- Bake for 10-12 minutes or until edges are lightly golden.
- Cool cookies for 5 minutes on the baking sheet, then transfer to a wire rack.
- For icing: Whisk powdered sugar, milk, and vanilla until smooth. Drizzle over cookies and add candy eyeballs.
- Allow icing to set before serving.