Mint Chocolate Chip Macarons Recipe: A Step-by-Step Guide

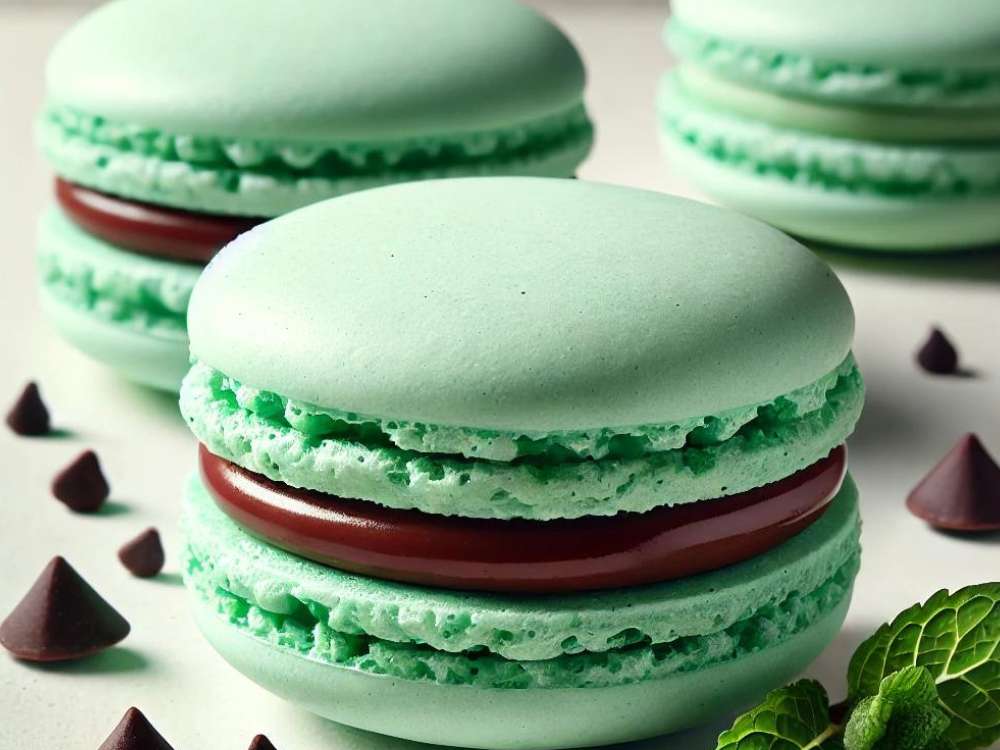
Macarons can be a delicate treat to master, but the results are worth every ounce of effort. If you’re a fan of the classic mint chocolate chip flavor, this recipe will be a delight! With the perfect balance of mint and chocolate, these Mint Chocolate Chip Macarons are light, airy, and have that iconic macaron “feet” that everyone aims for.
In this post, we’ll walk you through every detail, including tips and tricks that will help even beginners succeed. Along the way, we’ll provide answers to common questions, troubleshoot potential pitfalls, and ensure that you feel confident in your macaron-making abilities. So, let’s get baking!
What are Macarons?
Macarons are a French dessert known for their delicate meringue-based shells and flavorful fillings. While often confused with macaroons (the coconut-based American treat), macarons are lighter, with a slightly chewy texture. Their classic footed shape, smooth tops, and wide range of fillings make them a gourmet dessert that impresses at any occasion.
Why Make Mint Chocolate Chip Macarons?
Mint and chocolate are a timeless combination, reminiscent of everything from mint chocolate chip ice cream to after-dinner mints. When you blend these flavors into the crisp yet chewy macaron shell, the result is a dessert that feels both luxurious and nostalgic. These macarons are perfect for sharing or for treating yourself to something special.
Essential Ingredients
To make Mint Chocolate Chip Macarons, you’ll need some specific ingredients that ensure both the flavor and texture are just right. Precision is crucial, and weighing ingredients rather than measuring by volume will guarantee consistency.
For the Macaron Shells:
- 130 grams of almond flour – Look for finely ground almond flour, as it contributes to the smooth surface of the macaron.
- 234 grams of powdered sugar – This helps sweeten the shells and creates a smooth texture.
- 10 grams of chocolate cookie crumbs – Adds that mint chocolate chip texture.
- 4 large egg whites – These are the base of the meringue, essential for creating light, airy macarons.
- 106 grams of white granulated sugar – Helps stabilize the meringue.
- Pinch of kosher salt – Balances sweetness.
- 1/2 teaspoon peppermint extract – Provides the signature mint flavor.
- 6 drops of green food coloring and 4 drops of blue food coloring – The combination gives macarons that minty green hue.
For the Mint Chocolate Chip Filling:
- 2 large egg whites
- 133 grams sugar
- Pinch of salt
- 150 grams unsalted butter, softened
- 1/4 teaspoon vanilla extract
- 2.5 ounces semi-sweet or dark chocolate, melted
- 3 tablespoons cocoa powder
Step-by-Step Guide to Making Macarons
Macarons require attention to detail and patience, but the process is straightforward when broken down into steps. Follow these instructions carefully to avoid common mistakes.
1. Preparing the Ingredients
- Sift the Dry Ingredients: Combine the almond flour, powdered sugar, and cookie crumbs. Sift them together into a bowl, ensuring there are no lumps. This step is essential to avoid a grainy texture in your macarons.
- Separate the Egg Whites: Measure your egg whites carefully. For best results, separate the eggs the night before and let the whites age in the fridge. This helps them whip up more consistently.
- Set Up Your Piping Bag: Prepare your piping bag with a round tip and set it in a tall glass. This makes filling the bag much easier when the time comes.
2. Making the Macaron Batter
- Whip the Egg Whites: In the bowl of a stand mixer, add the egg whites, sugar, and a pinch of salt. Start on medium speed, gradually increasing to high. You’re aiming for stiff, glossy peaks. This takes about 4-6 minutes.
- Add Peppermint and Food Coloring: Add in the peppermint extract, followed by the food coloring. The mixture should have a light green hue that resembles mint chocolate chip ice cream.
- Fold in the Dry Ingredients: Gently fold the sifted dry ingredients into the egg whites in batches. Be careful not to overmix! You want the batter to flow like lava but still hold its shape when piped.
3. Piping and Baking
- Pipe the Macarons: Transfer the macaron batter into your prepared piping bag. Pipe the batter onto a baking sheet lined with parchment paper, creating small circles about ¾ inch wide. Leave enough space between them as they won’t spread much but still need airflow.
- Tap the Tray: After piping, tap the baking sheet against your counter a few times. This step eliminates air bubbles, which can cause cracks.
- Rest the Macarons: Let the macarons rest at room temperature for 30-60 minutes. They should form a skin on top, making them less prone to cracking in the oven.
- Bake: Preheat your oven to 300°F (150°C). Bake the macarons for 12-15 minutes, rotating halfway through. You’ll know they’re done when they have firm feet and don’t wobble when touched lightly.
Making the Mint Chocolate Chip Filling
While your macarons are cooling, you can prepare the mint chocolate chip filling.
- Dissolve the Sugar: In a double boiler, whisk together the egg whites, sugar, and a pinch of salt until the sugar dissolves. You’ll know it’s ready when you no longer feel granules between your fingers.
- Whip the Mixture: Transfer the mixture to a stand mixer and beat until glossy stiff peaks form.
- Add the Butter: Slowly add the softened butter one cube at a time, allowing it to incorporate fully. If your mixture curdles, microwave a portion of it and re-incorporate it to bring it back together.
- Flavor with Chocolate and Mint: Add in the melted chocolate, vanilla extract, and sifted cocoa powder. Mix until fully combined.
Assembling the Macarons
- Pair the Shells: Once the macarons have cooled, carefully peel them off the parchment paper and match them up in pairs based on size.
- Pipe the Filling: Pipe the mint chocolate chip buttercream filling onto one half of each macaron pair. Gently sandwich them together, applying even pressure.
- Rest for Flavor Development: Ideally, you’ll want to let the macarons sit in the fridge for 24 hours before serving. This resting period allows the flavors to meld and the texture to soften to perfection.
Common Macaron-Making Mistakes
Even experienced bakers sometimes struggle with macarons. Here are some common issues and how to avoid them:
- Cracked Shells: This usually means the macarons didn’t rest long enough before baking. Ensure they develop a skin on top before baking.
- Hollow Shells: Overmixing the batter can cause hollow shells. Fold the batter just until it flows like lava.
- No Feet: Macarons need high heat to develop their characteristic feet. Make sure your oven temperature is accurate and consistent.
- Too Stiff/Runny Buttercream: Temperature control is key. If your buttercream is too stiff, it’s likely too cold. If it’s too runny, chill it for a few minutes and re-whip.
Expert Tips and Tricks
- Use a Macaron Template: Print out a macaron template to place under your parchment paper. This ensures evenly sized macarons.
- Aging Egg Whites: Let your egg whites age in the fridge for 24-48 hours before using them. This step helps them whip up more consistently.
- Weigh Your Ingredients: Precision is critical in macaron-making. Invest in a good kitchen scale and use it for every ingredient.
Frequently Asked Questions
Why Did My Macarons Crack?
Cracked macarons are often due to insufficient resting time or oven temperature issues. Ensure that your macarons develop a skin before baking, and check your oven temperature with an external thermometer for accuracy.
Can I Use Gel Food Coloring?
Yes! Gel food coloring is more concentrated than liquid food coloring, meaning you can use less to achieve vibrant colors. Just a few drops will give you that perfect minty hue.
How Should I Store Macarons?
Store macarons in an airtight container in the fridge. They’re best enjoyed after 24 hours of rest, but they can last up to a week. You can also freeze them for up to 3 months.
Final Thoughts
Mastering the art of making Mint Chocolate Chip Macarons may take some practice, but once you get the hang of it, the results are always rewarding. Whether you’re making these for a special occasion or just to treat yourself, their delightful flavor and perfect texture will impress anyone lucky enough to try them.
By following this step-by-step guide, using the expert tips, and avoiding common mistakes, you’re well on your way to creating macarons that look and taste like they came from a Parisian patisserie. Happy baking!


