

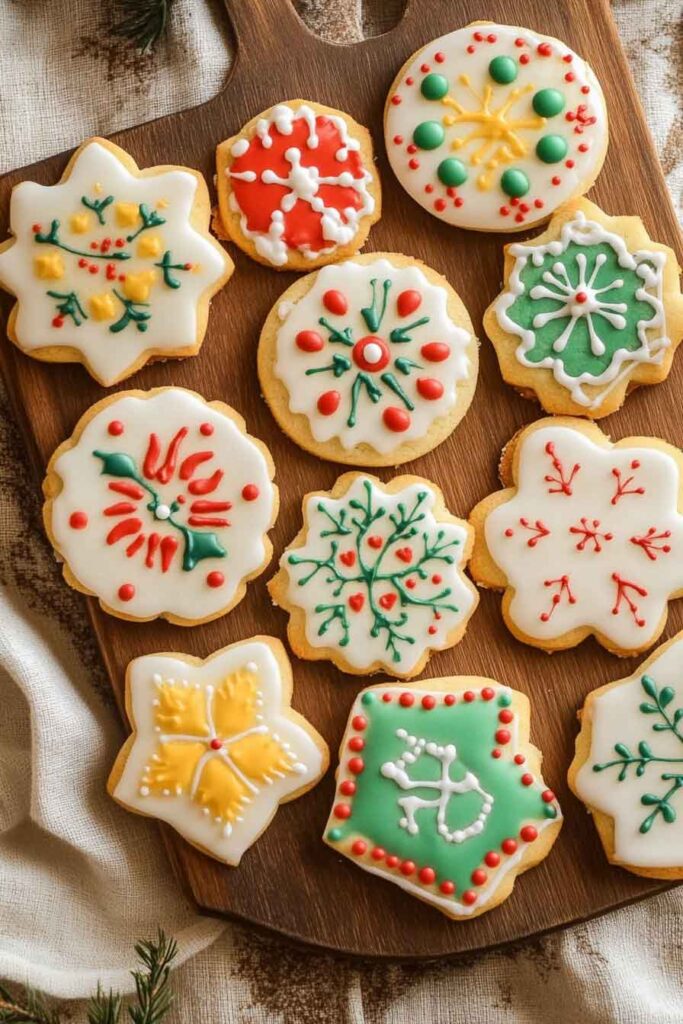
These cookies? Total holiday magic. They’re soft, sweet, and so fun to decorate.
I make them every year with my family. We roll, cut, bake—and then go crazy with frosting and sprinkles. It’s messy… and totally perfect.
You don’t need anything fancy. Just simple ingredients and your favorite cookie cutters. They’re great for gifting or leaving out for Santa!
Let’s bake some holiday joy together. I’ll show you exactly how I do it. And yep—kids love helping too.


Why You’ll Love This Recipe
- Perfect for the Holidays: These cookies are the ideal treat for Christmas, New Year’s, or any holiday gathering, adding a festive touch to your dessert table.
- Customizable Decorating: Whether you love royal icing or glaze, these cookies can be decorated to match any theme or season.
- Easy to Make: With a simple dough and quick baking time, you’ll have your cookies ready in no time.
- Kid-Friendly: This recipe is easy enough for little ones to get involved with, from cutting out fun shapes to decorating.
- Melt-In-Your-Mouth Texture: The combination of butter, sugar, and just a hint of almond extract creates a soft, delicate texture that everyone will love.
Required Kitchen Tools
Before we get started, make sure you have the following tools ready for your baking session:
- Mixing Bowls: For combining your wet and dry ingredients.
- Hand or Stand Mixer: For blending the butter and sugar until light and fluffy.
- Rolling Pin: To roll out the dough to an even thickness for perfect cut-out cookies.
- Cookie Cutters: You can use traditional holiday shapes like stars, trees, or snowflakes, or get creative with your designs.
- Baking Sheets: You’ll need a few of these to bake your cookies.
- Parchment Paper: This will prevent the cookies from sticking to the baking sheets and ensure easy cleanup.
- Cooling Rack: To allow the cookies to cool completely before decorating.

Ingredients
These simple ingredients will make about 24 cookies, but feel free to double the recipe if you’re planning a large batch. Here’s what you’ll need:
- Unsalted Butter: 1 cup (room temperature)
- Granulated Sugar: 1 cup
- Large Egg Yolks: 2
- Almond Extract: 1 teaspoon (or substitute with vanilla extract for a different flavor profile)
- All-Purpose Flour: 3 cups (spooned and leveled for accurate measurement)
- Salt: 1/2 teaspoon
- Royal Icing or Easy Glaze Icing (for decorating; recipe below)
The beauty of this recipe lies in the simplicity of the ingredients. No need for any special baking items—just basic pantry staples! The star of the show is the almond extract. Its delicate flavor adds a unique twist to the traditional sugar cookie flavor.
Step-by-Step Instructions
1. Cream the Butter and Sugar
Start by placing the unsalted butter and granulated sugar in a large mixing bowl. Using a hand or stand mixer, beat them together on medium speed until the mixture is light and fluffy. This step usually takes about 2-3 minutes. The goal is to cream the butter and sugar so that they form a smooth, pale mixture.
2. Add the Egg Yolks and Almond Extract
Once your butter and sugar are creamed, add the egg yolks and almond extract to the mixture. Beat them in until fully combined. The egg yolks help bind the dough together, while the almond extract adds that signature holiday flavor.
3. Mix in the Dry Ingredients
In a separate bowl, whisk together the all-purpose flour and salt. Gradually add the dry ingredients into the wet mixture, about half a cup at a time, mixing on low speed after each addition. Make sure everything is fully incorporated, but don’t overmix—it’s important to stop once the dough comes together.

4. Chill the Dough
After the dough has formed, wrap it in plastic wrap and refrigerate it for at least 30 minutes. Chilling the dough is crucial because it makes it easier to roll out and helps the cookies maintain their shape while baking.
5. Roll Out the Dough
Once the dough is chilled, remove it from the fridge and place it on a floured surface. Use a rolling pin to roll the dough out to about 1/4 inch thickness. The dough should be firm, and not too sticky, so add a bit of flour if needed.
6. Cut Out Shapes
Using your favorite cookie cutters (I recommend a festive holiday set for maximum fun!), cut the dough into shapes. You can use classic shapes like stars, snowflakes, trees, or even candy canes for a more whimsical touch.
7. Bake the Cookies
Now that your cookies are ready, preheat your oven to 350°F (177°C). Line your baking sheets with parchment paper to prevent the cookies from sticking.
Place the cut-out cookies on the prepared baking sheets, spacing them about 2 inches apart. The cookies will spread slightly, so it’s important to leave enough room for them to bake evenly.
Bake the cookies for 8-10 minutes or until the edges are just starting to turn golden brown. The center should still look soft but set. Keep an eye on the cookies towards the end of baking, as they can go from perfectly golden to overbaked very quickly.
8. Cool the Cookies
Once the cookies are done, remove them from the oven and let them cool on the baking sheet for 5 minutes. This brief resting period ensures they’re firm enough to move without breaking.
After 5 minutes, transfer the cookies to a cooling rack to cool completely. It’s important that the cookies are fully cooled before decorating, or the icing will melt and slide off.
Decorating the Cookies
Now comes the fun part—decorating your cookies! Whether you’re making intricate designs or keeping it simple, you can easily customize these cookies with Royal Icing or Easy Glaze Icing. I’ll share both recipes with you, so you can choose the one that works best for you!
Royal Icing (Traditional Decor)
Royal icing is the perfect option if you want smooth, glossy, and intricate designs. It dries hard, making it ideal for stacking or gifting your cookies. Here’s how to make it:
Ingredients:
- Powdered Sugar: 2 cups (sifted)
- Meringue Powder: 1 tablespoon (or egg whites)
- Water: 2-3 tablespoons (adjust as needed for consistency)
- Lemon Juice: 1/2 teaspoon (optional for a slight tang)
Instructions:
- In a bowl, combine the sifted powdered sugar and meringue powder.
- Add the water a little at a time, mixing until the icing reaches a thick but pipeable consistency. It should hold stiff peaks but still flow when squeezed from a piping bag.
- Optional: Add a few drops of lemon juice for a little extra flavor and shine.
- Once mixed, transfer the icing to a piping bag fitted with a small round tip, or you can use a plastic squeeze bottle for more control.
- Decorate your cooled cookies by outlining and filling in the shapes. Let the icing dry completely before adding any additional layers or details.
Easy Glaze Icing (Quick & Simple)
If you want a simpler, glossy finish with minimal effort, the easy glaze icing is a fantastic option. It’s not as stiff as royal icing but still holds its shape well for designs like drizzles or dots.
Ingredients:
- Powdered Sugar: 1 cup
- Milk: 2-3 teaspoons (or more, depending on the desired consistency)
- Vanilla Extract: 1/2 teaspoon
- Food Coloring: For vibrant colors
Instructions:
- In a bowl, whisk together the powdered sugar, milk, and vanilla extract until smooth.
- Add more milk, a teaspoon at a time, until the icing reaches a runny, glaze-like consistency. It should easily flow from a spoon but not be too thin.
- If you want to color your glaze, divide it into separate bowls and add food coloring of your choice.
- Spoon the glaze over the cooled cookies, spreading it evenly with a small spatula or dipping the cookies directly into the icing for a quick and easy coating.
- Allow the glaze to set for about 30 minutes before serving or packaging the cookies.
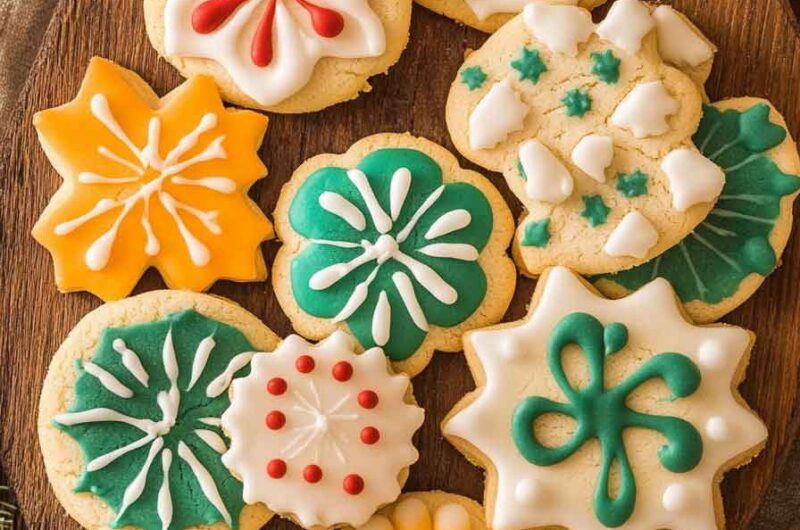
Decorating Tips
- Use Sprinkles: Once your icing is applied, don’t forget to add festive sprinkles, colored sugar, or edible glitter for extra flair.
- Create Faces or Designs: You can use colored icing or chocolate chips to create faces or holiday-themed designs. Think snowman faces, Santa hats, or reindeer antlers!
- Personalize Your Cookies: For a fun twist, write initials or short messages on the cookies to make them more personalized.
Storing Holiday Cut-Out Sugar Cookies
These cookies stay fresh for about 5-7 days at room temperature if stored in an airtight container. If you plan to keep them longer, I recommend storing them in the fridge. You can also freeze the undecorated cookies for up to 3 months and then decorate them when you’re ready to serve or give as gifts.
If you’ve decorated with royal icing, be sure to store the cookies in a cool, dry place to preserve the finish.
How to Serve Holiday Cut-Out Sugar Cookies
- Holiday Platters: These cookies are perfect for holiday parties. Arrange them on a beautiful platter with other holiday-themed treats like gingerbread or shortbread.
- Gift-Giving: These cookies make excellent gifts! Package them in cute tins or clear cellophane bags tied with ribbon for a sweet homemade gift.
- With Hot Cocoa: Serve these cookies alongside a cozy mug of hot chocolate, or use them as an accompaniment to coffee during a festive brunch.
Nutrition Facts
Serving Size: 1 cookie
Servings Per Recipe: 24
| Nutrient | Amount Per Serving |
|---|---|
| Calories | 160 |
| Total Fat | 7g |
| Saturated Fat | 4.5g |
| Trans Fat | 0g |
| Cholesterol | 25mg |
| Sodium | 80mg |
| Total Carbohydrates | 23g |
| Dietary Fiber | 0g |
| Sugars | 13g |
| Protein | 2g |
| Calcium | 6mg |
| Iron | 0.7mg |

Holiday Cut-Out Sugar Cookies
Course: Uncategorized24
cookies15
minutes8
minutes160
kcalIngredients
Unsalted Butter: 1 cup (room temperature)
Granulated Sugar: 1 cup
Large Egg Yolks: 2
Almond Extract: 1 teaspoon (or substitute with vanilla extract)
All-Purpose Flour: 3 cups (spooned and leveled)
Salt: 1/2 teaspoon
Royal Icing or Easy Glaze Icing (see recipes below)
Directions
- Cream the Butter and Sugar:
In a large bowl, beat the butter and sugar together with a hand or stand mixer on medium speed until light and fluffy (about 2-3 minutes). - Add the Egg Yolks and Almond Extract:
Mix in the egg yolks and almond extract until fully combined. - Mix in the Dry Ingredients:
In a separate bowl, whisk together the flour and salt. Gradually add the dry ingredients to the wet mixture, mixing until combined. - Chill the Dough:
Wrap the dough in plastic wrap and refrigerate for at least 30 minutes. - Roll Out the Dough:
Preheat your oven to 350°F (177°C). Roll the dough out on a floured surface to about 1/4-inch thickness. Use cookie cutters to cut out desired shapes. - Bake the Cookies:
Place the cookies on a parchment-lined baking sheet, spaced 2 inches apart. Bake for 8-10 minutes or until the edges are lightly golden. Let cool for 5 minutes on the baking sheet before transferring to a cooling rack. - Decorate the Cookies:
Once the cookies are completely cooled, decorate with royal icing or glaze icing (recipes below). Let the icing set for 30 minutes before serving. - Royal Icing (For Decorating):
- Powdered Sugar: 2 cups (sifted)
- Meringue Powder: 1 tablespoon (or use egg whites)
- Water: 2-3 tablespoons
- Lemon Juice: 1/2 teaspoon (optional)
- Easy Glaze Icing (For Decorating):
- Milk: 2-3 teaspoons
- Powdered Sugar: 1 cup
- Vanilla Extract: 1/2 teaspoon
- Food Coloring: Optional
Holiday Cut-Out Sugar Cookies FAQs
How do I store the cookies?
Store the cookies in an airtight container at room temperature for 5-7 days, or refrigerate them for a longer shelf life. Undecorated cookies can be frozen for up to 3 months.
Can I freeze the dough?
Yes! You can freeze the dough before chilling or after rolling it out. Wrap it tightly in plastic wrap and store it in a ziplock bag. When ready to bake, let it thaw in the fridge for a few hours before proceeding with the recipe.
Can I make these cookies gluten-free?
Yes, you can substitute the all-purpose flour with a gluten-free flour blend. Just be sure to check the blend’s instructions, as some may require additional binding agents like xanthan gum.
Can I use butter instead of margarine?
Yes, using unsalted butter provides a richer flavor and better texture. I always recommend using butter for the best results in cookies!
Conclusion
Holiday Cut-Out Sugar Cookies are a wonderful way to celebrate the season and share a little sweetness with friends and family. From the easy-to-make dough to the fun of decorating, this recipe is a perfect holiday tradition to create lasting memories. Whether you’re hosting a holiday party, baking for a gift exchange, or simply indulging in a festive treat, these cookies are sure to become a staple in your holiday baking repertoire.