Harvest Buttercream Cookie Sandwiches

These harvest buttercream cookie sandwiches? Oh my gosh—they taste like fall in every bite. Warm spices, soft cookies, and creamy filling.
I made a batch for a cozy night in, and wow, they disappeared fast. The buttercream? So fluffy and full of autumn flavor.
If you want something sweet and simple that feels super festive, you’re in the right spot. Let’s bake these little fall hugs together.

Why You’ll Love This Recipe
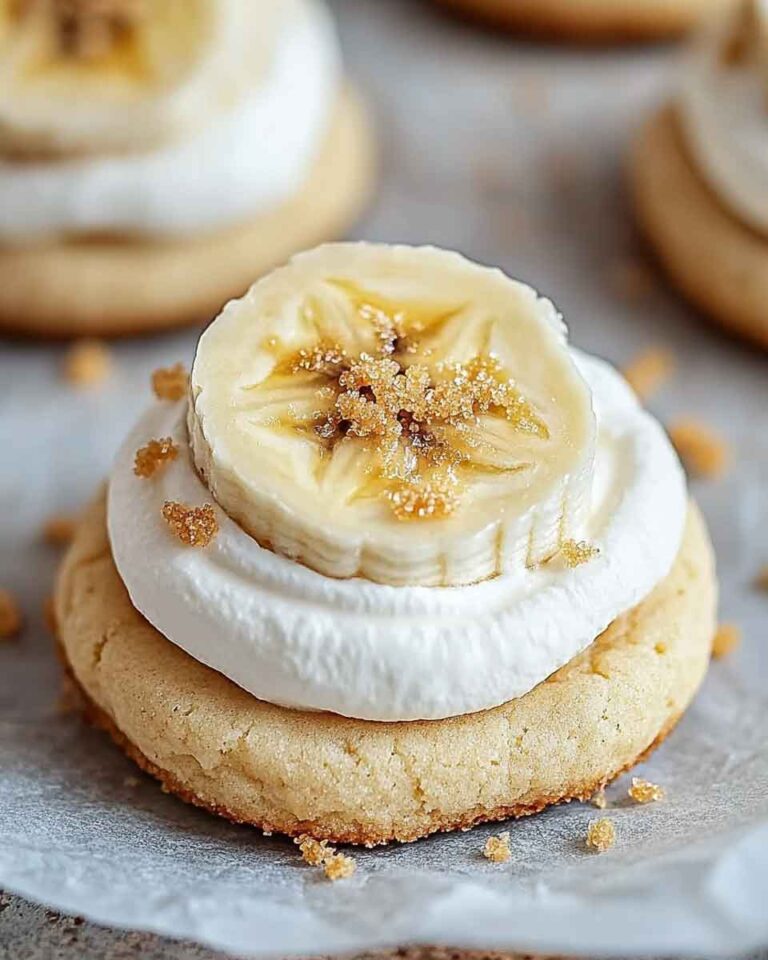
- Perfect for Fall: With flavors like pumpkin, cinnamon, and nutmeg, these cookies are a delicious way to celebrate the season.
- Soft & Chewy: The pumpkin puree in the dough ensures each bite is soft and pillowy, with a slight spice that complements the sweet buttercream filling.
- Beautiful & Festive: The buttercream filling can be colored to match the autumn palette of orange and yellow, making these cookie sandwiches a visually stunning treat.
- Great for All Occasions: Whether you’re serving them at a fall party, packing them in lunchboxes, or simply enjoying them with a cup of coffee, they’re sure to be a hit.
- Easy to Make: Despite their impressive look, these cookies are easy to make and require simple ingredients that you likely already have in your pantry.
Required Kitchen Tools
Before we dive into the recipe, let’s make sure you have all the necessary tools on hand:
- Mixing bowls: For combining your dry and wet ingredients.
- Electric mixer: To beat the butter and sugar into a fluffy mixture and create that perfect buttercream.
- Baking sheets: For baking your delicious cookies.
- Parchment paper: To prevent cookies from sticking to the baking sheet and ensure easy cleanup.
- Wire rack: For cooling the cookies after baking.
- Cookie scoop or spoon: To help portion out the cookie dough evenly.
- Spatula: For spreading that irresistible buttercream filling on the cookies.

Ingredients
Here’s what you’ll need to make these incredible fall-inspired cookies (exact measurements are in the recipe card below):
For the Pumpkin Spice Cookies:
- 1 cup unsalted butter, softened: This provides the rich base for your cookies and helps them stay soft.
- 1 cup granulated sugar: Sweetens the dough and creates a lovely texture.
- 1 large egg: Binds the ingredients together and gives the cookies their chewy texture.
- 1 tsp vanilla extract: Adds a warm, sweet flavor to complement the spices.
- 2 cups all-purpose flour: The base of your cookie dough.
- 1/2 tsp baking powder: Helps the cookies rise and ensures they are soft and fluffy.
- 1/4 tsp salt: Balances the sweetness and enhances the flavors.
- 1/2 cup pumpkin puree: Gives the cookies that lovely fall flavor and moisture.
- 1 tsp cinnamon: A key spice in any autumn treat, bringing warmth and depth.
- 1/2 tsp nutmeg: Adds a lovely, aromatic spice to complement the pumpkin.
For the Buttercream Filling:
- 1/2 cup unsalted butter, softened: The base for the creamy buttercream filling.
- 3 cups powdered sugar: Sweetens the filling and gives it the perfect consistency.
- 2 tbsp milk: Helps make the buttercream smooth and spreadable.
- 1 tsp vanilla extract: Adds a touch of sweetness and depth to the filling.
- Orange and yellow food coloring (optional): For a festive look that mimics the beautiful colors of autumn.

Step-by-Step Instructions for Harvest Buttercream Cookie Sandwiches
1. Make the Cookie Dough
Cream the Butter and Sugar:
In a large mixing bowl, beat the softened butter and granulated sugar using an electric mixer until the mixture becomes light and fluffy. This should take about 2-3 minutes. The more you beat the butter and sugar, the softer your cookies will be.
Add the Wet Ingredients:
Next, add the egg and vanilla extract to the butter-sugar mixture. Beat until fully incorporated. The mixture should be smooth and slightly fluffy.
Mix in the Pumpkin Puree:
Add the pumpkin puree to the bowl and mix until fully combined. This is where the magic happens! The pumpkin puree gives the cookies their moist texture and helps them stay soft.
Combine the Dry Ingredients:
In a separate bowl, whisk together the all-purpose flour, baking powder, salt, cinnamon, and nutmeg. These dry ingredients will give the cookies their structure and the wonderful spice flavors that make them so delicious.
Combine Wet and Dry Ingredients:
Slowly add the dry ingredients to the wet mixture. Mix on low speed with your electric mixer until everything is just combined. Be careful not to overmix, or the cookies might turn out tough.
2. Scoop and Bake the Cookies
Preheat Your Oven:
Preheat your oven to 350°F (177°C). Line two baking sheets with parchment paper to prevent the cookies from sticking and make cleanup easier.
Scoop the Dough:
Using a cookie scoop or spoon, scoop about 1.5 tablespoons of dough for each cookie and place them about 2 inches apart on the prepared baking sheets. The dough will spread slightly as it bakes, so give them some room to grow.
Bake the Cookies:
Bake the cookies for 10-12 minutes, or until the edges are lightly golden and the centers are still slightly soft. The cookies will continue to cook as they cool, so don’t worry if the centers look a little underdone. Allow them to cool on the baking sheets for 5 minutes before transferring them to a wire rack to cool completely.
3. Make the Buttercream Filling
Beat the Butter and Powdered Sugar:
While the cookies are cooling, make the buttercream filling. In a medium bowl, beat the softened butter with an electric mixer until it’s creamy and smooth.
Add the Powdered Sugar and Milk:
Gradually add the powdered sugar, a little at a time, and continue mixing until it’s fully incorporated. Add the milk and vanilla extract and beat until the buttercream is smooth and fluffy. If it’s too thick, you can add a little more milk to get the right consistency.
Add Food Coloring (Optional):
If you want to add a festive touch to your buttercream filling, divide the frosting into two bowls and add a few drops of orange food coloring to one bowl and yellow food coloring to the other. Mix well until the colors are fully incorporated.
4. Assemble the Cookie Sandwiches
Pipe the Buttercream:
Once the cookies have cooled completely, flip half of them upside down. Use a piping bag or a spatula to spread a generous amount of buttercream filling onto the flat side of each cookie. If you don’t have a piping bag, you can simply spoon the frosting onto the cookie.
Sandwich the Cookies Together:
Take another cookie and place it on top of the buttercream-covered cookie, flat side down. Gently press them together to create a sandwich.
Decorate:
If you’d like, you can decorate the cookies with sprinkles or additional colored frosting to give them a more festive look.
Serving and Decoration

How to Serve Harvest Buttercream Cookie Sandwiches
These delicious cookies are perfect for a variety of occasions:
- Fall Gatherings: Serve these cookie sandwiches at your next Halloween party, Thanksgiving dinner, or any autumn celebration.
- For a Sweet Treat: Enjoy them as an afternoon snack with a warm cup of coffee or cider.
- For Gift-Giving: Package these cookie sandwiches in a festive box and give them to friends or family as a sweet homemade gift.
Storing Harvest Buttercream Cookie Sandwiches
How to Store the Cookies:
- In the Refrigerator: Store the cookie sandwiches in an airtight container in the refrigerator for up to 4 days. The buttercream filling will stay fresh and creamy, and the cookies will stay soft.
- In the Freezer: You can freeze the cookies if you want to make them ahead of time. Simply place the sandwiches in a single layer on a baking sheet and freeze for 1-2 hours. Once frozen, transfer them to an airtight container or freezer bag for up to 3 months. Let them thaw at room temperature before serving.
Nutrition Information (per cookie sandwich)
| Nutrient | Amount per serving |
|---|---|
| Calories | 280 |
| Total Fat | 14g |
| Saturated Fat | 8g |
| Cholesterol | 35mg |
| Sodium | 85mg |
| Total Carbohydrates | 38g |
| Dietary Fiber | 1g |
| Sugars | 25g |
| Protein | 2g |
Conclusion
These Harvest Buttercream Cookie Sandwiches are a perfect treat for the fall season. Whether you’re baking them for a party, sharing them with loved ones, or simply enjoying them on a crisp afternoon, these cookies will surely bring warmth and comfort to your home. With their soft, spiced cookies and rich buttercream filling, they capture everything that’s wonderful about fall in one delicious bite.
So go ahead, grab your ingredients, and treat yourself to these delicious, festive cookies—you won’t regret it!

Harvest Buttercream Cookie Sandwiches
Course: Uncategorized18
cookie sandwiches15
minutes10
minutes280
kcalIngredients
- For the Cookies:
1 cup unsalted butter, softened
1 cup granulated sugar
1 large egg
1 tsp vanilla extract
2 cups all-purpose flour
1/2 tsp baking powder
1/4 tsp salt
1/2 cup pumpkin puree
1 tsp cinnamon
1/2 tsp nutmeg
- For the Buttercream Filling:
1/2 cup unsalted butter, softened
3 cups powdered sugar
2 tbsp milk
1 tsp vanilla extract
Orange and yellow food coloring (optional)
Directions
- Preheat the oven to 350°F (177°C) and line two baking sheets with parchment paper.
- Make the Cookie Dough: Cream the butter and sugar, then add the egg, vanilla extract, and pumpkin puree. Mix until smooth. Add the dry ingredients and combine.
- Scoop the Dough: Use a cookie scoop to form dough balls and place them on the baking sheets.
- Bake: Bake for 10-12 minutes, until the edges are golden. Cool on a wire rack.
- Make the Buttercream: Beat the butter, powdered sugar, milk, and vanilla. Add food coloring if desired.
- Assemble: Spread buttercream on the flat side of a cookie and sandwich with another cookie. Repeat for all cookies.
- Enjoy! Serve and store in an airtight container.