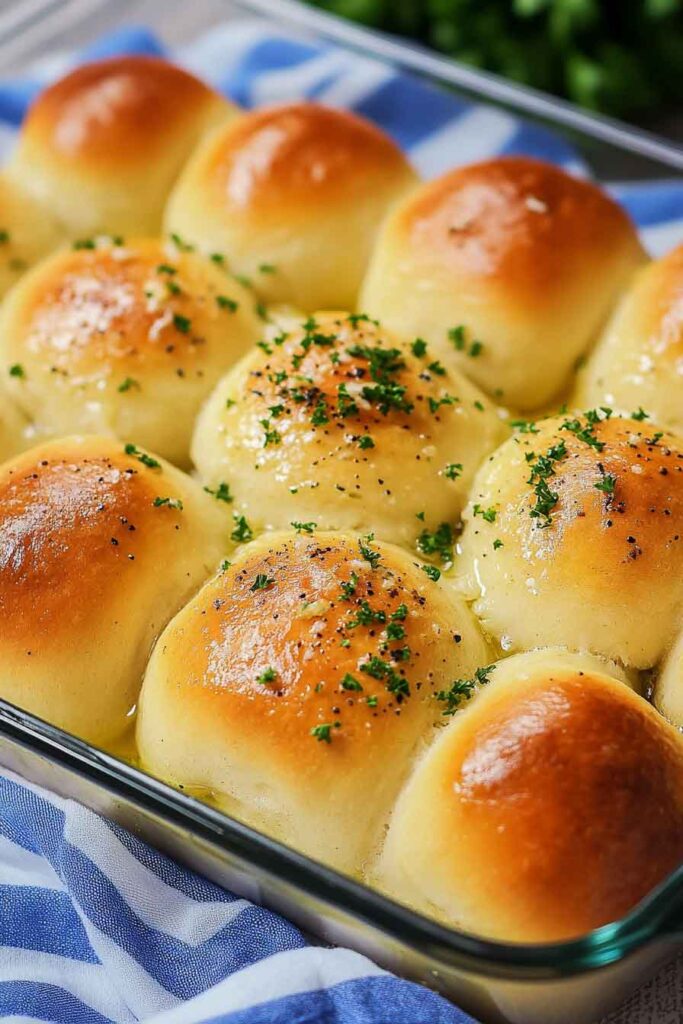
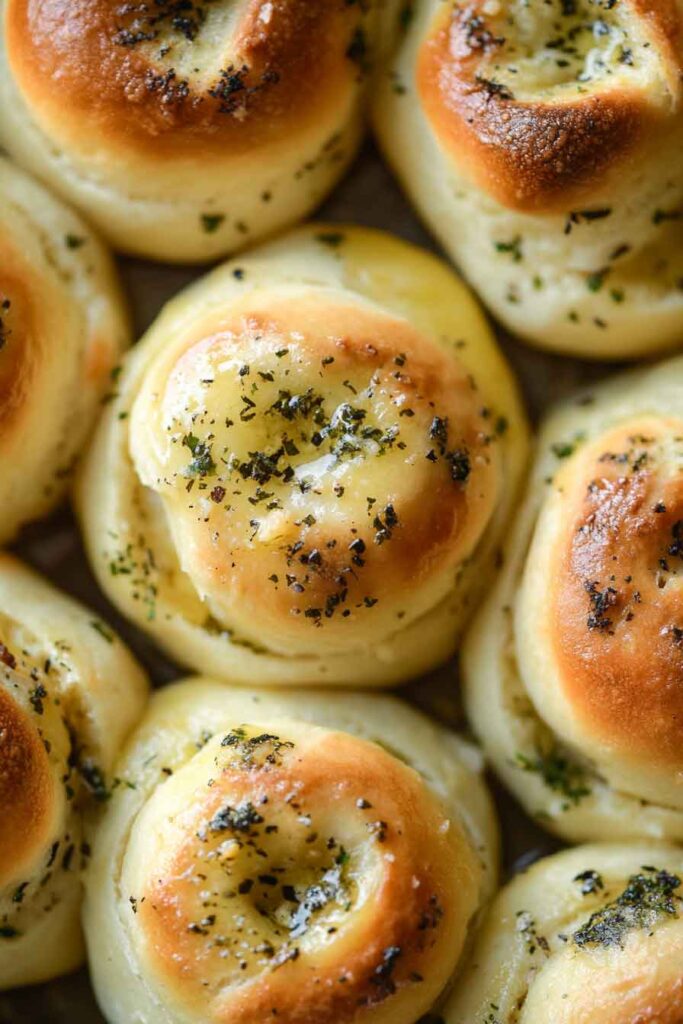
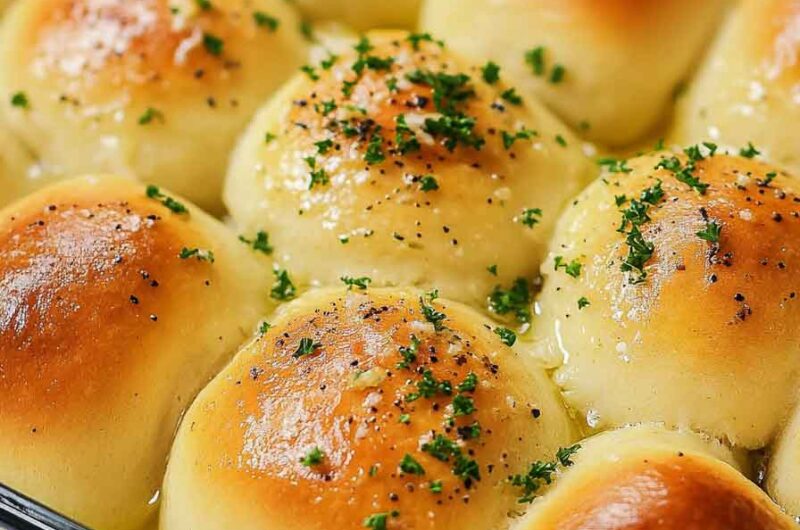
Garlic Herb Rolls

The smell of garlic and warm bread always makes me smile. When I bake Garlic Herb Rolls, the whole kitchen feels cozy. It’s like comfort in every bite.
The rolls come out soft, buttery, and full of flavor. I like tearing them apart and seeing the steam rise. They taste so good with dinner or just by themselves.
I love how simple they are to make at home. They look fancy but really, it’s just a little dough, butter, and herbs. You’ll want to keep baking them again and again.
So, let’s roll up our sleeves and start. These Garlic Herb Rolls are easy, tasty, and worth every bite. I’ll walk you through how I make them.
Why You’ll Love These Garlic Herb Rolls
- Soft and Fluffy: With a texture that’s light as a cloud and perfectly tender, these rolls will melt in your mouth.
- Packed with Flavor: A combination of garlic and herb seasoning gives these rolls a savory, aromatic kick that’s impossible to resist.
- Easy to Make: Though they might seem fancy, these rolls are straightforward to prepare and require no special skills!
- Perfect for Any Occasion: Whether you’re hosting a dinner party, preparing a family meal, or looking for an irresistible snack, these garlic herb rolls are the perfect addition.
- Make-Ahead Friendly: You can make the dough in advance and refrigerate it, making these rolls even easier to prepare.
Required Kitchen Tools
Before we get started with the recipe, here’s a quick list of essential kitchen tools you’ll need:
- Mixing Bowls: You’ll need at least two bowls—one for the dry ingredients and one for the wet ingredients.
- Measuring Cups and Spoons: For precise measurements, especially when working with dry ingredients like flour and yeast.
- Stand Mixer (optional): This is optional but highly recommended if you want to save some time and effort. A stand mixer with a dough hook will make kneading the dough a breeze.
- Baking Sheet or Pan: You’ll need a pan to arrange the rolls on while they rise and bake.
- Parchment Paper: To prevent the rolls from sticking and to ensure an easy cleanup.
- Cloth or Towel: To cover the rolls as they rise.
- Pastry Brush: For brushing the garlic butter topping on the rolls once they come out of the oven.
Ingredients
Here’s a breakdown of the ingredients you’ll need to make these fluffy, garlicky rolls. Don’t worry, the list is simple and easy to follow. All measurements are included in the recipe card below!
Dough Ingredients:
- Whole Milk (14.5 oz or 411 grams): Warm milk helps activate the yeast and gives the dough a soft texture.
- Unsalted Butter (4 oz or 113 grams): For a buttery, tender roll. It’s best to use unsalted butter to control the salt content.
- Honey (3 Tablespoons or 61 grams): A little bit of honey adds a touch of sweetness and helps the dough rise beautifully.
- Kosher Salt (1 ¼ teaspoons or 6 grams): The salt enhances the flavor and helps balance the sweetness of the honey.
- Garlic & Herb Seasoning (1 Tablespoon): I use Kinder’s Garlic & Herb Seasoning for a savory kick. You can also substitute this with fresh garlic and your favorite herbs.
- Bread Flour (22 oz or 624 grams): Bread flour is ideal because it has a higher protein content, which helps the rolls rise and get that perfect fluffy texture.
- Instant Yeast (1 teaspoon or 3 grams): Instant yeast helps the dough rise quickly without requiring proofing.
Topping Ingredients:
- Butter (2 oz or 57 grams): This will be brushed over the rolls after baking for that irresistible buttery finish.
- Garlic & Herb Seasoning (1 teaspoon): To sprinkle over the rolls once they’re baked, infusing them with even more flavor.
Variations for Garlic Herb Rolls
While this recipe is already packed with flavor, here are some fun variations and tweaks you can try:
- Add Fresh Garlic: If you want a more intense garlic flavor, add freshly minced garlic to the dough and in the garlic butter topping.
- Use Different Herbs: Feel free to mix up the herbs you use! Thyme, rosemary, oregano, or basil can be used in place of the original garlic and herb seasoning.
- Cheese Option: Add shredded parmesan cheese to the dough for an extra cheesy, savory kick!
- Sweeten It Up: You can experiment by adding a bit more honey for a slightly sweeter roll that would go beautifully with savory dips or soups.
- Stuffed Rolls: Get creative and stuff the rolls with ingredients like mozzarella, roasted garlic, or caramelized onions before baking.
Step-by-Step Instructions for Making Garlic Herb Rolls
1. Prepare the Dough
Start by warming the whole milk. You want the milk to be warm to the touch but not too hot (around 100°F or 38°C). If the milk is too hot, it could kill the yeast, so be careful.
In a large mixing bowl, combine the warm milk, honey, and kosher salt. Stir to dissolve the honey and salt into the milk. Once mixed, sprinkle the instant yeast over the milk mixture and stir it gently. Let this sit for about 5 minutes to activate the yeast. You should notice a slight froth on the surface of the liquid, indicating the yeast is alive and working.
Next, add the unsalted butter (softened) and the garlic & herb seasoning. If you don’t have a stand mixer, now is the time to grab a wooden spoon or your hands to mix everything together.
Gradually add the bread flour to the liquid mixture. Start with about half and mix it in. Once the dough becomes thicker, you can slowly add the remaining flour. The goal is to form a soft dough that’s slightly sticky but not too wet.
2. Knead the Dough
If you’re using a stand mixer, attach the dough hook and let the mixer knead the dough on low speed for about 5-7 minutes. If you’re doing this by hand, turn the dough out onto a floured surface and knead it for about 8-10 minutes until the dough is smooth and elastic.
3. Let the Dough Rise
Once the dough is kneaded, form it into a ball and place it in a lightly greased bowl. Cover the bowl with a cloth or plastic wrap and let the dough rise in a warm place for 1-1.5 hours, or until it doubles in size. This is the first rise, and it’s important to give the dough plenty of time to rise for that soft texture.
4. Shape the Rolls
Once the dough has risen, punch it down to release any air bubbles. Turn it out onto a floured surface and gently roll it into a log. Cut the dough into 12-16 equal portions, depending on the size of rolls you prefer.
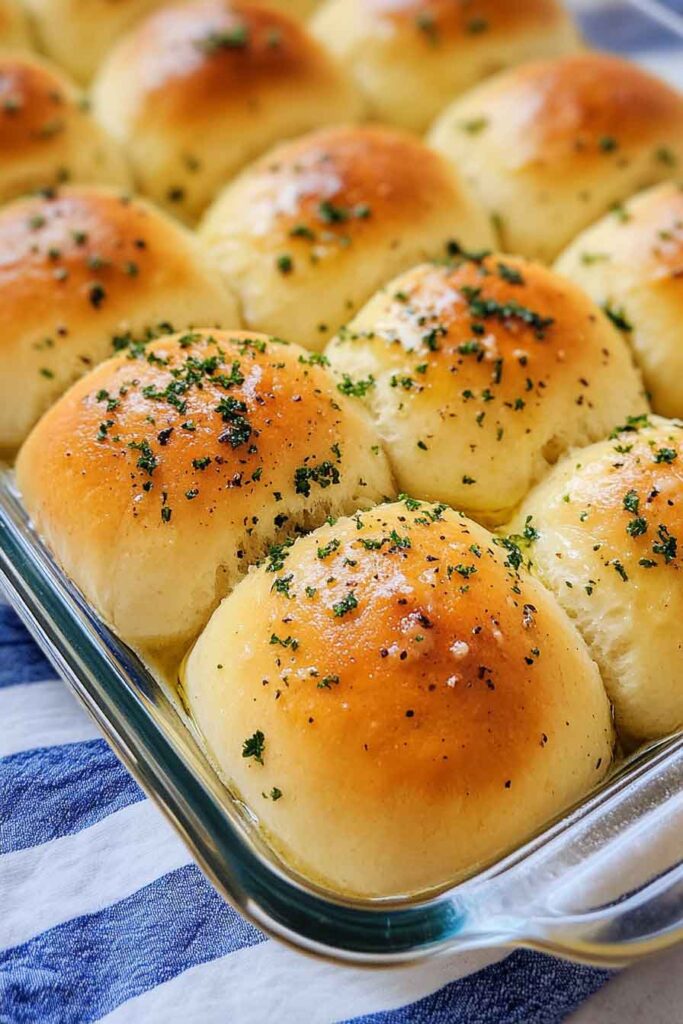
Shape each piece into a ball and place them on a parchment-lined baking sheet or into a greased baking dish. Arrange them close together so that when they bake, they rise upward and form a soft, pull-apart texture.
5. Second Rise
Cover the shaped rolls with a clean towel and let them rise for another 30-45 minutes. This second rise helps the rolls become even fluffier.
6. Preheat the Oven
While the rolls are undergoing their second rise, preheat your oven to 350°F (175°C). This ensures the oven is ready for baking as soon as the rolls have finished rising.
7. Bake the Rolls
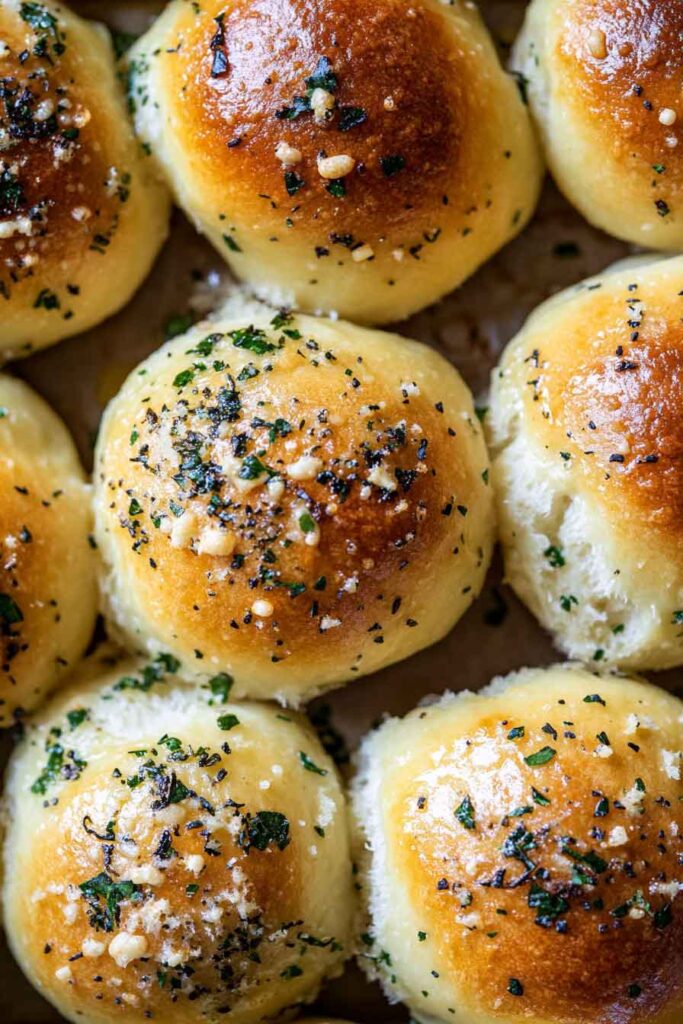
Once the rolls have finished rising, place them in the preheated oven and bake for 18-22 minutes, or until they are golden brown on top. The rolls should sound hollow when tapped on the bottom, which is a good sign they are fully baked.
8. Prepare the Garlic Butter Topping
While the rolls are baking, melt the butter for the topping. Stir in the garlic & herb seasoning to the melted butter. Once the rolls are out of the oven, immediately brush the garlic butter over the tops of the rolls. This step will infuse them with flavor and give them a glossy, delicious finish.
How to Serve Garlic Herb Rolls
These garlic herb rolls are incredibly versatile, so they pair well with so many different dishes. Here are some ideas on how to serve them:
- As a Side to Pasta Dishes: Serve these rolls with your favorite pasta dishes, such as spaghetti, lasagna, or fettuccine alfredo. The garlic and herb flavors complement creamy and tomato-based sauces perfectly.
- With Soups and Stews: They’re the perfect accompaniment to hearty soups and stews like chicken noodle soup, beef stew, or a creamy potato soup.
- For Dipping: Serve them alongside a warm dipping sauce or a garlic butter dip. They are excellent for dipping in marinara sauce or olive oil and balsamic vinegar.
- As a Snack: Enjoy them on their own as a savory snack or appetizer. They’re also perfect for brunch with scrambled eggs or a cheese platter.
Storing Garlic Herb Rolls
- Unbaked Dough: You can store the unbaked dough in the refrigerator for up to 24 hours. Simply cover it tightly and allow it to rise at room temperature for 30 minutes before proceeding with the recipe.
- Baked Rolls: Store the baked rolls in an airtight container for 2-3 days at room temperature. For longer storage, you can freeze the rolls for up to 3 months. Simply wrap them in plastic wrap and aluminum foil, and thaw them in the oven when ready to eat.
- Reheat: To reheat, wrap the rolls in foil and place them in the oven at 350°F (175°C) for 10-15 minutes. They’ll taste as fresh as the day they were baked!
Nutrition Information (Per Roll)
| Nutrient | Amount |
|---|---|
| Calories | 180 kcal |
| Carbohydrates | 28g |
| Protein | 4g |
| Fat | 6g |
| Fiber | 1g |
| Sodium | 230mg |
| Sugar | 4g |
Garlic Herb Rolls
Course: Uncategorized12-16
rolls20
minutes18
minutes180
kcal2
hoursIngredients
- For the Dough:
14.5 oz whole milk (411 grams)
4 oz unsalted butter (113 grams)
3 Tablespoons honey (61 grams)
1 ¼ teaspoon kosher salt (6 grams)
1 Tablespoon garlic & herb seasoning
22 oz bread flour (624 grams)
1 teaspoon instant yeast (3 grams)
- For the Topping:
2 oz butter (57 grams)
1 teaspoon garlic & herb seasoning
Directions
- Warm the milk and mix with honey, salt, and yeast. Let sit for 5 minutes.
- Add butter and garlic & herb seasoning.
- Gradually add bread flour and knead until smooth.
- Let dough rise for 1-1.5 hours.
- Punch down dough, shape into rolls, and let rise for 30-45 minutes.
- Preheat oven to 350°F (175°C).
- Bake for 18-22 minutes until golden brown.
- Brush with garlic butter topping.
- Serve and enjoy!
Conclusion
These Garlic Herb Rolls are a delightful addition to any meal and a great way to elevate your cooking with minimal effort. Whether you’re serving them with a hearty soup, pasta, or enjoying them on their own, they are sure to be a hit. The combination of fluffy bread with the savory garlic and herb seasoning is a flavor sensation you won’t want to miss. So, roll up your sleeves, get baking, and enjoy these perfect rolls fresh out of the oven!