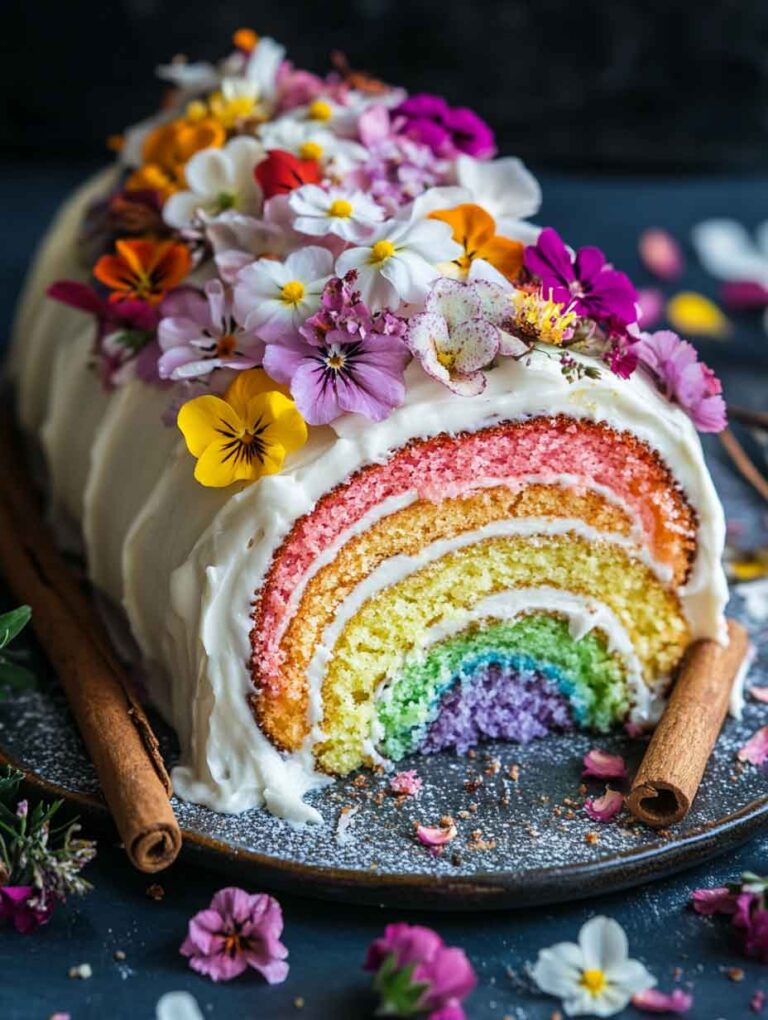
Festive Tree Cake
I love baking cakes that look as fun as they taste. This festive tree cake is bright, colorful, and perfect for the holiday table. It makes everyone smile the moment they see it.
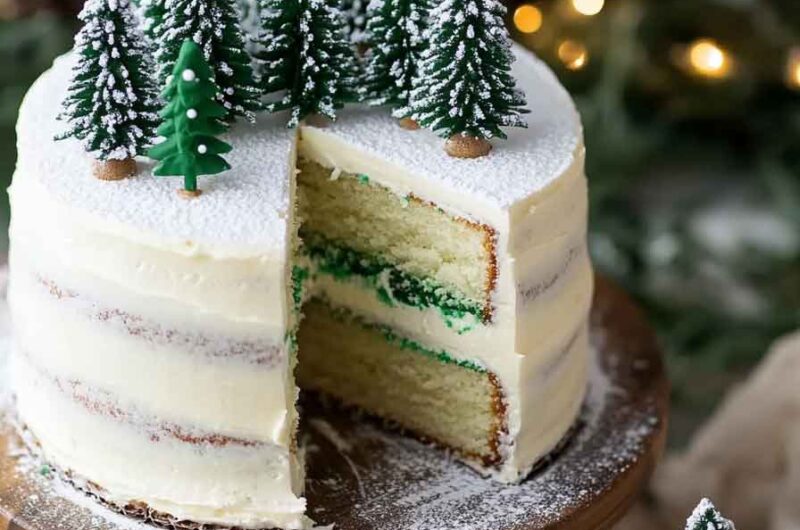
The cake is soft and sweet, and the frosting makes it extra special. I like how the tree shape feels so cheerful. It’s simple but looks like a holiday centerpiece.
My family always gets excited when I bring this out. It’s great for parties, gifts, or just making a December night feel magical. And the best part is anyone can make it.
So, let’s bake this festive tree cake together. You’ll see how easy it is to decorate. And when it’s done, you’ll have a cake that’s ready to shine at any holiday gathering.

Why You’ll Love This Recipe
- Visually Stunning: This festive tree-shaped cake will surely be the star of your holiday celebrations.
- Flavorful Layers: Soft, moist vanilla cake combined with the sweet, buttery frosting is a dream come true.
- Customizable Decorations: You can decorate this cake however you like, from adding colorful sprinkles to putting a fun star-shaped cookie on top.
- Fun for the Whole Family: This cake is a great project to do with the kids or to bake and surprise the family with!
- Perfect for Special Occasions: Whether it’s Christmas, New Year’s, or any holiday party, this cake will make any event feel extra special.
Required Kitchen Tools
Before we dive into the recipe, let’s gather the necessary tools for this holiday masterpiece.
- Three 8-inch Round Cake Pans: These pans are perfect for baking the layers that will form the tree.
- Parchment Paper: Helps prevent sticking and makes removing the cakes easy.
- Mixing Bowls: For mixing the dry ingredients, wet ingredients, and frosting.
- Electric Mixer: An electric hand mixer or stand mixer is best for getting the batter light and fluffy.
- Wire Racks: These are essential for cooling your cakes to prevent them from becoming soggy.
- Spatula: You’ll need this to spread the frosting evenly on each layer.
- Star-Shaped Cookie Cutter (optional): To create the star-shaped cookie that will serve as the topper.
Ingredients
Here’s what you’ll need to create this beautiful holiday dessert:
For the Vanilla Cake:
- 2 ½ cups all-purpose flour
- 2 ½ teaspoons baking powder
- ½ teaspoon salt
- 1 cup unsalted butter, room temperature
- 1 ¾ cups granulated sugar
- 4 large eggs
- 1 teaspoon vanilla extract
- 1 cup milk
For the Green Buttercream Frosting:
- 3 cups buttercream frosting (store-bought or homemade)
- Green gel food coloring
- Assorted sprinkles (optional, for decoration)
- Star-shaped cookie (optional, for the tree topper)
Variations for the Festive Tree Cake
While the recipe above creates a gorgeous classic tree cake, feel free to get creative with the design and flavors! Here are some variations you can try:
- Flavor Variations: Switch up the flavor of your cake by adding citrus zest, cinnamon, or even almond extract to your batter for a festive twist.
- Frosting Options: If you want a richer flavor, try adding cream cheese to your buttercream frosting or use a chocolate frosting to make a “chocolate tree.”
- Decoration Variations: Instead of using sprinkles, try decorating your cake with edible glitter, mini chocolate chips, or crushed candy canes for added texture and flavor.
- Star-Topped Cake: For an extra touch of flair, top your tree with a star-shaped sugar cookie or a star-shaped fondant decoration.
- Color Combinations: While green is the go-to color for a tree, you could also create a pink or blue holiday tree cake if you’re aiming for a more whimsical look.
Step-by-Step Instructions
Creating a festive tree cake may sound like a big task, but with this step-by-step guide, it’s manageable and fun! Let’s get started.
Step 1: Prepare Your Cake Pans
Start by preparing your cake pans. Preheat your oven to 350°F (175°C). Next, line the bottom of your three 8-inch round cake pans with parchment paper and grease the sides with butter or cooking spray. This will help your cakes come out of the pans easily once baked.
Step 2: Mix the Dry Ingredients
In a medium mixing bowl, sift together the all-purpose flour, baking powder, and salt. This step ensures that the dry ingredients are evenly mixed and that there are no lumps. Set aside.
Step 3: Cream the Butter and Sugar
In a large mixing bowl, use your electric mixer to cream together the unsalted butter and granulated sugar. Beat on medium speed for about 2-3 minutes until the mixture is light and fluffy.
Step 4: Add the Eggs and Vanilla Extract
Add the eggs, one at a time, to the butter-sugar mixture, mixing well after each addition. Once all the eggs are incorporated, add the vanilla extract and mix until smooth.
Step 5: Incorporate the Dry Ingredients and Milk
Add the dry ingredients to the wet mixture in batches, alternating with the milk. Start and end with the dry ingredients. Mix until just combined after each addition to avoid over-mixing.
Step 6: Bake the Cakes
Divide the cake batter evenly between the three prepared cake pans. Use a spatula to smooth the top of each layer. Bake for 25-30 minutes, or until a toothpick inserted into the center comes out clean. Allow the cakes to cool in their pans for about 10 minutes before transferring them to wire racks to cool completely.
Step 7: Make the Green Buttercream Frosting
While the cakes are cooling, it’s time to prepare the frosting. If you’re using store-bought buttercream, simply add a few drops of green gel food coloring and mix until you get a vibrant green shade. If you’re making homemade buttercream, start with 1 cup of unsalted butter, beat until creamy, and then gradually add powdered sugar, vanilla extract, and a little milk until you achieve a smooth, spreadable frosting. Add green gel food coloring and mix to your desired color.
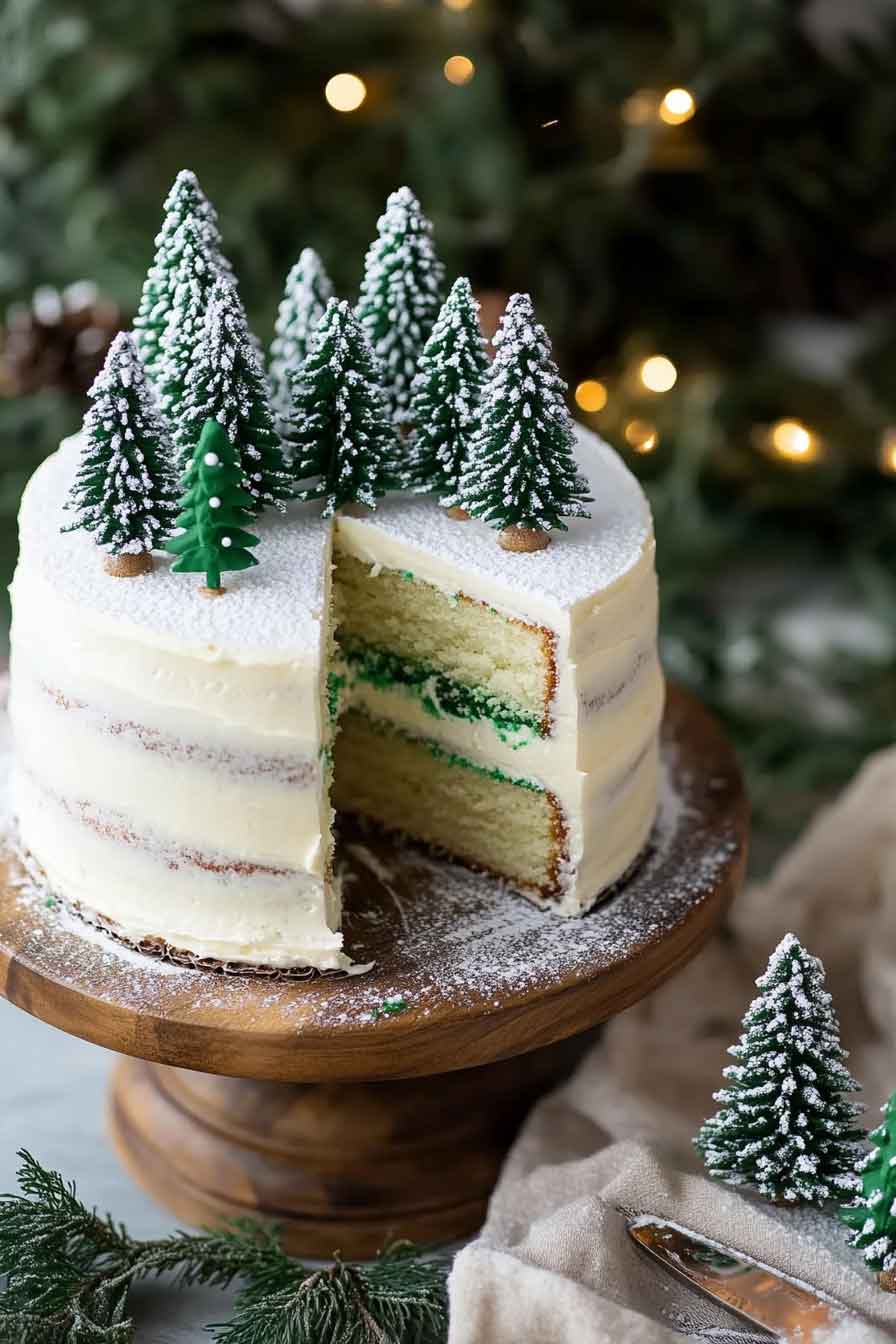
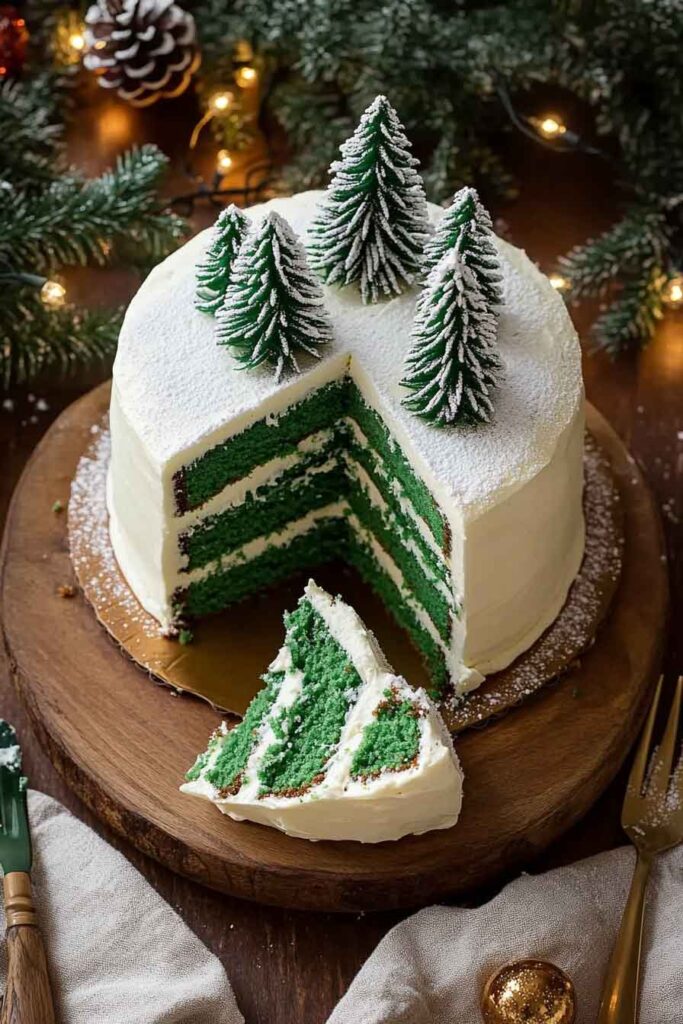
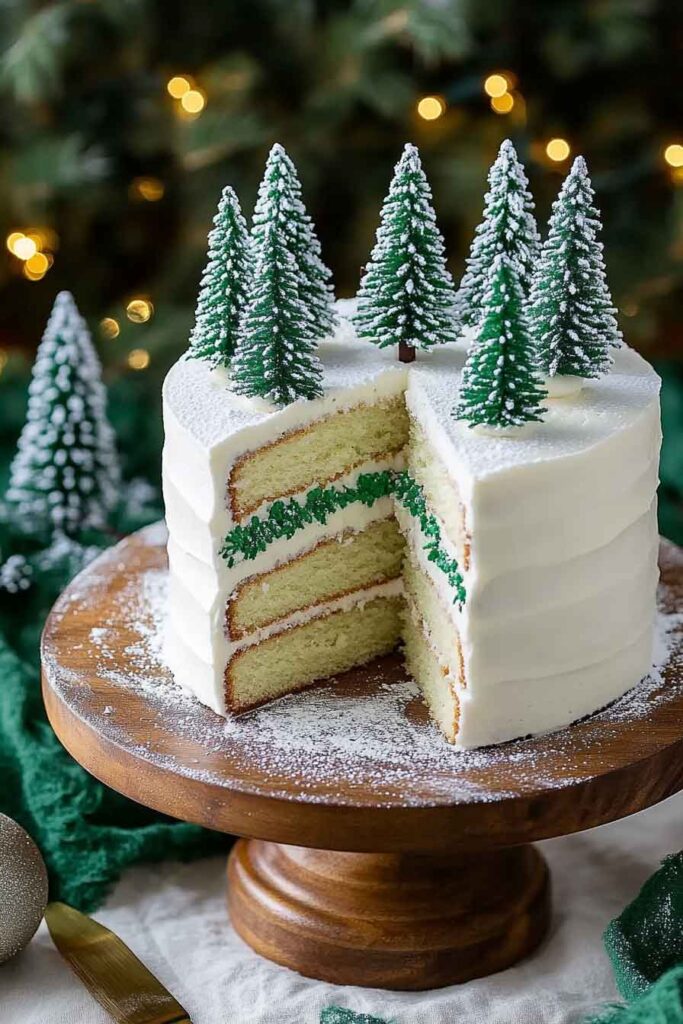
Step 8: Assemble the Tree Cake
Once your cakes have completely cooled, it’s time to assemble your festive tree. Start by placing the first layer of cake on a cake board or serving platter. Spread a generous amount of green frosting over the top.
For the second layer, cut it into a slightly smaller circle to create a layered, tree-shaped effect. Repeat with the third layer, cutting it slightly smaller than the second. As you stack the layers, each one will get smaller, creating the cone shape of a tree.
Step 9: Frost the Cake
Once all three layers are stacked, spread a thin layer of frosting over the entire cake to seal in any crumbs. This is known as a crumb coat. Chill the cake for about 30 minutes in the fridge to firm up the crumb coat.
After the crumb coat has set, apply the final coat of green buttercream frosting, smoothing it out with a spatula or offset spatula. Make sure to cover the entire cake, shaping it to look like a tree.
Step 10: Decorate the Cake
Now for the fun part! Use assorted sprinkles to decorate your tree cake. You can scatter them around the base for a “snowy” look or place them in patterns to mimic ornaments on the tree. If you’ve made a star-shaped cookie, place it on top of the cake to finish off the tree.
Step 11: Chill and Serve
Place the completed cake in the fridge for another 15-20 minutes to allow the frosting to set before slicing and serving. Once it’s ready, slice and enjoy the festive flavors and textures!

Serving Suggestions
The Festive Tree Cake is not only a treat for the eyes but also for the taste buds. It’s perfect for holiday parties, family gatherings, or as a centerpiece on your holiday dessert table. You can serve it with:
- A cup of hot cocoa or eggnog for a cozy holiday drink pairing.
- A scoop of vanilla ice cream on the side for a creamy, refreshing contrast to the rich cake.
- Fruit compote or a berry sauce to add a burst of flavor and color.
Storing the Festive Tree Cake
- Leftovers: If you have leftovers, store them in an airtight container in the refrigerator for up to 3 days. To prevent the frosting from getting too hard, you may want to wrap the cake in plastic wrap before storing.
- Freezing: If you want to make the cake ahead of time, you can freeze the individual cake layers. Wrap each layer tightly in plastic wrap and freeze for up to 3 months. Thaw the layers at room temperature before frosting and assembling the cake.
Nutritional Information (per serving)
| Nutrient | Amount |
|---|---|
| Calories | 400-450 |
| Total Fat | 20g |
| Saturated Fat | 12g |
| Cholesterol | 70mg |
| Sodium | 150mg |
| Total Carbohydrates | 55g |
| Fiber | 1g |
| Sugars | 35g |
| Protein | 3g |
Conclusion
If you’re looking to bring some extra magic to your holiday gatherings, the Festive Tree Cake is the ultimate dessert to make a lasting impression. With its moist vanilla cake layers, sweet green buttercream frosting, and festive decorations, this cake is as delicious as it is beautiful. Whether you’re a baking pro or a beginner, this recipe is sure to be a hit and leave everyone eagerly awaiting the next slice.
Festive Tree Cake
Course: Uncategorized12
servings25
minutes40
minutes400-450
kcal1
hourIngredients
2 ½ cups all-purpose flour
2 ½ tsp baking powder
½ tsp baking soda
½ tsp salt
1 cup unsalted butter, softened
1 ¾ cups granulated sugar
4 large eggs
2 tsp vanilla extract
1 cup whole milk
- Frosting & Decoration:
2 cups unsalted butter, softened
6 cups powdered sugar
2 tsp vanilla extract
4–5 tbsp heavy cream
Green gel food coloring
Assorted sprinkles, candy stars, or edible pearls
Directions
- Preheat oven to 350°F (175°C). Grease and line a 9×13-inch pan or tree-shaped cake pan.
- In a bowl, whisk flour, baking powder, baking soda, and salt
- In another bowl, beat butter and sugar until light and fluffy. Add eggs one at a time, mixing well. Stir in vanilla.
- Gradually add dry ingredients, alternating with milk, until batter is smooth.
- Pour into pan and bake 35–40 minutes, or until a toothpick comes out clean. Cool completely.
- For frosting, beat butter until creamy. Add powdered sugar gradually, then vanilla and cream. Adjust consistency as needed.
- Tint frosting green with food coloring. Spread evenly over cooled cake.
- Decorate with sprinkles, candy stars, and pearls to look like a Christmas tree