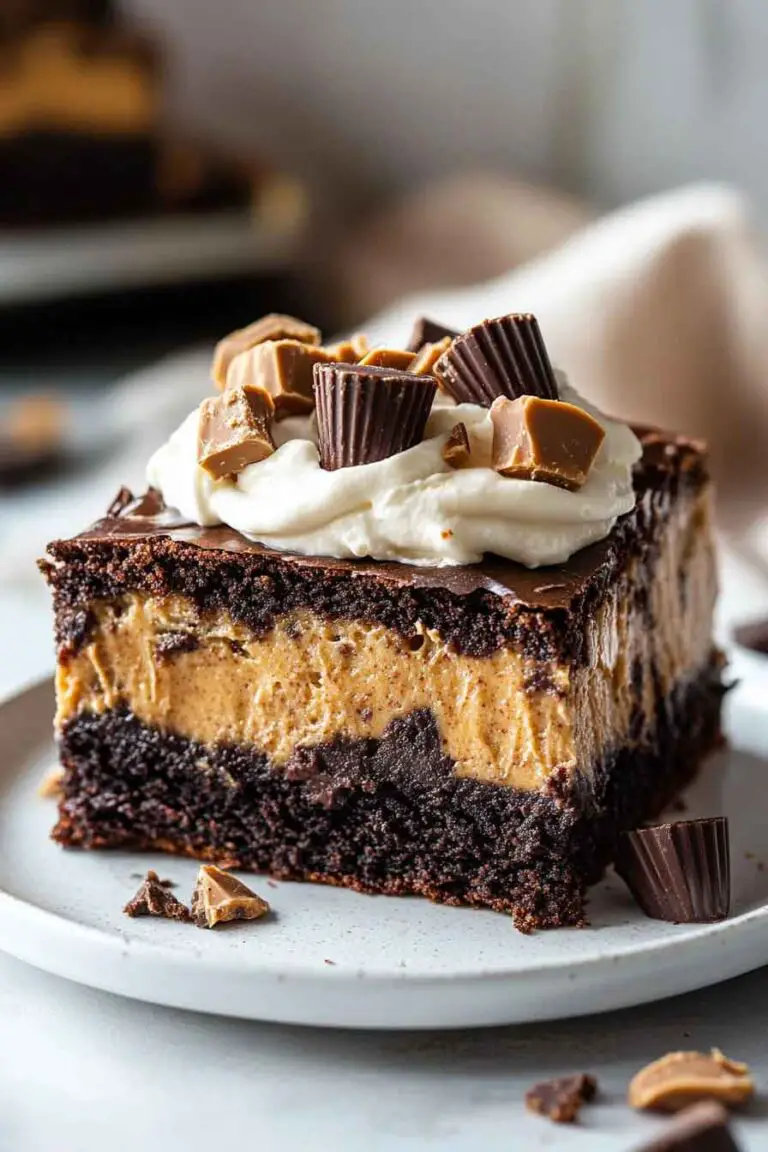
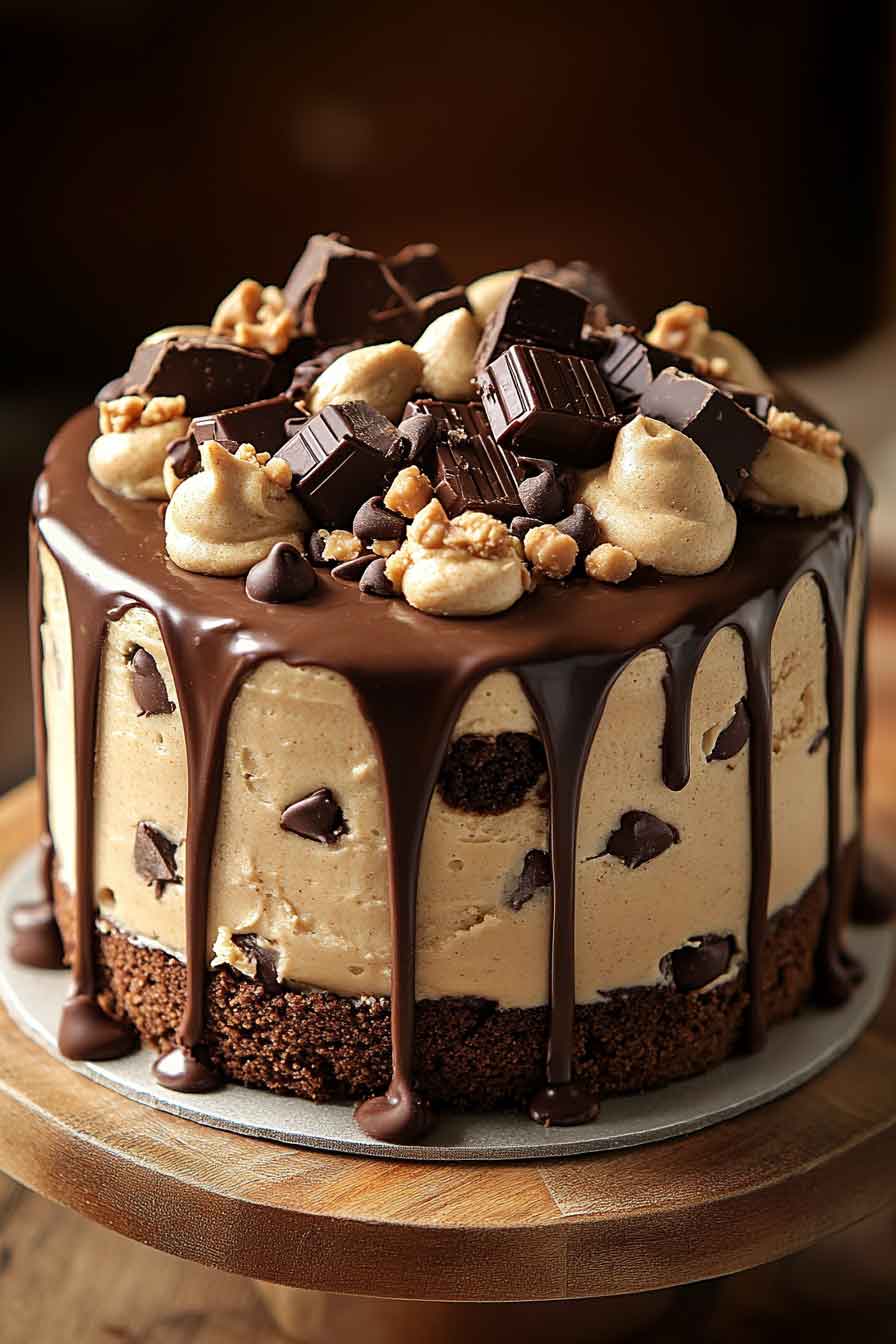
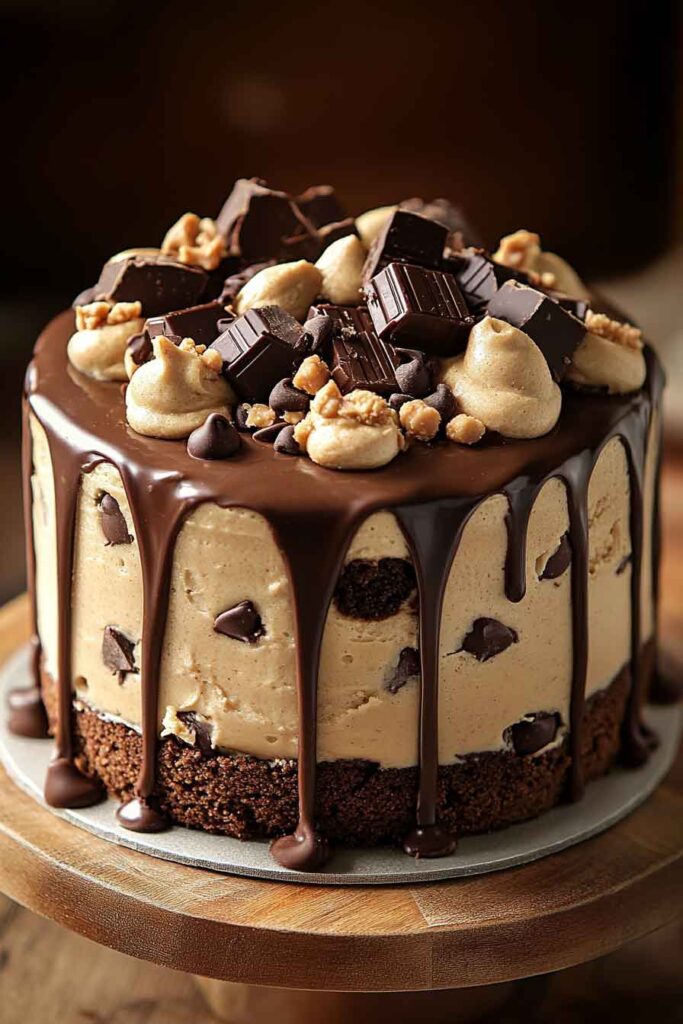
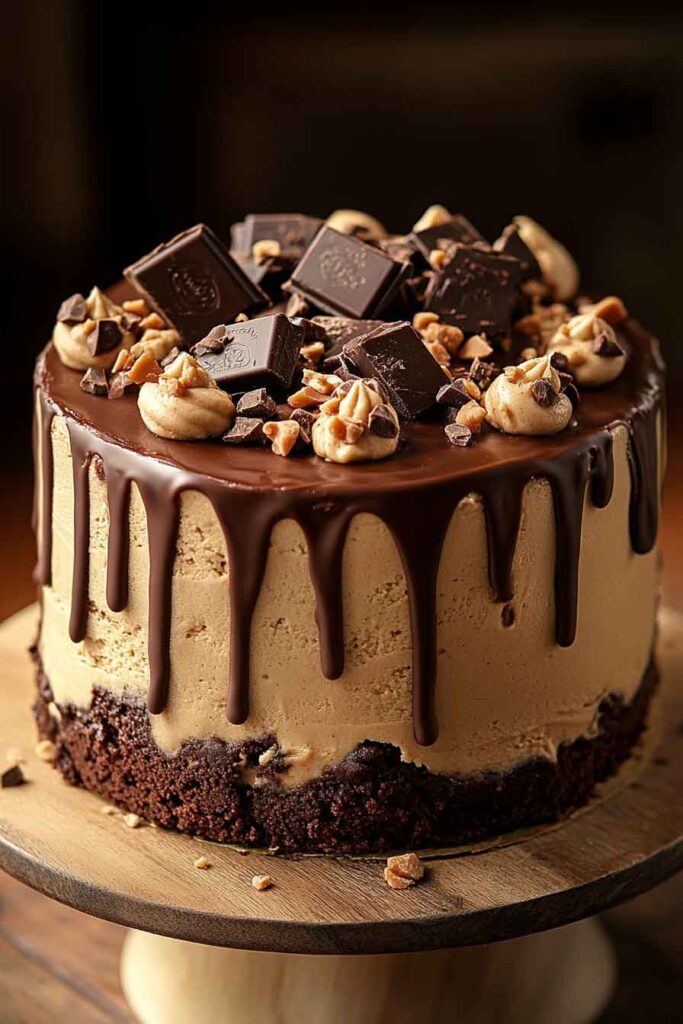
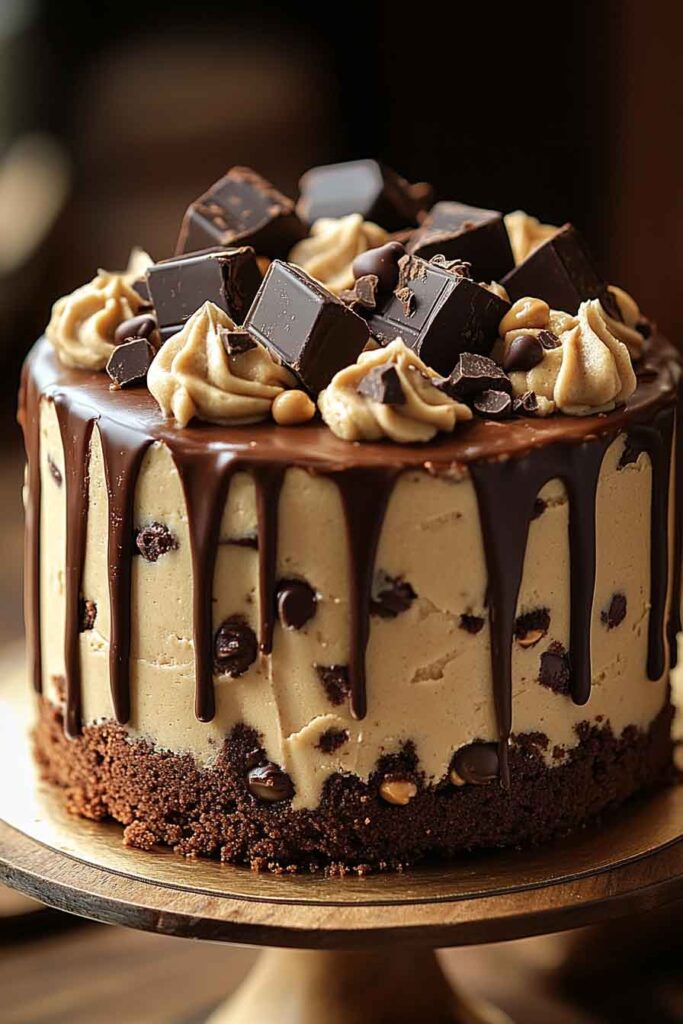
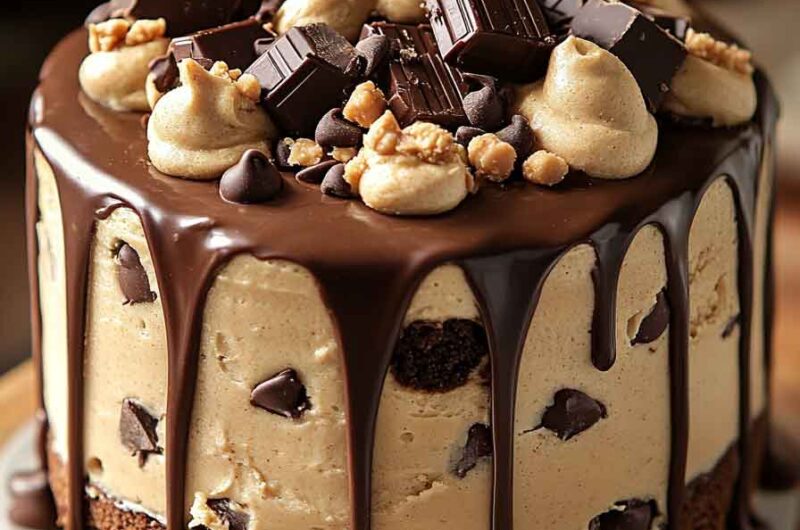
Decadent Brownie and Peanut Butter Cookie Dough Cake
Okay, let’s be real—this one’s for the true dessert lovers. It’s a brownie. It’s cookie dough. It’s cake. Yep, all in one.
The first time I made it, I couldn’t believe how rich and gooey it turned out. That peanut butter cookie dough layer? Oh wow, it melts in your mouth.
If you love chocolate and peanut butter together, this is your dream cake. It’s sweet, soft, and totally over-the-top in the best way.
So yeah, let’s get into it. You’re gonna want a big glass of milk for this one.
Why You’ll Love This Recipe
- Decadent Layers: Fudgy brownies meet creamy, safe-to-eat peanut butter cookie dough.
- No Raw Eggs or Flour Issues: The cookie dough is 100% safe to eat—no baking required!
- Perfect Make-Ahead Dessert: Prepare it in advance and chill until ready to serve.
- Easy but Impressive: No complicated techniques—just simple layering for an eye-catching dessert.
- Chocolate-Peanut Butter Heaven: The classic flavor pairing is taken to the next level!
Required Kitchen Tools
To make this layered delight, you’ll need:
- 9-inch round cake pan or springform pan – For shaping the cake layers.
- Mixing bowls – One for brownies, one for cookie dough.
- Whisk & Spatula – For mixing the batter and dough smoothly.
- Electric Mixer (Optional) – Helps make the cookie dough extra creamy.
- Measuring Cups & Spoons – Accuracy is key!
- Parchment Paper – For easy brownie removal.
- Knife & Offset Spatula – For layering and smoothing the cake.
Ingredients
For the Brownie Layer:
- Dark Chocolate (Chopped): Deep, rich cocoa flavor for fudgy brownies.
- Unsalted Butter: Adds richness and moisture.
- Granulated Sugar: Sweetens and creates the perfect texture.
- Large Eggs: Provide structure and chewiness.
- All-Purpose Flour: The foundation of the brownies.
- Unsweetened Cocoa Powder: Intensifies the chocolate flavor.
- Salt: Enhances all the flavors.
For the Peanut Butter Cookie Dough Layer:
- Unsalted Butter (Softened): Makes the dough creamy.
- Brown Sugar: Adds caramel-like depth to the cookie dough.
- Granulated Sugar: Provides additional sweetness.
- Milk: Keeps the dough soft and smooth.
- Vanilla Extract: Enhances the overall flavor.
- All-Purpose Flour (Heat-Treated): Ensures safe-to-eat cookie dough.
- Salt: Balances the sweetness.
- Creamy Peanut Butter: The star of the show!
- Mini Chocolate Chips: Add texture and extra chocolate goodness.
Variations for this Cake
- Chocolate Lover’s Dream: Add melted chocolate into the cookie dough for an extra fudge-like texture.
- Nutty Crunch: Stir in chopped peanuts or toffee bits for a crunchy contrast.
- Salted Caramel Swirl: Drizzle salted caramel between layers for a sweet-salty balance.
- Gluten-Free Option: Use a gluten-free brownie mix and almond flour in the cookie dough.
- Extra Peanut Butter: Swirl peanut butter into the brownie batter for double the peanutty goodness.
Step-by-Step Instructions
1. Prepare the Brownie Layer
- Preheat the oven to 350°F (175°C) and line a 9-inch round cake pan with parchment paper.
- In a microwave-safe bowl, melt the dark chocolate and butter together in 30-second intervals, stirring after each until smooth.
- Whisk in the granulated sugar until fully combined.
- Add the eggs, one at a time, whisking well after each addition.
- Sift in the flour, cocoa powder, and salt, folding gently until no streaks remain.
- Pour the batter into the prepared pan and bake for 25–30 minutes, or until a toothpick inserted comes out with moist crumbs.
- Let the brownie cool completely before moving to the next step.
Step-by-Step Instructions (Continued)
2. Prepare the Peanut Butter Cookie Dough Layer
This layer is completely egg-free and uses heat-treated flour to make it safe to eat raw!
- Heat-Treat the Flour:
- Spread the all-purpose flour on a baking sheet and bake at 350°F (175°C) for 5 minutes to eliminate any bacteria.
- Let the flour cool completely before using.
- Cream the Butter and Sugars:
- In a large bowl, use a hand or stand mixer to beat the softened butter, brown sugar, and granulated sugar until light and fluffy (about 2–3 minutes).
- Add the Wet Ingredients:
- Mix in the vanilla extract and milk, beating until fully combined.
- Incorporate the Dry Ingredients:
- Gradually add the heat-treated flour and salt, mixing on low speed until fully combined.
- Mix in the Peanut Butter:
- Add the creamy peanut butter and continue mixing until smooth and well incorporated.
- Fold in the Chocolate Chips:
- Using a spatula, gently fold in the mini chocolate chips.
- Chill the Dough:
- Transfer the cookie dough to a bowl, cover, and refrigerate for 15–20 minutes. This helps firm up the dough and makes it easier to spread later.
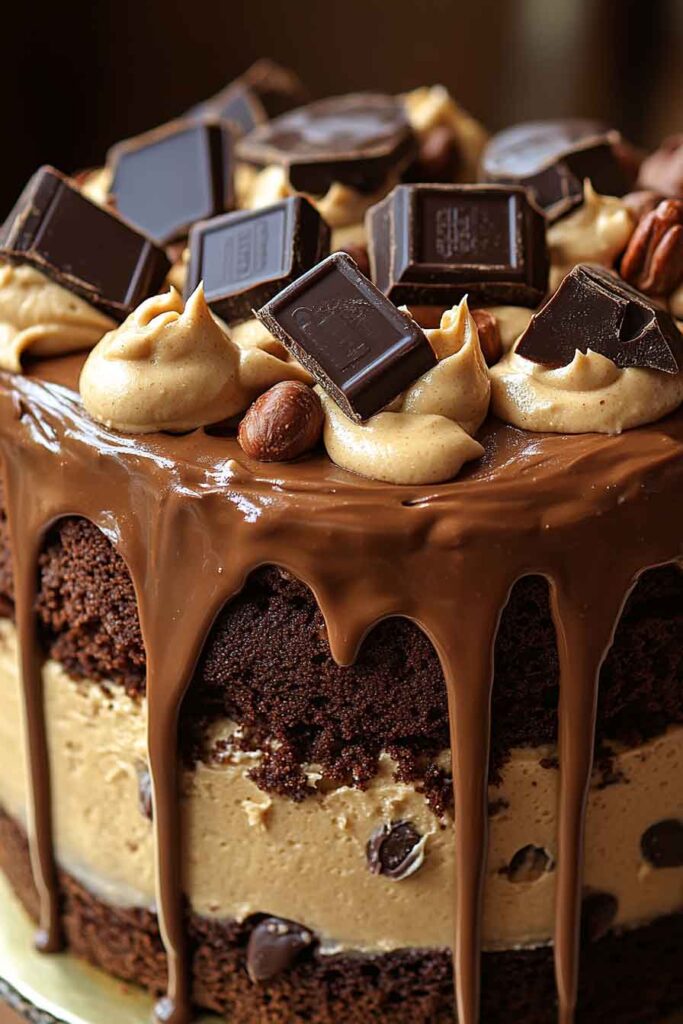
3. Assemble the Cake
Now that both layers are ready, it’s time to assemble this masterpiece!
- Remove the Brownie from the Pan:
- If you used a springform pan, simply release the brownie layer.
- If using a regular cake pan, run a knife around the edges and carefully lift it out using parchment paper.
- Spread the Peanut Butter Cookie Dough Layer:
- Place the brownie layer on a serving plate or cake stand.
- Using an offset spatula or butter knife, evenly spread the cookie dough mixture over the cooled brownie.
- Smooth out the top for a clean finish.
- Chill for Easy Slicing:
- Cover the cake with plastic wrap and refrigerate for at least 1 hour (or up to 24 hours) to allow the layers to set.
Serving and Decoration
This cake is rich, indulgent, and beautifully layered, making it a perfect centerpiece for any dessert table. Here are some fun ways to serve and decorate it:
How to Serve:
- Slice and Enjoy: This cake is best served slightly chilled for clean, even slices. Use a sharp knife warmed under hot water to cut through smoothly.
- With Ice Cream: Serve slices with a scoop of vanilla, chocolate, or peanut butter ice cream for an extra treat.
- Drizzle Toppings: Enhance each slice with a drizzle of melted chocolate, caramel, or extra peanut butter.
- Whipped Cream: A dollop of homemade whipped cream or a light dusting of powdered sugar adds an elegant touch.
- Chopped Peanuts or Chocolate Shavings: Sprinkle on top for added crunch and decoration.
Storing Your Cake
Refrigeration:
- Store the assembled cake in an airtight container in the fridge for up to 5 days.
- Keep it covered to prevent it from absorbing other flavors.
Freezing Instructions:
- Whole Cake: Wrap the fully assembled cake tightly in plastic wrap and then in aluminum foil. Freeze for up to 3 months.
- Individual Slices: Cut the cake into slices, wrap each slice in plastic wrap, and store them in a freezer-safe bag for grab-and-go treats.
- Thawing: Transfer to the fridge overnight or leave at room temperature for 30 minutes before serving.
Nutrition Information
| Serving Size | Calories | Carbs | Fat | Protein | Sugar |
|---|---|---|---|---|---|
| 1 Slice (1/10 of cake) | ~450 | 48g | 24g | 8g | 35g |
Note: Nutrition values are approximate and depend on the exact ingredients used.
Decadent Brownie and Peanut Butter Cookie Dough Cake
Course: Uncategorized10
servings30
minutes25
minutes~450
kcal1
hoursIngredients
- For the Brownie Layer:
6 oz dark chocolate, chopped
½ cup unsalted butter
¾ cup granulated sugar
2 large eggs
¾ cup all-purpose flour
¼ cup unsweetened cocoa powder
¼ tsp salt
- For the Peanut Butter Cookie Dough Layer:
½ cup unsalted butter, softened
½ cup brown sugar
¼ cup granulated sugar
2 tbsp milk
1 tsp vanilla extract
1 ¼ cups all-purpose flour, heat-treated
¼ tsp salt
½ cup creamy peanut butter
½ cup mini chocolate chips
Directions
- Prepare the Brownie Layer:
- Preheat oven to 350°F (175°C) and line a 9-inch round cake pan with parchment paper.
- In a microwave-safe bowl, melt chocolate and butter in 30-second intervals, stirring until smooth.
- Whisk in sugar, then add eggs, whisking until fully combined.
- Sift in flour, cocoa powder, and salt, folding gently.
- Pour into the pan and bake for 25–30 minutes or until a toothpick comes out with moist crumbs.
- Cool completely before assembling.
- Make the Peanut Butter Cookie Dough Layer:
- Heat-treat the flour: Spread flour on a baking sheet and bake at 350°F (175°C) for 5 minutes. Let cool.
- Cream butter, brown sugar, and granulated sugar until light and fluffy (~2 minutes).
- Mix in vanilla extract and milk.
- Gradually add heat-treated flour and salt, mixing on low.
- Blend in peanut butter, then fold in mini chocolate chips.
- Chill dough for 15–20 minutes before assembling.
- Assemble the Cake:
- Remove the brownie layer from the pan and place it on a serving plate.
- Evenly spread the peanut butter cookie dough over the brownie layer using a spatula.
- Cover and refrigerate for at least 1 hour before slicing.
- Serve & Enjoy:
- Slice with a sharp knife warmed under hot water for smooth cuts.
- Serve chilled or at room temperature with whipped cream, melted chocolate, or ice cream.
Frequently Asked Questions
1. Is the cookie dough safe to eat raw?
Yes! This recipe uses heat-treated flour and has no raw eggs, making it completely safe.
2. Can I bake this as a traditional cake?
The brownie layer is baked, but the cookie dough layer is meant to be enjoyed raw. However, you can spread the cookie dough on top of the warm brownie for a melty effect.
3. Can I make this ahead of time?
Absolutely! This cake keeps well in the fridge for up to 5 days or in the freezer for 3 months.
4. What’s the best way to store leftovers?
Keep leftovers covered and refrigerated. If frozen, thaw at room temperature for 30 minutes before serving.
Conclusion
This Decadent Brownie and Peanut Butter Cookie Dough Cake is the ultimate treat for chocolate and peanut butter lovers. With a rich, fudgy brownie base and a creamy, safe-to-eat peanut butter cookie dough layer, this dessert is as indulgent as it gets.
It’s the perfect no-fuss, make-ahead dessert for birthdays, special occasions, or just a weekend indulgence. Plus, it’s easy to customize with extra toppings, mix-ins, or drizzles of chocolate and caramel.