

You won’t believe how good these Crispy Lemon and Meringue Delights taste! They’re crispy and light, with a pop of lemon. I just had to share them with you.
I love the sweet crunch of the meringue with the zingy lemon. It feels fancy, but it’s really so easy to make. These treats always make me smile.
You’ll want to make them too, trust me. They’re perfect for snacks or sharing with friends. Plus, they look so pretty!
Let’s jump right in and make these Crispy Lemon and Meringue Delights. Get your ingredients ready, and let’s bake together!

Why You’ll Love This Recipe
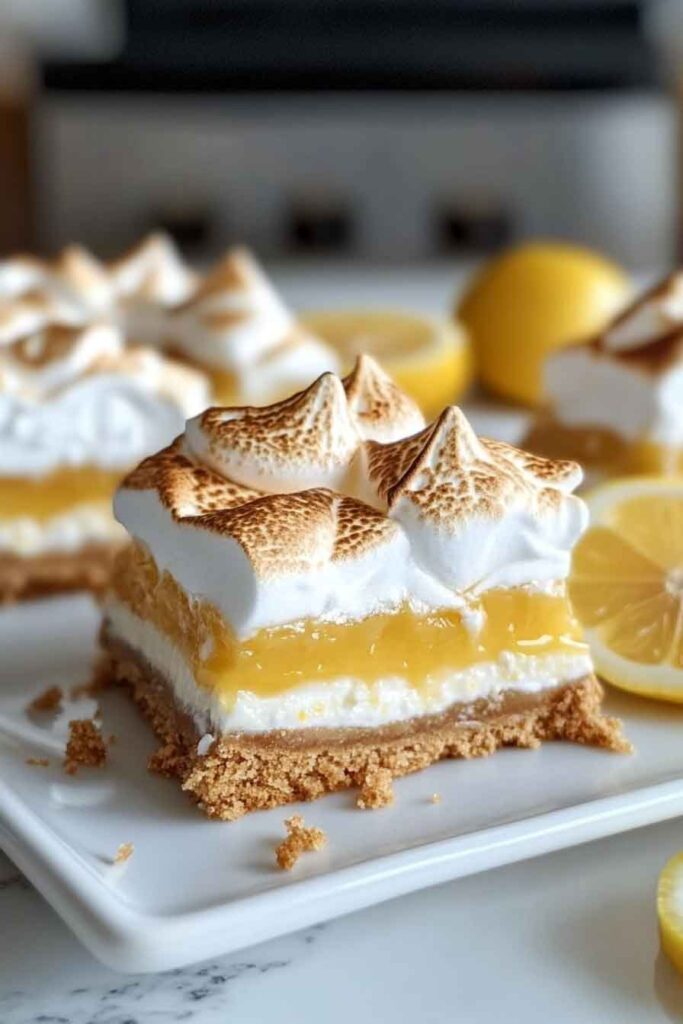
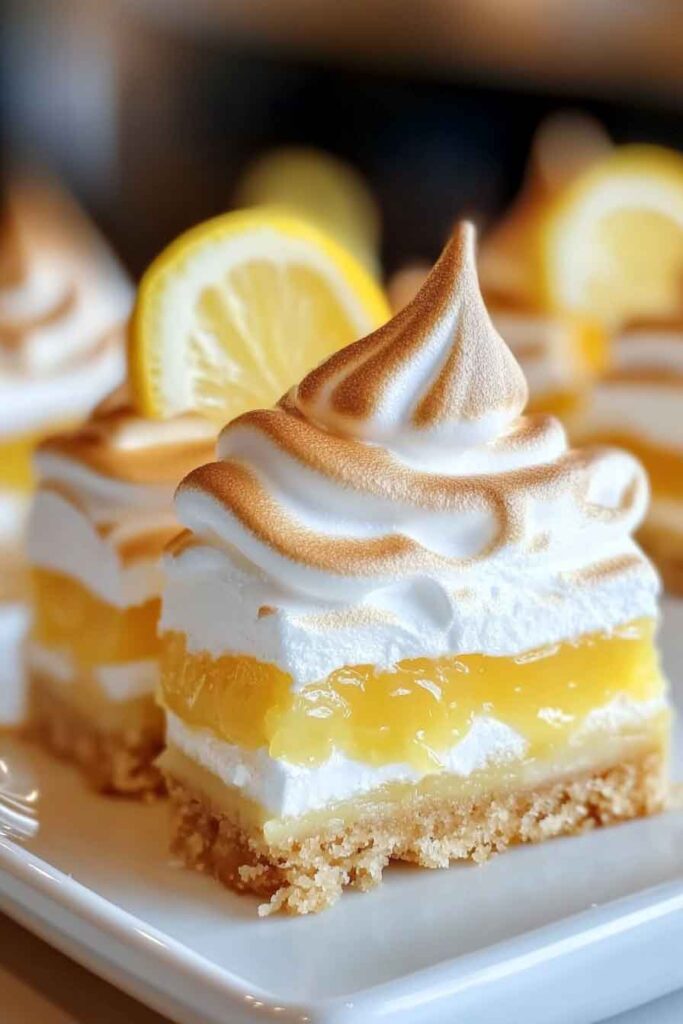
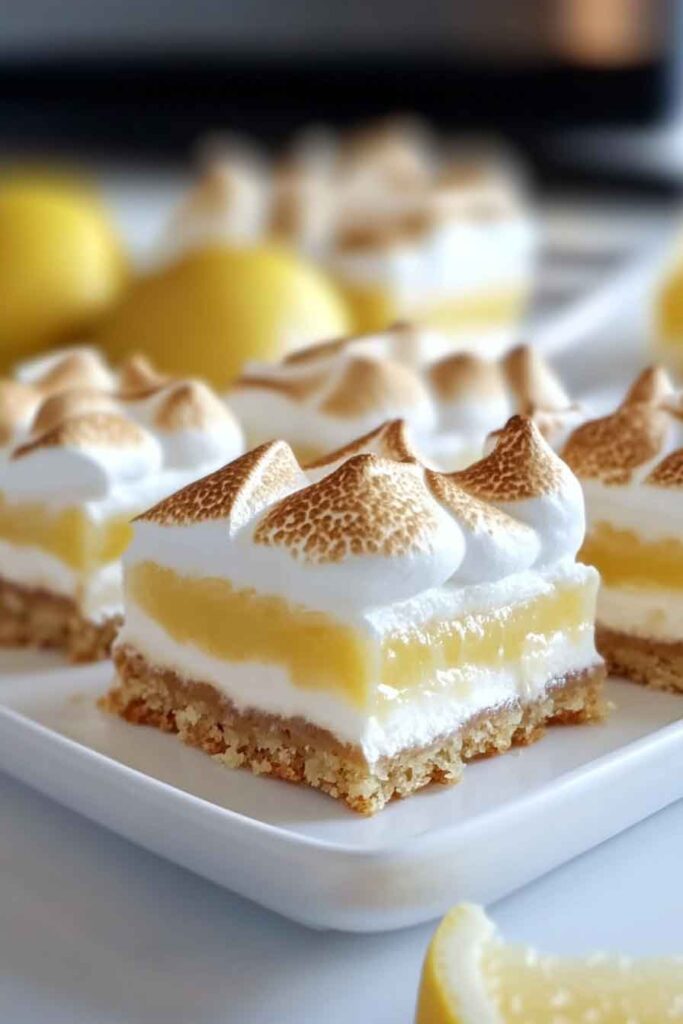
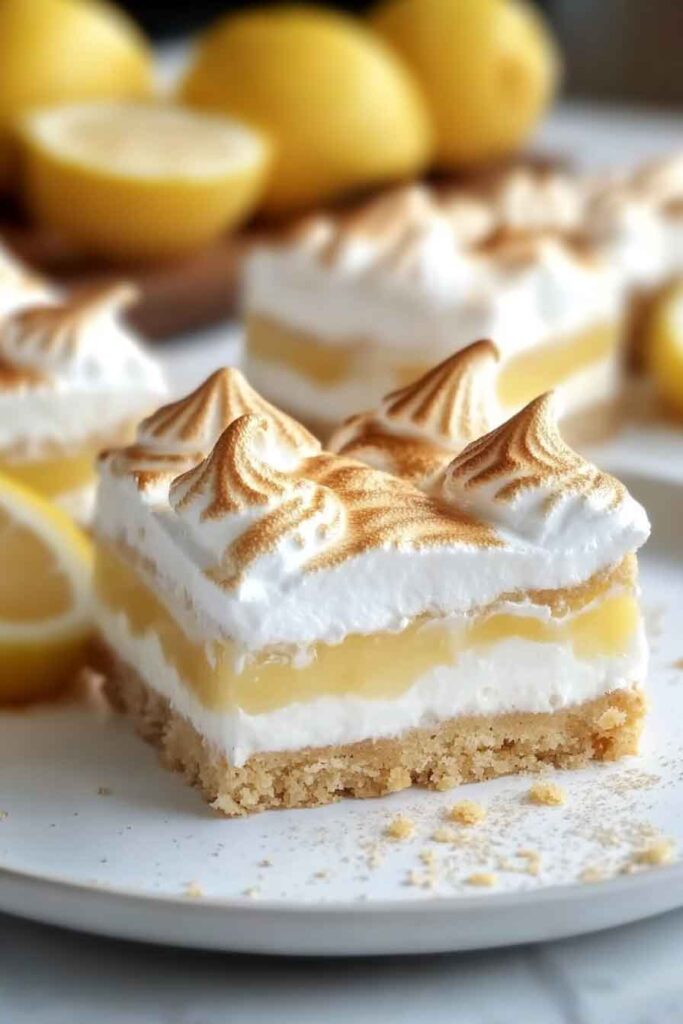
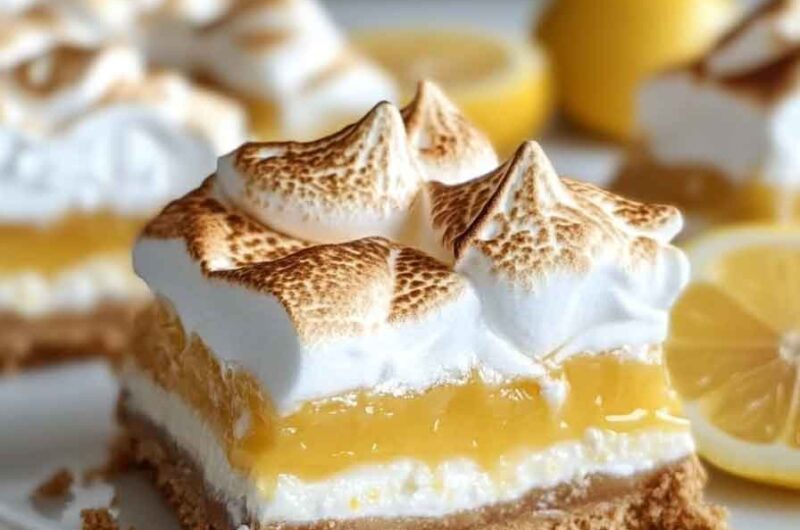
Reader Favorite: Imagine the crispy shell giving way to the smooth, tangy lemon curd and fluffy meringue. Your taste buds will thank you!
Crispy and Crunchy: The pie crust forms a perfectly golden shell that adds the ideal crunch to balance the creamy filling.
Light and Tangy: The lemon curd brings a zesty, refreshing bite while the meringue offers that airy sweetness we all crave in a dessert.
Quick and Easy: Although the recipe seems complex, it’s surprisingly easy to make! You’ll only need a few ingredients and steps to create these delights.
Make-Ahead Friendly: You can prepare the filling and the shells in advance, then assemble and bake just before serving.
Required Kitchen Tools
- Oven – To bake the pie crust shells to golden perfection.
- Pie Dish or Cookie Sheet – You’ll use this to bake the pie crust shells.
- Mixing Bowls – One for the lemon curd and another for the meringue.
- Electric Mixer – For whipping the meringue to a fluffy consistency.
- Pastry Brush – To apply the egg wash to the pie crusts.
- Rolling Pin – For rolling out the pie crust if necessary.
- Sifter – To dust the powdered sugar over the finished delights.
Ingredients
For the Cannoli Shells:
- Pie Crusts: I recommend using Pillsbury pie crust for the most consistent, flaky results. You can find it in the refrigerated section of your grocery store.
- Egg (for egg wash): This helps the pie crust become golden brown and crispy.
- Water (for egg wash): You’ll combine this with the egg to create the perfect consistency for your wash.
For the Filling:
- Lemon Curd: You can buy lemon curd from the store or make your own from scratch. It adds that perfect tangy flavor that pairs beautifully with the meringue.
- Marshmallow Fluff: This is going to give the filling its light, sweet, and fluffy texture. It’s the perfect contrast to the tart lemon curd.
- Frozen Whipped Cream (thawed): Whipped cream adds another layer of fluffiness to the filling. Thaw it first to ensure it incorporates well.
- Fresh Lemon Zest (optional): If you want an extra burst of lemon flavor, adding zest to the filling will really enhance the overall taste. You can also use it as a garnish.
For the Topping:
- Powdered Sugar: To lightly dust the finished delights and give them that irresistible sweet finish.
Variations for Crispy Lemon and Meringue Delights
- Add a Berry Twist: Incorporate mashed raspberries or strawberries into the filling for a fruity twist that complements the lemon.
- Use Homemade Pie Crust: If you prefer making your own pie crust, feel free to do so. You’ll need about 2 pie crusts, rolled out and cut into circles to fit your baking mold.
- Lemon Meringue with a Crunch: Try adding crushed graham crackers to the bottom of the pie crust for added texture and flavor.
- Flavored Meringue: For a unique twist, try flavoring your meringue with a hint of vanilla or almond extract for added depth.
- Mini Delights: Instead of making one large dish, you can turn these into mini crispy lemon meringue bites by using a muffin tin or mini tart pans.
Step-by-Step Instructions
1. Preheat the Oven and Prepare the Pie Crusts
Before we dive into the fun part, it’s important to get your oven preheated and your pie crusts ready to go.
- Preheat your oven to 375°F (190°C).
- Roll out the pie crusts on a lightly floured surface if needed, and use a round cutter or a glass to cut out individual circles that will fit into your muffin tin or tart pan. If you don’t have a cutter, a simple glass with a diameter slightly larger than your muffin cups will work perfectly.
- Place the circles of pie crust into the muffin tin or tart pans and press down gently to fit. Use a fork to poke a few holes in the bottom of each crust to prevent them from puffing up while baking.
- Brush the crusts with an egg wash: Beat one egg with a tablespoon of water, then brush this mixture lightly over the top of the pie crusts to help them turn golden brown and crisp as they bake.
2. Bake the Pie Crusts
- Place your muffin tin or tart pan in the preheated oven and bake the pie crusts for about 10-12 minutes or until they are golden brown. Keep a close eye on them toward the end to avoid over-baking.
- Once they’re done, remove the pie crusts from the oven and set them aside to cool.
3. Make the Lemon Curd Filling
If you’re using store-bought lemon curd, you can skip this step and move on to the next part. However, if you’re making your own lemon curd, it’s really simple!
Ingredients for Homemade Lemon Curd:
- 1/2 cup fresh lemon juice (about 3-4 lemons)
- Zest of 2 lemons
- 3/4 cup granulated sugar
- 3 large egg yolks
- 4 tablespoons unsalted butter, cut into small pieces
Directions:
- Combine the lemon juice, zest, and sugar in a saucepan over medium heat. Stir occasionally until the sugar has dissolved completely.
- Whisk the egg yolks in a small bowl until they’re smooth. Gradually pour about 1/4 cup of the hot lemon mixture into the egg yolks while whisking constantly. This step is crucial to avoid scrambling the eggs.
- Slowly pour the egg yolk mixture back into the saucepan with the remaining lemon mixture. Stir continuously to prevent the eggs from cooking too quickly.
- Cook over low-medium heat, stirring constantly until the curd thickens and coats the back of a spoon (about 5-7 minutes).
- Once thickened, remove from the heat and add the butter, stirring until it’s fully incorporated.
- Let the curd cool for a few minutes. You can transfer it to a bowl and refrigerate it if you’re not using it right away. Just be sure to give it enough time to cool before using it in the meringue delights.
4. Whip the Meringue
Now, onto the meringue! This part creates that signature light and fluffy texture that pairs perfectly with the creamy lemon curd filling. The key to a good meringue is to whip the egg whites to stiff peaks, so be sure you’re paying close attention to the texture.
Ingredients for the Meringue:
- 3 large egg whites (be sure no yolk gets in)
- 1/4 teaspoon cream of tartar
- 1/2 cup granulated sugar
- 1/2 teaspoon vanilla extract (optional, for added flavor)
Directions:
- Whip the egg whites: Place the egg whites in a large, clean mixing bowl. Use an electric mixer to beat the egg whites on medium speed until soft peaks form. This means the egg whites should form soft, cloud-like peaks but shouldn’t hold their shape completely yet.
- Add the cream of tartar: This helps stabilize the meringue and ensures it will hold its shape during baking.
- Gradually add the sugar: With the mixer running, slowly add the sugar in small spoonfuls. Continue to beat the mixture on high speed until stiff peaks form. This means the egg whites should be glossy, smooth, and hold their shape when you lift the beaters.
- Add vanilla extract (optional): If you like, you can add a little vanilla extract for extra flavor, but this is totally optional. The meringue will already have a natural sweetness from the sugar.
Once your meringue is ready, it’s time to assemble the delights!

5. Assemble the Crispy Lemon and Meringue Delights
This is where the magic happens! Combining all the elements into the pie crusts will create a perfect balance of textures – the crispy shell, tangy lemon curd, and fluffy meringue will make every bite an unforgettable experience.
- Fill the pie crusts with lemon curd: Start by spooning a generous amount of cooled lemon curd into each baked pie crust. Make sure it’s spread evenly, filling each crust almost to the top. The curd should create a smooth, tangy base for the meringue to sit on.
- Top with the meringue: Spoon a dollop of whipped meringue on top of the lemon curd. Use the back of a spoon to gently spread it out to the edges of the crust, ensuring it covers the lemon curd completely. Try to make soft peaks with the meringue, creating an aesthetically pleasing texture that will brown beautifully in the oven.
- Bake the assembled delights: Place your filled and topped delights back in the oven at 350°F (175°C) for about 10-12 minutes. You want the meringue to turn golden brown and crisp. Keep an eye on them toward the end so that the meringue doesn’t over-brown or burn.
6. Let Cool and Dust with Powdered Sugar
After baking, remove your delights from the oven and let them cool for a few minutes. The meringue will settle as it cools, creating a beautiful, light texture. Once cooled, dust the tops of the delights lightly with powdered sugar. This not only adds a touch of sweetness but also gives your treats a pretty finishing touch.
7. Serve and Enjoy
Serve your Crispy Lemon and Meringue Delights chilled or at room temperature. You can garnish with a bit of extra lemon zest or a few fresh mint leaves if you want to elevate the presentation.
These delightful little treats will be the star of any dessert table. They’re perfect for parties, family gatherings, or just a special treat for yourself. The crisp shell, tangy lemon curd, and light-as-air meringue are a combination that’s hard to resist.
Storing Crispy Lemon and Meringue Delights
These treats are best enjoyed fresh, as the crispy shell and meringue are at their most perfect when served right after baking. However, if you have leftovers or want to make them ahead of time, here are some storage tips to keep them tasting amazing.
How to Store Leftovers:
- For the Pie Shells: If you’ve baked extra pie crusts that aren’t filled, store them in an airtight container at room temperature for up to 2 days. They’ll stay crisp and fresh.
- For the Assembled Delights: If you have assembled lemon curd and meringue delights left, store them in the fridge. Place them in an airtight container, making sure the meringue is not touching anything, as it can absorb moisture and lose its texture. They’ll keep for up to 2 days in the refrigerator.
- Reheating: Meringue doesn’t reheat well and may lose its fluffy texture. However, you can let them come to room temperature before serving, which might help revive the texture. Just be aware that the crispy shell may soften after refrigeration.
Can You Freeze Crispy Lemon and Meringue Delights?
Yes, you can freeze the assembled delights! To do so, place the delights on a baking sheet and freeze them individually. Once frozen solid, transfer them to an airtight container or freezer-safe bag. To serve, let them thaw in the fridge overnight. Just keep in mind that the meringue might lose some of its airy texture after freezing and thawing.
Serving Suggestions for Crispy Lemon and Meringue Delights
While these treats are delicious on their own, there are a few ways to elevate their presentation and flavor profile for special occasions.
Serve as Mini Desserts:
If you made mini versions of the delights (using a muffin tin or mini tart pans), they’re perfect for a dessert buffet or a tea party. Arrange them on a beautiful platter, maybe with some fresh fruit or edible flowers around them, to make a stunning visual statement.
Pair with Fresh Berries:
These crispy delights go wonderfully with fresh fruit like strawberries, raspberries, or blueberries. You can serve them on the side or even top each treat with a few fresh berries to add a burst of color and a fruity flavor contrast.
Add a Dollop of Whipped Cream:
For an extra indulgence, top each crispy lemon and meringue delight with a small spoonful of whipped cream. You can sweeten the whipped cream with a little sugar and vanilla extract or keep it simple with just a touch of powdered sugar.
With a Scoop of Sorbet:
Lemon meringue pairs exceptionally well with sorbet, especially citrus flavors like lemon or raspberry. The combination of cold, smooth sorbet and the tangy lemon curd and airy meringue creates a refreshing treat that’s perfect for warm weather.
Crispy Lemon and Meringue Delights FAQs
Can I Use Store-Bought Lemon Curd?
Absolutely! If you’re short on time, using store-bought lemon curd is a great shortcut. Look for a high-quality curd (usually found near the jams and jellies) to ensure the flavor is bright and tangy. You can also use store-bought meringue if you don’t want to make it from scratch, though I recommend homemade for the best texture.
Can I Make the Lemon Curd Ahead of Time?
Yes! Lemon curd can be made in advance and stored in an airtight container in the fridge for up to 1-2 weeks. It will keep its flavor and texture for a long time, and it’s a great way to prepare ahead of time if you’re hosting a special event or just want to have it on hand for quick use.
Can I Use a Different Filling Than Lemon Curd?
Certainly! While lemon curd is the classic choice, you could easily substitute it with other fruit curds, such as lime curd, orange curd, or even passionfruit curd for a tropical twist. Just be sure to adjust the sweetness of the meringue to match the flavor of the filling.
How Do I Prevent the Meringue from Weeping?
Weeping occurs when meringue releases moisture, which can make it soggy. To prevent this, make sure you are whipping the meringue to stiff peaks, not soft peaks. Additionally, be sure not to overbake the meringue; just bake it long enough for it to turn golden brown. If you bake it too long, the meringue may separate and release liquid.
Why Did My Meringue Weaken or Collapse?
If your meringue collapses or doesn’t hold its shape, it could be due to a few reasons:
- Not enough sugar: The sugar stabilizes the egg whites, so be sure to gradually add it while whipping.
- Under-whipping: Make sure you whip the meringue to stiff peaks, as soft peaks will not hold their shape during baking.
- Contaminants in the bowl or eggs: Even the smallest amount of grease or yolk in the bowl or on the whisk can prevent the meringue from forming properly. Make sure everything is squeaky clean before you start whipping.
Nutrition Information (Per Serving)
- Calories: 180 kcal
- Total Fat: 8g
- Saturated Fat: 4g
- Cholesterol: 35mg
- Sodium: 55mg
- Total Carbohydrates: 24g
- Dietary Fiber: 0.5g
- Sugars: 18g
- Protein: 3g

Crispy Lemon and Meringue Delights
Course: Uncategorized6-8
individual delights25
minutes10
minutes180
kcalIngredients
- For the Cannoli Shells:
Pie crusts (Pillsbury pie crust recommended): 1 package
Egg (for egg wash): 1
Water (for egg wash): 1 tablespoon
- For the Filling:
Lemon curd (store-bought or homemade): 1 cup
Marshmallow fluff: 1/2 cup
Frozen whipped cream, thawed: 1 cup
Fresh lemon zest (optional): 1 tablespoon
- For the Topping:
Powdered sugar: 1 tablespoon (for dusting)
Directions
- Preheat Oven: Preheat to 375°F (190°C). Roll out pie crusts, cut into circles, and place in muffin tin. Poke holes with a fork and brush with egg wash (egg + water).
- Bake the Shells: Bake for 10-12 minutes, or until golden brown. Let cool.
- Make the Lemon Curd (if using homemade): Combine lemon juice, zest, sugar, egg yolks, and butter. Cook until thickened, then cool.
- Whip the Meringue: Beat egg whites with cream of tartar and sugar until stiff peaks form.
- Assemble Delights: Fill each pie shell with lemon curd, top with meringue, and bake for 10-12 minutes until golden.
- Cool and Dust with Powdered Sugar: Let cool slightly before dusting with powdered sugar. Serve and enjoy!
Conclusion
Crispy Lemon and Meringue Delights are a perfect dessert for any occasion. With their crispy, flaky crust, smooth and tangy lemon curd, and light-as-air meringue topping, they’re sure to impress your family and friends. Whether you’re making them for a special event or just treating yourself, these delights are a wonderful way to indulge in a sweet and refreshing dessert.
Enjoy the process, savor every bite, and don’t forget to share with others—these treats are meant to be shared and enjoyed by everyone!