

Oh my gosh—these brownies are insane. Cookies & cream plus red velvet? It’s like dessert magic in every bite.
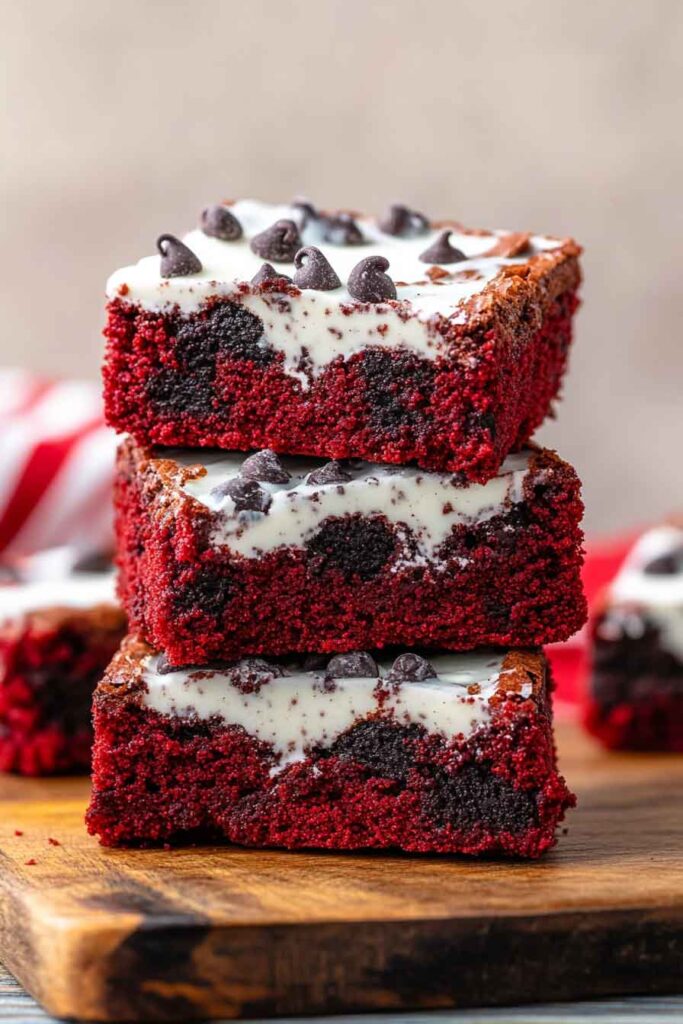
I baked a batch for fun, and they vanished in minutes. They’re soft, gooey, and full of crushed cookies. Honestly, it’s hard to stop at one.
You’re gonna love how easy they are. Just mix, bake, and get ready for brownie heaven. Perfect for parties… or, you know, just because.
So, let’s do this together. I’ll show you exactly how I made them. And trust me, you’ll be hooked after the first bite.

Why You’ll Love These Cookies & Cream Red Velvet Brownies
- Easy to Make: All you need is a box of red velvet cake mix, a few pantry staples, and a handful of add-ins to create this dessert masterpiece.
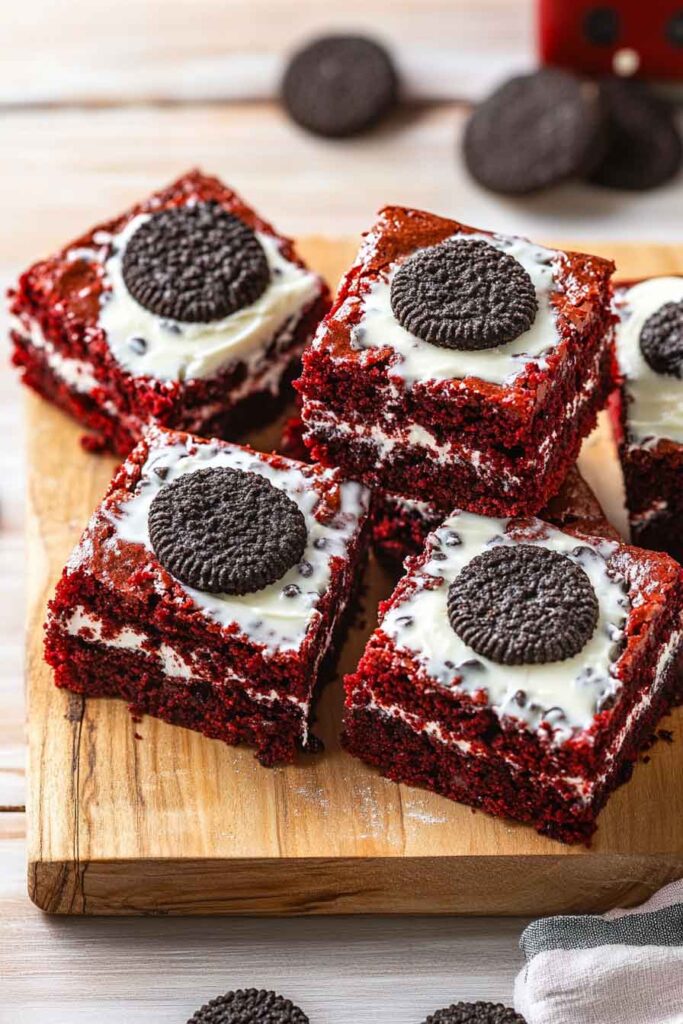
- Cookies & Cream Flavor: The sweet, creamy combination of white chocolate chips and crushed Oreos gives these brownies an irresistibly rich and indulgent flavor.
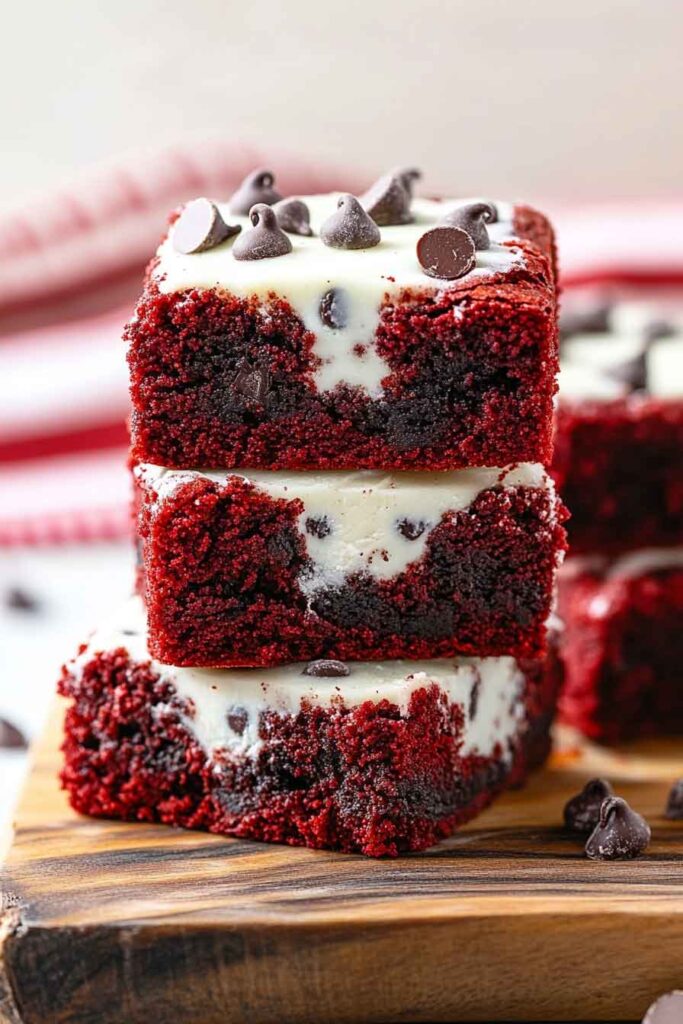
- Perfect for Red Velvet Lovers: If you’re a fan of red velvet cake, you’re going to love this brownie recipe. The moist, soft texture combined with the vibrant red color is the epitome of a red velvet treat.
- Foolproof Recipe: No need for complicated techniques—this recipe is easy to follow and turns out perfectly every time.
- Crowd Favorite: Whether you’re hosting a party, attending a potluck, or simply want a delicious dessert for the family, these brownies are sure to be a hit!
Required Kitchen Tools
Before you get started on this delicious red velvet brownie journey, make sure you have these kitchen tools on hand:
- Mixing Bowls: You’ll need a large mixing bowl to combine your ingredients, plus a smaller one for your dry ingredients.
- Electric Mixer (Optional): While you can mix everything by hand, an electric mixer will help ensure a smooth batter, especially when combining the wet ingredients.
- 9×9-inch Baking Pan: This is the ideal size for making thick, gooey brownies. If you want a thinner layer, you can opt for a 9×13-inch pan, but make sure to adjust your baking time.
- Spatula or Spoon: Use a spatula or spoon to fold in the white chocolate chips and crushed Oreos.
- Parchment Paper: Lining the baking pan with parchment paper makes it easy to remove the brownies once they’ve cooled and prevents sticking.
Ingredients
Here’s a list of the ingredients you’ll need to make these delicious red velvet brownies. You can find most of these in your local grocery store:
- Red Velvet Cake Mix (15.25 oz Box): The base of these brownies is a box of red velvet cake mix. This shortcut helps keep the recipe quick and easy without compromising on flavor.
- Unsalted Butter (1/2 cup, melted): Butter adds richness and moisture to the brownies. It helps achieve that perfect fudgy texture while enhancing the flavor of the red velvet.
- Large Eggs (2): Eggs are essential for binding the ingredients together and providing structure to the brownies.
- Vanilla Extract (1 tsp): Just a teaspoon of vanilla adds depth of flavor to complement the red velvet and cookies and cream combination.
- White Chocolate Chips (1/2 cup): These chips add a creamy sweetness to balance the slight tanginess of the red velvet cake mix.
- Crushed Oreo Cookies (10-12 cookies): No cookies and cream dessert would be complete without Oreos. The crushed Oreos bring a crunch and indulgent flavor that’s perfect in brownies.
Variations for Cookies & Cream Red Velvet Brownies
While this recipe is already delicious, you can easily customize it to suit your tastes or dietary preferences. Here are a few ideas for variations you can try:
- Use Milk Chocolate Chips: If you prefer milk chocolate over white chocolate, swap the white chocolate chips for milk chocolate chips or semisweet chocolate chips.
- Add a Layer of Cream Cheese: For a cheesecake-like twist, add a layer of cream cheese frosting or a swirl of cream cheese into the brownie batter. This will create a rich and tangy contrast to the sweet red velvet flavor.
- Go Nuts: If you like a bit of crunch in your brownies, fold in some chopped nuts like walnuts or pecans for added texture and flavor.
- Make It Dairy-Free: You can make these brownies dairy-free by using a dairy-free butter substitute and swapping out the white chocolate chips for dairy-free options.
- Add a Dash of Cinnamon: For a bit of spice, try adding a pinch of ground cinnamon to the brownie batter to enhance the flavor profile.
Step-by-Step Instructions
Now that you have your ingredients ready, it’s time to get baking! Here’s how to make your Cookies & Cream Red Velvet Brownies step by step:
1. Preheat the Oven and Prepare the Pan
Preheat your oven to 350°F (177°C) and line a 9×9-inch baking pan with parchment paper. You can also lightly grease the pan with butter or cooking spray if you prefer. The parchment paper will make it easier to remove the brownies from the pan once they’ve cooled.
2. Combine the Wet Ingredients
In a large mixing bowl, whisk together the melted unsalted butter, eggs, and vanilla extract until smooth and well combined. The melted butter will help to create that fudgy brownie texture, while the eggs provide structure.
3. Add the Red Velvet Cake Mix
Add the box of red velvet cake mix to the wet ingredients. Stir gently with a spoon or spatula until the dry mix is fully incorporated. The batter will be thick, which is perfect for dense and fudgy brownies.
4. Fold in the Add-Ins
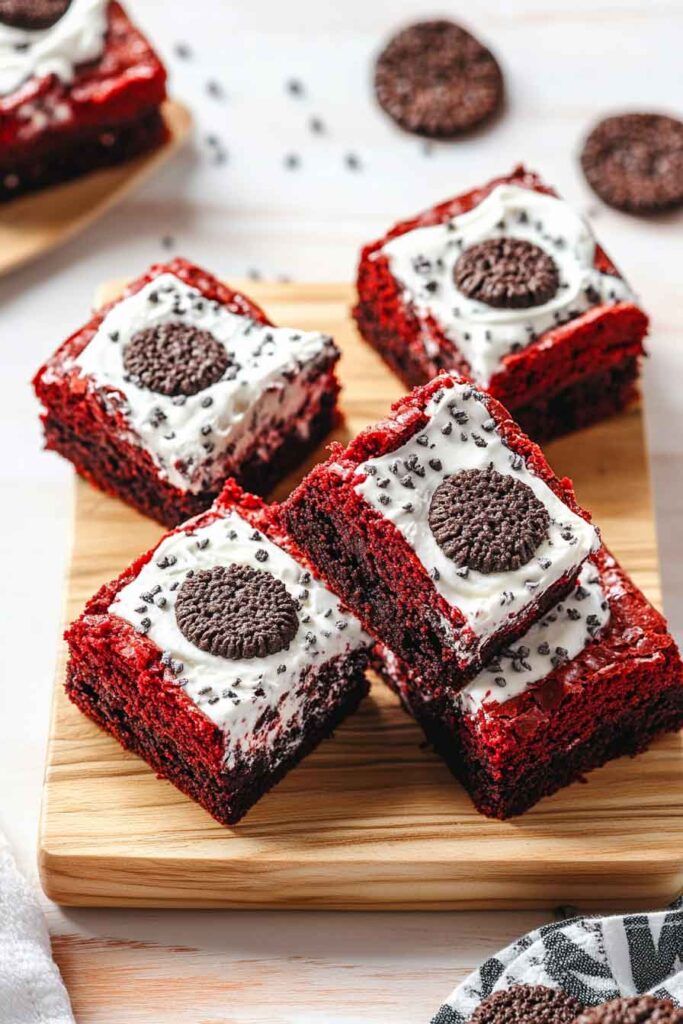
Once the cake mix is fully combined with the wet ingredients, fold in the white chocolate chips and crushed Oreo cookies. This is where the magic happens! The white chocolate chips will melt into the batter, and the crushed Oreos will give your brownies the perfect cookies and cream texture.
5. Bake the Brownies
Transfer the batter to the prepared baking pan and spread it evenly with a spatula. Bake in the preheated oven for 25-30 minutes, or until a toothpick inserted into the center comes out with just a few moist crumbs (not wet batter). Be careful not to overbake—this will ensure the brownies remain soft and fudgy.
6. Cool the Brownies
Once your brownies are done baking, remove them from the oven and allow them to cool in the pan for about 10-15 minutes. This short cooling period helps set the brownies without making them too firm. After that, carefully lift the brownies out of the pan using the parchment paper, and transfer them to a wire rack to cool completely. Cutting them while they are still slightly warm will result in more gooey brownies, but it’s important to let them cool for a bit so they can hold their shape when sliced.
7. Slice and Serve
Once the brownies have cooled completely, it’s time to slice them into squares. For neat slices, use a sharp knife and wipe it clean between cuts. This will ensure that the edges are smooth and the white chocolate chips and Oreo pieces are evenly distributed in each slice. These brownies are rich and indulgent, so smaller portions work perfectly.
Serve them up on a plate, and prepare for the compliments to roll in. These Cookies & Cream Red Velvet Brownies are a perfect dessert for any occasion, and the combination of red velvet, cookies, and cream is a flavor combination that’s always a hit!
How to Serve Cookies & Cream Red Velvet Brownies
These brownies are delicious on their own, but there are plenty of ways to take them to the next level when it comes to serving. Here are a few ideas for how to enjoy them:
- With a Scoop of Ice Cream: You can’t go wrong by pairing these brownies with a scoop of vanilla or red velvet ice cream. The cold, creamy texture of the ice cream contrasts beautifully with the fudgy, warm brownies.
- Drizzled with Chocolate or Caramel Sauce: For extra indulgence, drizzle your brownies with some rich chocolate or caramel sauce. This will take them to a whole new level of decadence.
- With Whipped Cream: Top each brownie with a dollop of freshly whipped cream for a light, airy contrast to the rich brownie texture.
- As a Layered Dessert: If you want to make these brownies the centerpiece of a larger dessert, cut them into small squares and layer them with mousse, whipped cream, and other desserts like fruit or crushed cookies for a fun and creative treat.

Storing Cookies & Cream Red Velvet Brownies
If you happen to have any leftovers (though I doubt it), here’s how to store them to maintain their delicious flavor and texture:
- Room Temperature: Store the brownies in an airtight container at room temperature for up to 3-4 days. They will stay moist and fudgy, and the flavors will continue to meld together.
- Refrigerator: You can also store them in the refrigerator for up to a week if you prefer. Just be sure to let them come to room temperature before serving, as they’ll have a firmer texture when chilled.
- Freezing: If you want to store them for a longer period, you can freeze the brownies. Wrap individual brownies in plastic wrap or aluminum foil and place them in an airtight container or freezer bag. They can be stored for up to 3 months. To thaw, simply leave them at room temperature for about 30 minutes or warm them in the microwave for a few seconds.
Nutrition Information (per serving)
Here’s a breakdown of the estimated nutrition per serving of these Cookies & Cream Red Velvet Brownies (based on cutting the batch into 16 servings):
| Nutrient | Amount per Serving |
|---|---|
| Calories | 220 |
| Total Fat | 12g |
| Saturated Fat | 7g |
| Cholesterol | 35mg |
| Sodium | 95mg |
| Total Carbohydrates | 30g |
| Dietary Fiber | 1g |
| Sugars | 19g |
| Protein | 2g |
Please note that these values may vary depending on the specific ingredients you use. For a more accurate nutrition breakdown, you can use a nutrition calculator to input the exact ingredients you’re using.


Cookies & Cream Red Velvet Brownies
Course: Uncategorized15
minutes25
minutes220
kcalIngredients
Red velvet cake mix (15.25 oz box)
Unsalted butter (1/2 cup, melted)
Large eggs (2)
Vanilla extract (1 tsp)
White chocolate chips (1/2 cup)
Crushed Oreo cookies (10-12 cookies)
Directions
- Preheat the oven to 350°F (177°C) and line a 9×9-inch baking pan with parchment paper.
- Combine the wet ingredients: In a large mixing bowl, whisk together melted butter, eggs, and vanilla extract.
- Add the red velvet cake mix to the wet ingredients and mix until smooth.
- Fold in white chocolate chips and crushed Oreo cookies.
- Spread the batter evenly into the prepared baking pan.
- Bake for 25-30 minutes, or until a toothpick inserted into the center comes out with a few moist crumbs.
- Cool and slice once the brownies have cooled to room temperature. Enjoy!
Conclusion
Cookies & Cream Red Velvet Brownies are the ultimate indulgence for dessert lovers! The beautiful red velvet flavor combined with the creamy sweetness of white chocolate and the crunch of Oreos makes these brownies an unforgettable treat. Whether you’re baking for a special event or simply craving something sweet, this easy-to-make dessert will surely satisfy your taste buds.
This recipe is as simple as it is delicious, and it’s a guaranteed hit at any gathering. It’s the perfect way to bring some joy to your next dessert table with minimal effort. So, grab your ingredients and get baking—your future brownie masterpiece awaits!
FAQs for Cookies & Cream Red Velvet Brownies
Can I use a different cake mix for these brownies?
Yes, absolutely! While red velvet cake mix gives these brownies their signature color and flavor, you can use other cake mixes such as chocolate or vanilla if you prefer. Just keep in mind that using a different flavor might change the overall taste profile.
Can I make these brownies gluten-free?
If you’re looking to make these brownies gluten-free, you can swap out the red velvet cake mix for a gluten-free cake mix. Make sure to check the ingredients of the cake mix to ensure that it’s fully gluten-free, and be mindful of cross-contamination if you are baking for someone with a gluten allergy.
Can I add more cookies to the batter?
If you love the cookies and cream flavor, feel free to add more crushed Oreos to the batter. Adding extra cookies will make the brownies even more indulgent and give them an extra crunchy bite.
Can I use other types of chocolate?
Yes! You can use milk chocolate chips, semi-sweet chocolate chips, or even a mix of different chocolate varieties. The white chocolate chips add a creamy sweetness that complements the red velvet flavor, but other chocolates will work great too, depending on your taste preferences.
How do I know when the brownies are done?
The best way to check if your brownies are done is to insert a toothpick into the center of the pan. If it comes out with a few moist crumbs (but not wet batter), then the brownies are ready. If the toothpick comes out clean, the brownies may be overcooked, so check them a little earlier next time.
Can I make these brownies ahead of time?
Yes, these brownies are great for making ahead! You can bake them up to two days in advance and store them in an airtight container at room temperature. They’ll stay deliciously soft and fudgy for several days.
Can I freeze the brownies after baking?
Yes, these brownies freeze really well! Once they’ve completely cooled, slice them into squares and wrap each piece in plastic wrap or foil. Then, place them in an airtight container or freezer bag. They can be stored in the freezer for up to 3 months. To enjoy, simply let them thaw at room temperature for about 30 minutes, or warm them up in the microwave for a few seconds.
Tips for Perfect Cookies & Cream Red Velvet Brownies
- Don’t Overmix the Batter: While you want to ensure everything is combined, overmixing the batter can lead to dense brownies. Mix until the ingredients are just incorporated for the best texture.
- Check for Doneness Early: All ovens bake differently, so be sure to check the brownies a few minutes before the suggested baking time. This will ensure they come out perfectly moist and fudgy.
- Let the Brownies Cool Before Cutting: It’s tempting to slice into the brownies while they’re still warm, but giving them a few minutes to cool will help them hold their shape and make them easier to cut.
- Add a Touch of Salt: If you like the sweet-salty combo, try sprinkling a tiny pinch of sea salt on top of the brownies before baking. The salt will complement the sweetness and enhance the overall flavor.
- Use Fresh Ingredients: Using fresh eggs and butter will help achieve the best flavor and texture. Make sure your baking powder or baking soda isn’t expired, as this can affect how the brownies rise and bake.