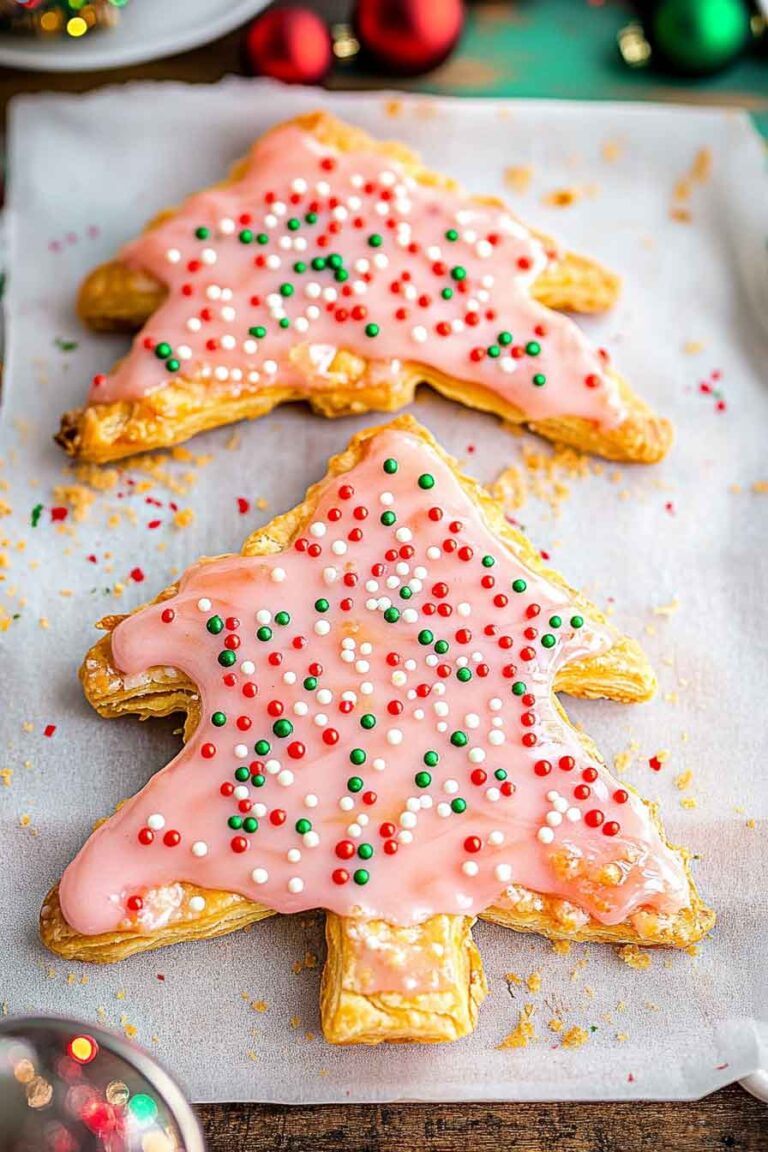
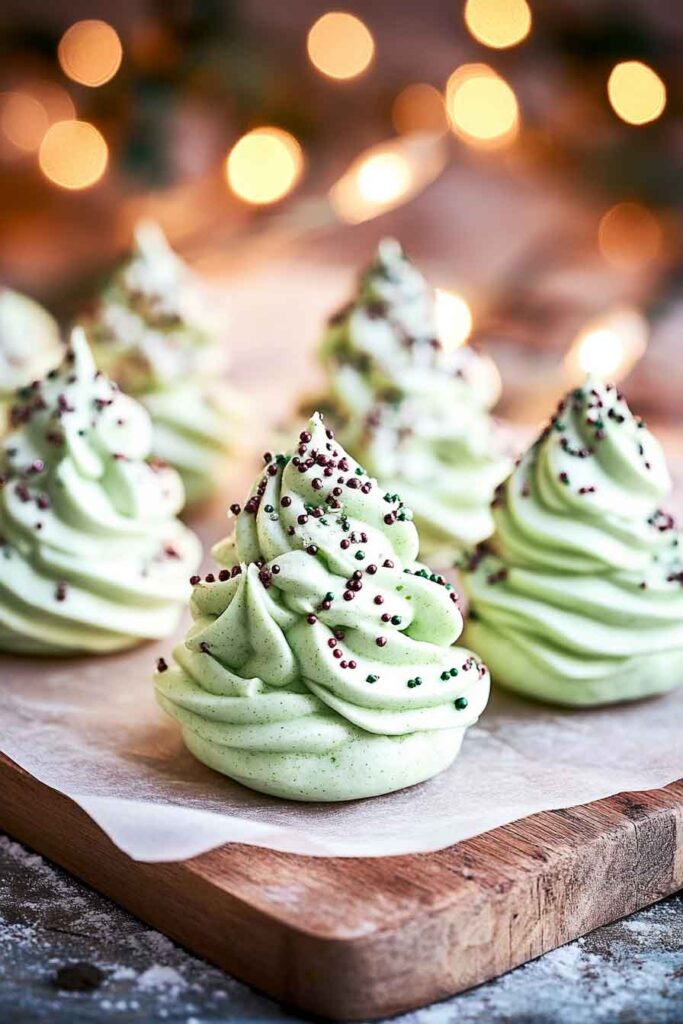
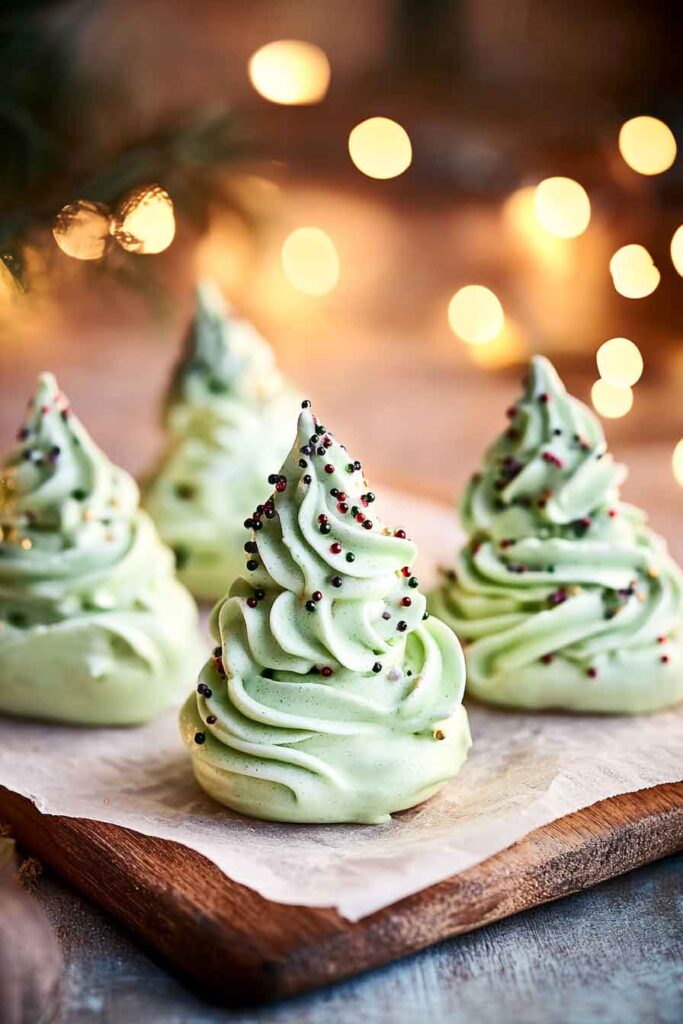
Christmas Tree Meringues

Oh wow, the first time I saw Christmas tree meringues, I couldn’t stop smiling. They look so cute, just like little snowy trees. And guess what? They’re super easy to make too.
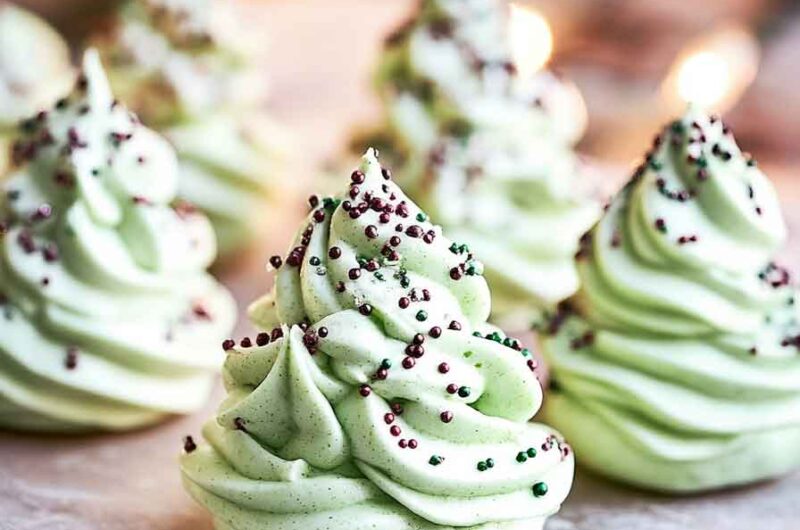
I love how they turn crisp on the outside but stay soft inside. The green color with sprinkles makes them look so magical. It’s like eating a sweet Christmas decoration.
Every time I make them, kids and grown-ups all get excited. They look fancy on the table but taste so light and yummy. Honestly, they always disappear so fast.
So, let’s make these pretty trees together! Just eggs, sugar, and a little magic, and we’ll have sweet Christmas meringues. Trust me, they’ll bring holiday cheer in every bite.
Why You’ll Love This Recipe
- Festive and Fun: These meringues are shaped like Christmas trees, bringing extra holiday cheer to any occasion.
- Light and Airy: Crispy on the outside and soft on the inside, these meringues are a perfect treat for anyone with a sweet tooth.
- Easy to Make: Despite looking fancy, they come together easily with only a handful of ingredients.
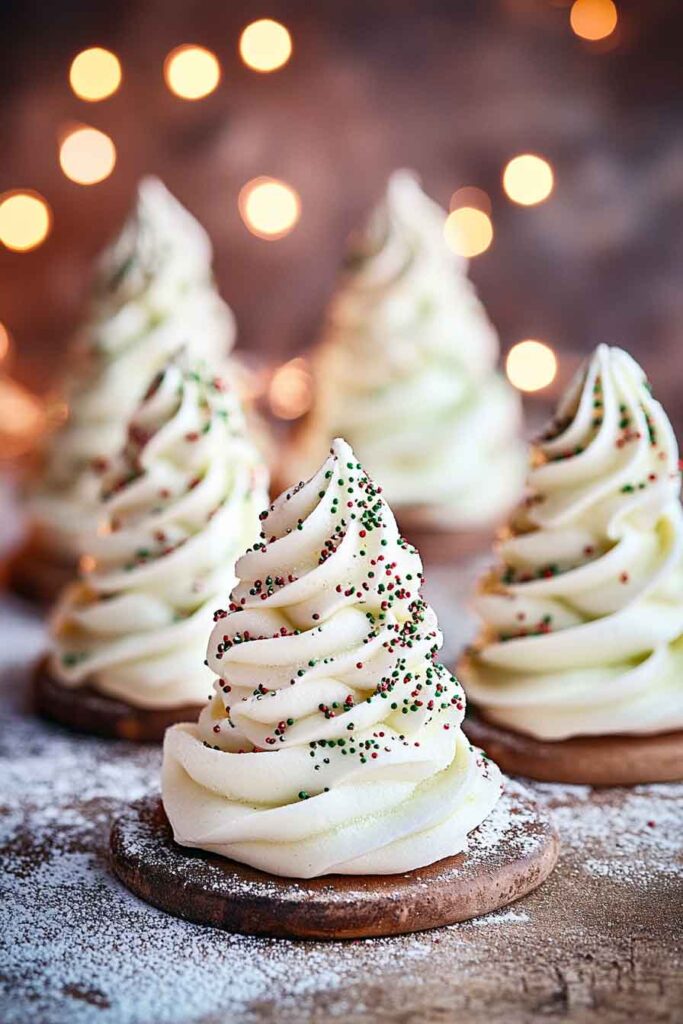
- Versatile Decorations: You can decorate your meringue trees however you like, with edible glitter, sprinkles, or even tiny star-shaped candies for the tree topper.
- Great for Gifting: Package them in cute boxes for a lovely homemade gift during the holidays.
- Fun for Kids: This is a recipe that kids will love helping with! From coloring the meringue to decorating, it’s a great family activity.
Required Kitchen Tools
Before we dive into the recipe, here’s a quick list of kitchen tools that will make this holiday treat easier to prepare:
- Electric Mixer (hand or stand mixer): Essential for whipping the egg whites to stiff peaks.
- Mixing Bowls: Use separate bowls for mixing egg whites and sugar.
- Piping Bags and Tips: A star-shaped piping tip is ideal for creating the Christmas tree shape.
- Baking Sheets: Line these with parchment paper to prevent sticking and make cleanup a breeze.
- Oven Thermometer: To ensure your oven is at the right temperature (low and slow is key with meringues).
- Spatula: A flexible spatula will help you fold the ingredients and scrape the bowl.
- Sifter (optional): To sift the powdered sugar if you’re using it for dusting the meringues.
Ingredients
The ingredients for these sweet treats are simple and straightforward, and most of them are pantry staples. Here’s what you’ll need:
Meringue Ingredients:
- 3 Egg Whites (Room Temperature): Make sure your egg whites are at room temperature for the best volume when whipped.
- 2/3 Cup White Sugar: The sugar helps to stabilize the meringue and give it its signature crisp texture.
- 1/4 tsp. Cream of Tartar: This stabilizer helps the meringue maintain its structure while it bakes.
- 1 tsp. Vanilla Extract: Adds a hint of sweetness and depth of flavor to the meringues.
- A Pinch of Salt: Balances the sweetness and enhances the flavor of the meringue.
- 1/2 tsp. Green Gel Food Coloring: To create a vibrant green color for the Christmas trees (gel food coloring works best as it doesn’t alter the texture).
Optional Decoration:
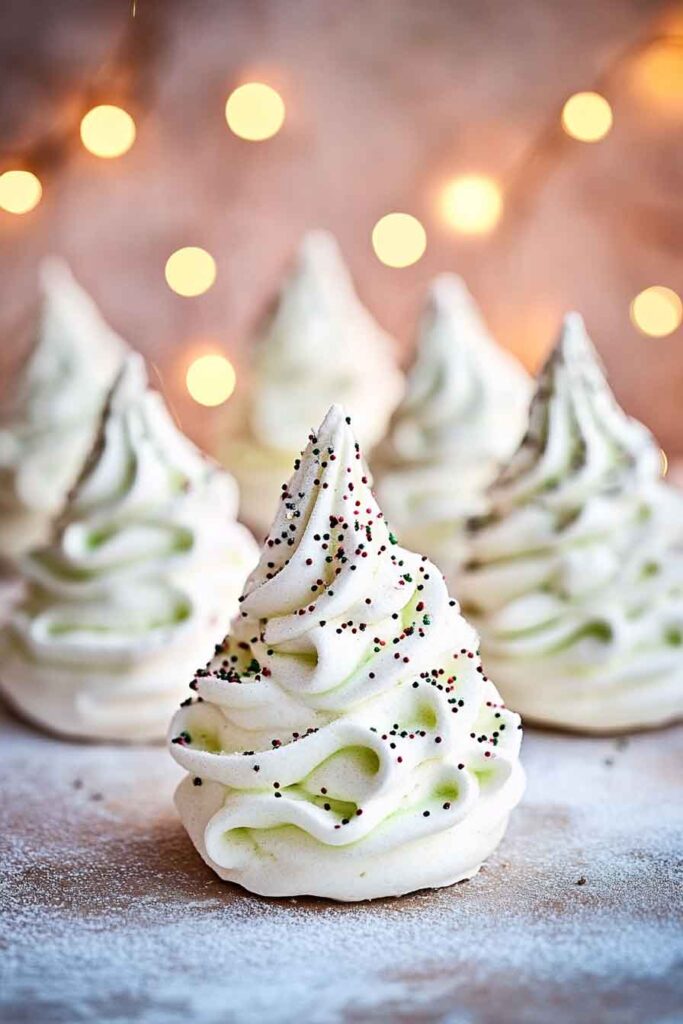
- Powdered Sugar: For a light dusting to give the meringue trees a “snowy” effect.
- Edible Glitter or Sprinkles: For a bit of sparkle and extra fun.
- Candy Stars or Tiny Ornaments: For decorating the tips of the trees.
Variations for Christmas Tree Meringues
While this recipe is delicious on its own, there are many ways to customize your Christmas Tree Meringues to make them your own!
Add Some Peppermint:
You can mix in a little crushed peppermint candy or peppermint extract for a festive holiday twist.
Make Them Multi-Colored:
If you want a rainbow of trees, divide the meringue batter into a few portions and color each one differently. You can pipe the different colors together for a fun effect.
Use Different Shapes:
While this recipe creates Christmas trees, feel free to pipe the meringue into other fun holiday shapes, like stars, snowflakes, or candy canes.
Add Edible Decorations:
Decorate your meringues with small sugar pearls, colored sugar, or sprinkles to make them extra festive.
Step-by-Step Instructions for Christmas Tree Meringues
Making meringue is easier than you might think, and it’s a fun process that results in light, crispy, and delightful cookies. Follow these easy steps, and you’ll have the perfect Christmas Tree Meringues in no time!
1. Prepare Your Baking Sheets and Piping Bags
Start by lining two baking sheets with parchment paper. You can either draw small tree shapes on the paper as guides or just pipe freehand. If you’re using guides, simply draw a triangle and a small trunk on the parchment, leaving space between each tree.
Prepare your piping bag by inserting a star-shaped piping tip. You can find these tips at most kitchen stores. This will help you pipe the meringue into a tree shape. If you don’t have a piping bag, you can use a plastic sandwich bag with the tip of the corner cut off (though a piping bag will give you more control).
2. Whip the Egg Whites
Place your egg whites into a clean, dry bowl (make sure there is no grease or water). Using an electric mixer, beat the egg whites on medium speed until they become foamy, about 1-2 minutes.
Once the egg whites are foamy, add the cream of tartar and salt. Continue beating at medium-high speed until soft peaks form. At this stage, the egg whites should hold their shape but still bend slightly.
3. Add Sugar Gradually
Now, begin adding the white sugar, one tablespoon at a time, while continuing to beat the egg whites. It’s essential to add the sugar gradually to avoid the meringue from breaking down. Continue to beat on high speed until stiff peaks form. The meringue should be glossy and hold its shape when you lift the beaters.
4. Add Vanilla and Food Coloring
Once the meringue has reached stiff peaks, add the vanilla extract and green gel food coloring. Mix gently until the color is evenly distributed throughout the meringue. If you want a darker green, you can add more food coloring, but be careful not to add too much, or the texture might change.
5. Pipe the Meringue Trees
Transfer the meringue into your prepared piping bag. Hold the piping bag vertically over your baking sheet and pipe the meringue in the shape of a Christmas tree. Start at the base and work your way up, making sure the layers of meringue overlap slightly to create the tree’s shape. Finish with a small peak at the top of the tree.
6. Bake the Meringues
Preheat your oven to 200°F (93°C). Meringues bake slowly at a low temperature to ensure they dry out and become crisp without browning. Place the meringue trees in the oven and bake for 1.5 to 2 hours. Avoid opening the oven during this time, as it can affect the drying process.
After the baking time is complete, turn off the oven and let the meringues cool completely in the oven with the door slightly ajar. This step helps them to set and ensures they don’t crack due to a sudden temperature change.
7. Decorate Your Meringue Trees
Once your meringues have cooled, it’s time to decorate! Dust the tops lightly with powdered sugar for a snowy effect. You can also add sprinkles, edible glitter, or even small candy stars to create tree toppers.
How to Serve Christmas Tree Meringues
Christmas Tree Meringues are a beautiful and delicious addition to any holiday celebration. Here are some fun ways to serve them:
- Holiday Dessert Table: Place them alongside other holiday treats like gingerbread cookies, sugar cookies, and fudge. The colorful meringues will add a festive touch to any dessert spread.
- Giftable Treats: Package the meringue trees in small gift boxes or treat bags for a fun homemade gift.
- Hot Chocolate Companion: Serve these meringues with a steaming mug of hot chocolate. Their crispy texture pairs perfectly with a rich, warm beverage.
- Party Snack: Meringues are a great finger food, perfect for Christmas parties or holiday gatherings.
Storing Christmas Tree Meringues
Meringues store well for several days if kept in the right conditions. Here’s how to keep them fresh:
- Storage: Place the meringue trees in an airtight container at room temperature. They will stay fresh for up to 5-7 days.
- Humidity Alert: Meringues are sensitive to humidity, so be sure to store them in a dry place. If you live in a humid environment, consider storing them in a dry cupboard or using desiccant packets to absorb moisture.
- Freezing: Meringues can be frozen for longer storage. Place them in an airtight container and freeze for up to 1 month. Let them come to room temperature before serving.
Nutrition (Approximate per Serving)
| Nutrient | Amount per Serving (1 Meringue) |
|---|---|
| Calories | 25 |
| Carbohydrates | 6g |
| Protein | 0g |
| Fat | 0g |
| Sugar | 6g |
| Sodium | 10mg |
Conclusion:
Christmas Tree Meringues are a fun, festive, and delicious treat that will elevate your holiday baking. They’re easy to make, versatile, and sure to impress guests with their elegant look. Whether you serve them at a holiday party, give them as gifts, or simply enjoy them with your family, these meringues are the perfect way to add a touch of sweetness to your Christmas season.
Christmas Tree Meringues
Course: Uncategorized20-25
meringues15
minutes1
minute25
kcalIngredients
3 Egg Whites (room temperature)
2/3 cup White Sugar
1/4 tsp Cream of Tartar
1 tsp Vanilla Extract
A pinch of Salt
1/2 tsp Green Gel Food Coloring
Powdered Sugar (optional, for dusting)
Edible Glitter/Sprinkles (optional)
Directions
- Preheat the oven to 200°F (93°C). Line baking sheets with parchment paper.
- Beat egg whites with cream of tartar and salt until soft peaks form.
- Gradually add sugar, continuing to beat until stiff peaks form.
- Add vanilla and food coloring. Mix gently.
- Pipe meringue into tree shapes on baking sheets.
- Bake for 1.5-2 hours. Turn off oven and let cool inside.
- Decorate with powdered sugar and sprinkles if desired.