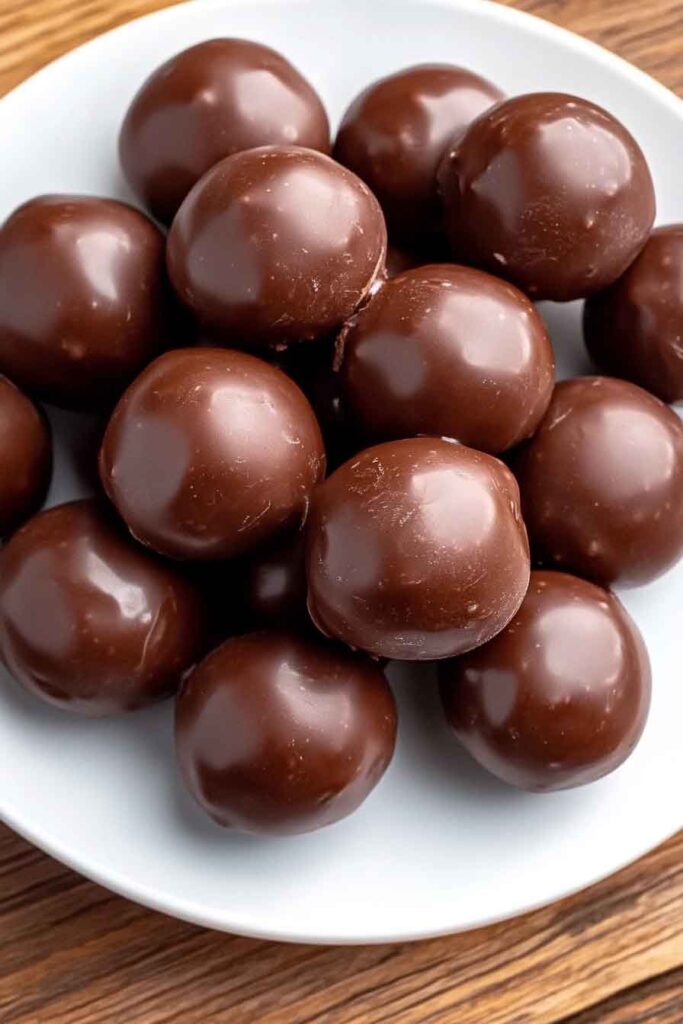
Chocolate Covered Cheesecake Balls Recipe

Okay, you have to try this. These Chocolate Covered Cheesecake Balls are little bites of heaven. They’re creamy, sweet, and covered in smooth chocolate—what’s not to love?
I made them once for a party, and they were gone in minutes. No joke. People were begging for the recipe, and I was like, “Wait, you want this simple thing?”
The best part? No baking. Just mix, chill, and dip. It’s honestly that easy—and they taste like you spent hours on them.
So, let’s do this together! I’ll walk you through it step by step. Grab your cream cheese and let’s make something delicious!
Why You’ll Love This Recipe
- Perfect for Any Occasion: Whether you’re hosting a party, looking for a holiday dessert, or just satisfying your sweet tooth, these cheesecake balls are an easy-to-make, delicious option.
- No-Bake Delight: These cheesecake balls don’t require any baking, which means they’re ideal for when you want to enjoy a decadent dessert without turning on the oven.
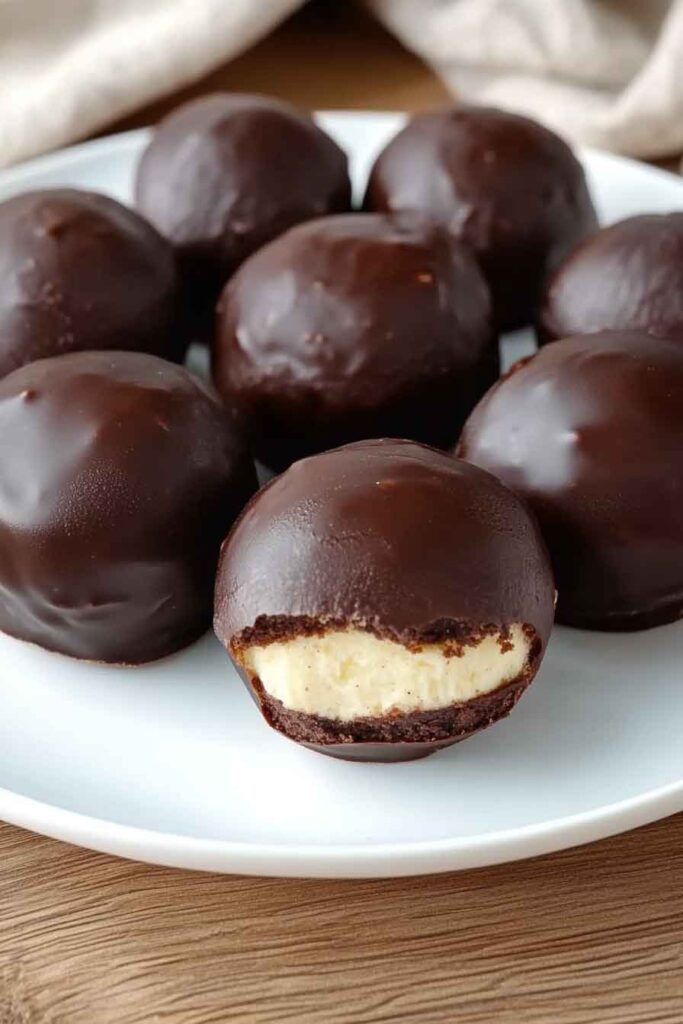
- Bite-Sized Perfection: Cheesecake is already a favorite dessert, and turning it into a ball covered in chocolate makes it even more fun and easy to eat. Plus, they are the perfect size for popping into your mouth.
- Rich and Creamy Texture: The cream cheese-based filling is smooth and tangy, balanced by a sweet graham cracker crust that gives it a classic cheesecake flavor.
- Customizable: You can add your own twist by mixing in different flavors, coatings, or toppings, which makes this a versatile recipe for many tastes.
- Great for Meal Prep or Gift Giving: These cheesecake balls can be prepped ahead of time, making them a great dessert for busy days. They also make a charming homemade gift when packaged in a decorative box.
Required Kitchen Tools
Before you start making your chocolate-covered cheesecake balls, make sure you have all the necessary tools. Here’s a list of essential equipment:
- Mixing Bowl: You’ll need a large mixing bowl for combining the cream cheese, sugar, and other ingredients.
- Hand Mixer or Stand Mixer: A hand mixer or stand mixer will help you whip the cream cheese mixture to a smooth, fluffy consistency.
- Baking Sheet: Line a baking sheet with parchment paper to set the cheesecake balls while they chill.
- Spoon or Cookie Scoop: For uniform, perfectly round cheesecake balls, a cookie scoop works wonderfully.
- Microwave-Safe Bowl: To melt the chocolate coating, use a microwave-safe bowl. Alternatively, you can use a double boiler if you prefer to melt the chocolate over indirect heat.
- Fork or Dipping Tool: To coat each cheesecake ball in chocolate, you’ll need a fork or a dipping tool to dip them without making a mess.
Ingredients
Here’s a breakdown of the ingredients you’ll need to make this mouthwatering dessert (don’t worry, all exact measurements are listed in the recipe card below):
For the Cheesecake Balls:
- Graham Crackers (for the crust): The graham cracker crumbs create the delicious cheesecake crust that complements the creamy filling.
- Unsalted Butter (melted): This binds the graham cracker crumbs together to form a solid crust for the cheesecake balls.
- Cream Cheese (softened): Cream cheese is the star ingredient that gives these cheesecake balls their smooth and tangy texture.
- Granulated Sugar: Sugar adds the sweetness that balances the tanginess of the cream cheese.
- Sour Cream (room temperature): Sour cream contributes to the richness and smoothness of the filling.
- Large Eggs (room temperature): Eggs help create a firm, cohesive texture for the cheesecake mixture.
- Vanilla Extract: A touch of vanilla enhances the flavor and adds depth to the cheesecake filling.
- All-Purpose Flour: Flour helps firm up the cheesecake filling so that it can hold its shape when rolled into balls.
- Fine Sea Salt: A pinch of salt brings out the sweetness of the cheesecake filling and balances the richness.
For the Chocolate Coating:
- Semisweet Chocolate (chopped or chips): Semisweet chocolate provides the perfect amount of sweetness and richness for coating the cheesecake balls.
- Coconut Oil (for smooth melting): Coconut oil helps the chocolate melt evenly and gives it a glossy finish when it hardens.
How to Make Chocolate Covered Cheesecake Balls: A Step-by-Step Guide
1. Prepare the Cheesecake Ball Crust
Start by making the graham cracker crust, which will serve as the base of your cheesecake balls. To do this, you need to crush graham crackers into fine crumbs. You can use a food processor for a quick and even result, or you can crush them manually by placing the crackers in a sealed plastic bag and rolling over them with a rolling pin.
Once the graham crackers are crushed, combine them with melted unsalted butter in a bowl. Mix them well until the crumbs are evenly coated with butter. This mixture will form the base of each cheesecake ball, providing that delicious, crunchy contrast to the creamy cheesecake filling.
2. Make the Cheesecake Filling
In another mixing bowl, beat together the softened cream cheese, granulated sugar, sour cream, eggs, and vanilla extract using a hand mixer or stand mixer. Whip the mixture on medium-high speed until it’s smooth and creamy with no lumps.
Add in the all-purpose flour and salt, and continue mixing until it’s fully combined. The filling should be thick but smooth, and it will hold its shape when scooped.
3. Combine the Crust and Filling
Take about a tablespoon of the graham cracker mixture and press it into the palm of your hand, forming a small, compact crust. Then scoop about a tablespoon of the cheesecake filling and roll it into a ball. Gently press the graham cracker crust around the cheesecake ball, ensuring it’s covered evenly. Repeat this process with the remaining crust and cheesecake filling. Place each ball on the lined baking sheet.
4. Chill the Cheesecake Balls
Once you’ve formed all the cheesecake balls, it’s important to chill them. Place the baking sheet in the refrigerator for at least 1 hour. Chilling the cheesecake balls helps them firm up, making them easier to dip into chocolate and ensuring they keep their shape.
5. Prepare the Chocolate Coating
While the cheesecake balls are chilling, prepare the chocolate coating. Place the semisweet chocolate and coconut oil into a microwave-safe bowl. Heat in the microwave in 20-second intervals, stirring in between, until the chocolate is completely melted and smooth.
If you don’t have a microwave, you can also melt the chocolate over a double boiler. Just make sure to stir it constantly to avoid burning the chocolate.
6. Dip the Cheesecake Balls in Chocolate
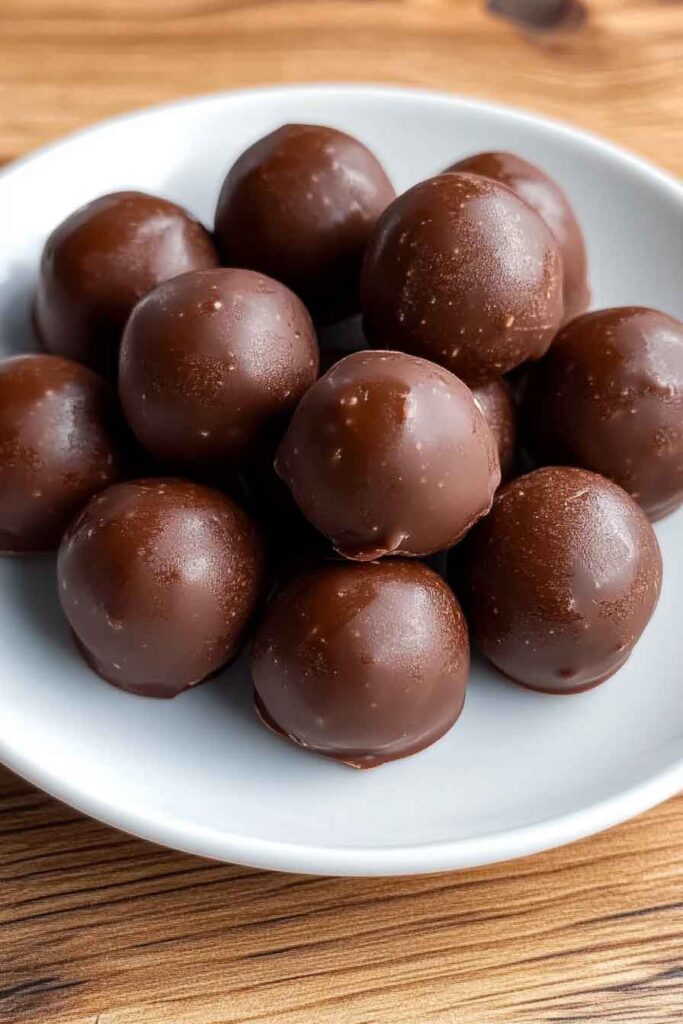
Once the cheesecake balls are chilled and the chocolate is ready, it’s time to dip them. Using a fork or dipping tool, dip each cheesecake ball into the melted chocolate, ensuring it’s completely coated. Let the excess chocolate drip off before placing the coated balls back onto the parchment-lined baking sheet.
7. Let the Chocolate Set
After dipping all the cheesecake balls in chocolate, return them to the refrigerator for at least 30 minutes to allow the chocolate coating to harden and set.
Variations for Chocolate Covered Cheesecake Balls
One of the best things about these cheesecake balls is how customizable they are! You can easily adjust the flavor and appearance of these treats to suit your preferences or match the occasion. Here are a few delicious ideas to elevate your cheesecake balls:
1. Add Flavor to the Cheesecake Filling
You can infuse the filling with a variety of flavors to create unique twists on this classic dessert:
- Citrus Cheesecake Balls: Add fresh lemon or orange zest to the cream cheese mixture for a tangy, citrusy burst. The bright, fresh flavor pairs wonderfully with the richness of the chocolate coating.
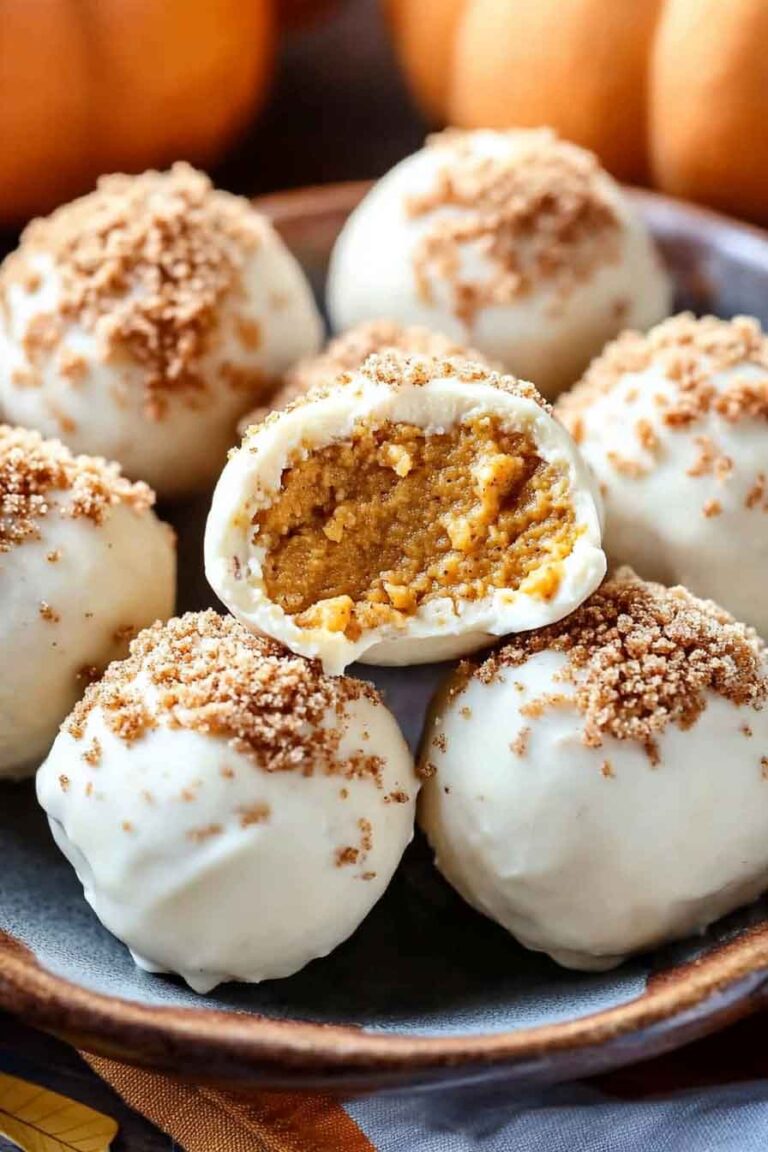
- Pumpkin Spice Cheesecake Balls: During the fall, stir in some pumpkin puree and a dash of cinnamon, nutmeg, and cloves for a pumpkin cheesecake version that’s perfect for the holidays.
- Mint Chocolate Cheesecake Balls: Add a few drops of peppermint extract to the filling for a minty twist. The combination of minty cheesecake and chocolate is a crowd-pleaser, especially during the winter months.
- Peanut Butter Cheesecake Balls: Mix creamy peanut butter into the filling for a peanut butter cheesecake version. The combination of peanut butter and chocolate is always a hit!
2. Toppings for Extra Texture and Flavor
For an added layer of texture and visual appeal, you can roll the chocolate-covered cheesecake balls in various toppings. These are some fun options to consider:
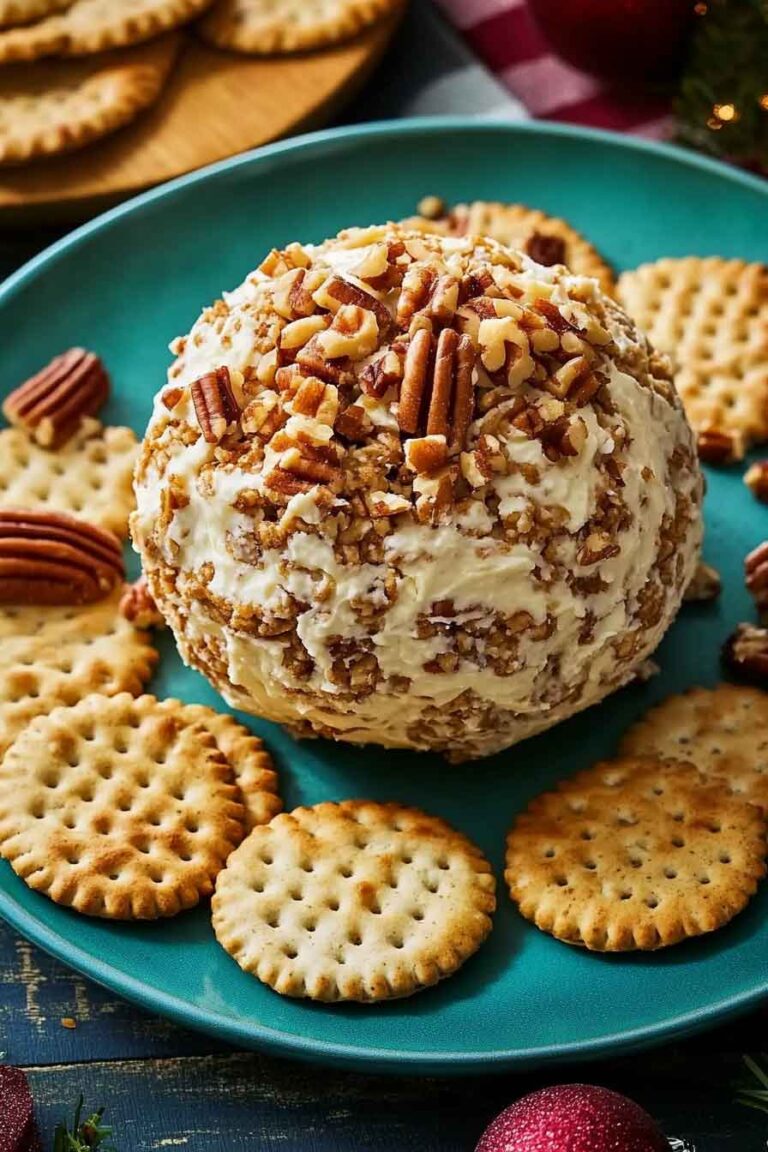
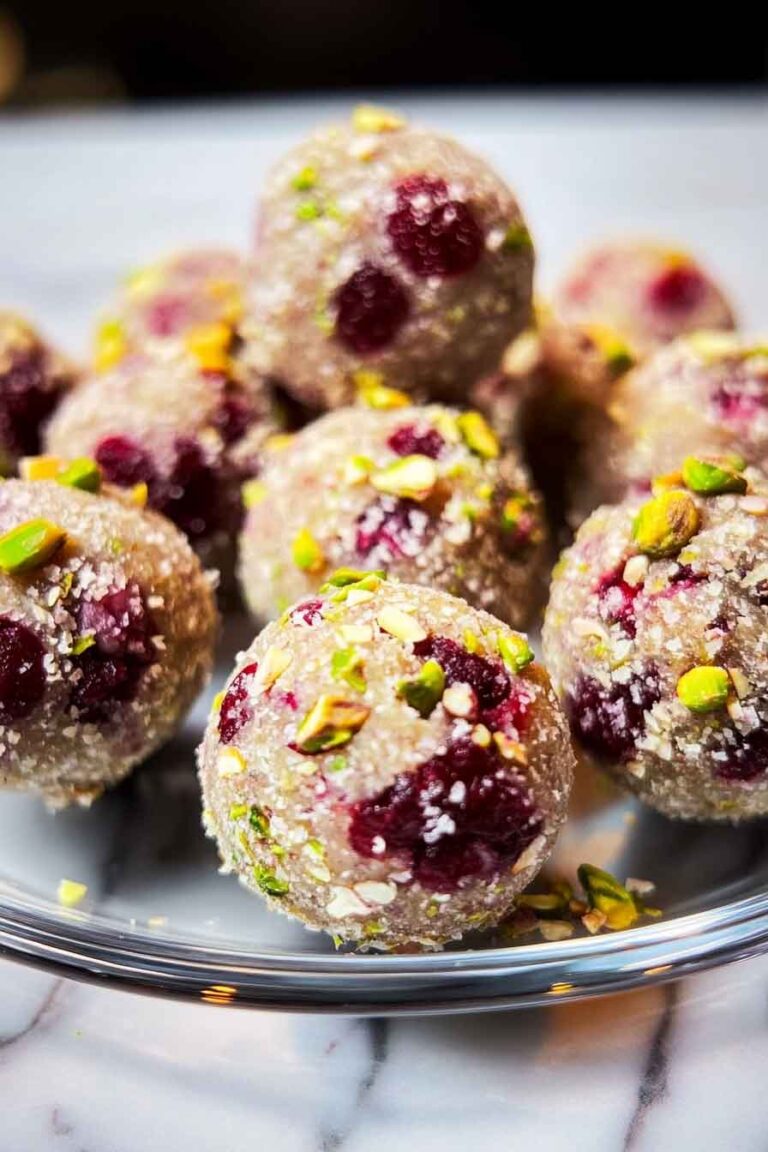
- Crushed Nuts: Roll your cheesecake balls in finely chopped almonds, walnuts, or pistachios. The nuts add a nice crunch and elevate the flavor profile.
- Crushed Graham Crackers: To maintain the classic cheesecake vibe, sprinkle some crushed graham cracker crumbs over the chocolate coating for added texture.
- Sprinkles: If you’re making these cheesecake balls for a celebration or a birthday party, colorful sprinkles are an excellent way to make them extra festive.
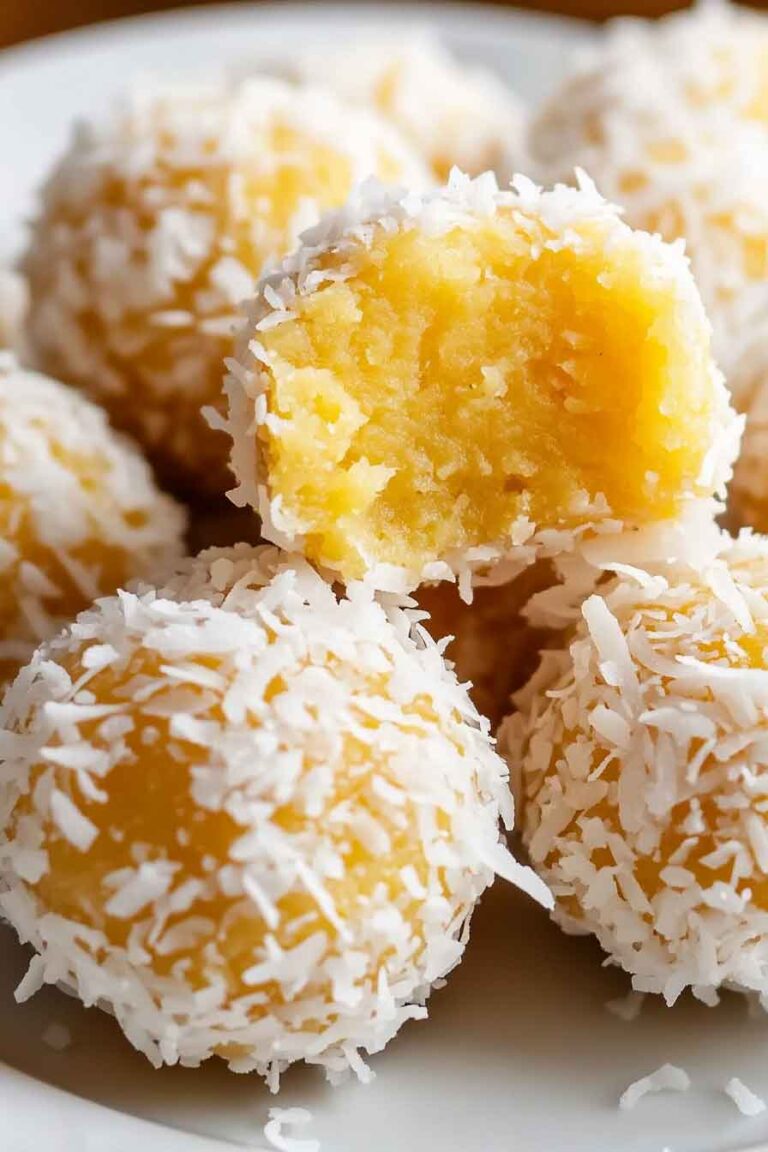
- Shredded Coconut: Shredded coconut pairs beautifully with the smooth cheesecake filling and chocolate coating, giving the balls a tropical flair.
- Mini Chocolate Chips: For a chocolate-lover’s dream, roll the cheesecake balls in mini chocolate chips for a double dose of chocolate.
3. Flavorful Chocolate Coatings
The semisweet chocolate used in the recipe is rich and delicious, but there are plenty of other chocolate coatings to consider. If you’re looking to mix things up, try one of these options:
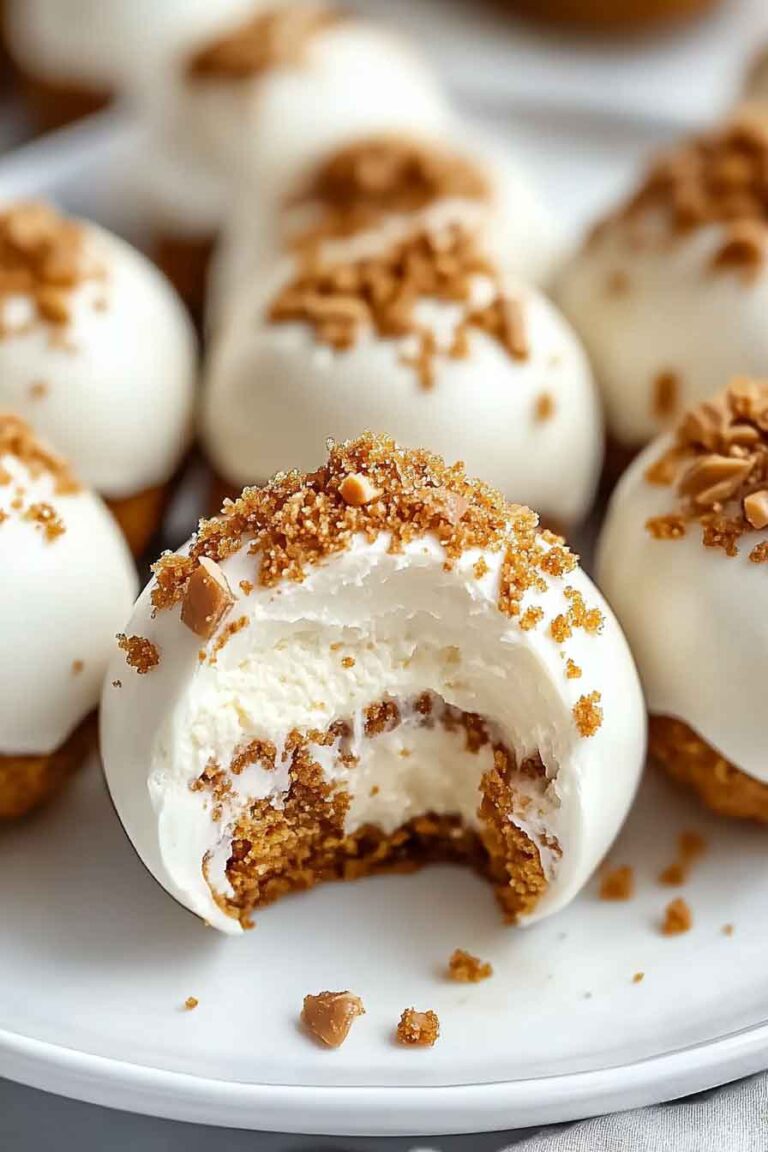
- White Chocolate Coating: For a creamy, sweet contrast to the tangy cheesecake, dip your balls in white chocolate instead of semisweet chocolate.
- Milk Chocolate Coating: Milk chocolate provides a sweeter, creamier coating, perfect for those who prefer a less intense chocolate flavor.
- Dark Chocolate Coating: If you’re a fan of deep, rich chocolate, try using dark chocolate for the coating. Its bittersweet flavor pairs wonderfully with the creamy cheesecake filling.
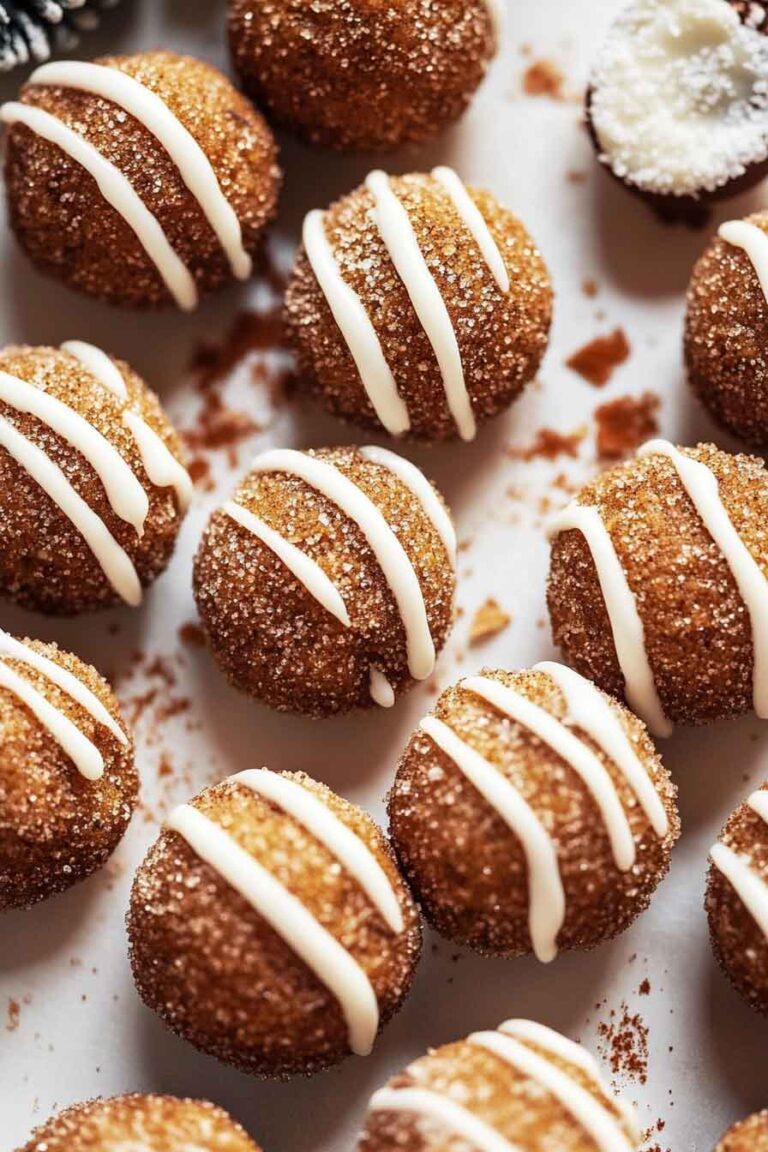
- Chocolate Drizzle: If you want a more delicate touch, drizzle melted chocolate over the cheesecake balls after they’ve been coated and set. You can use a contrasting color of chocolate (like white or milk) for an elegant look.

Step-by-Step Instructions (Continued)
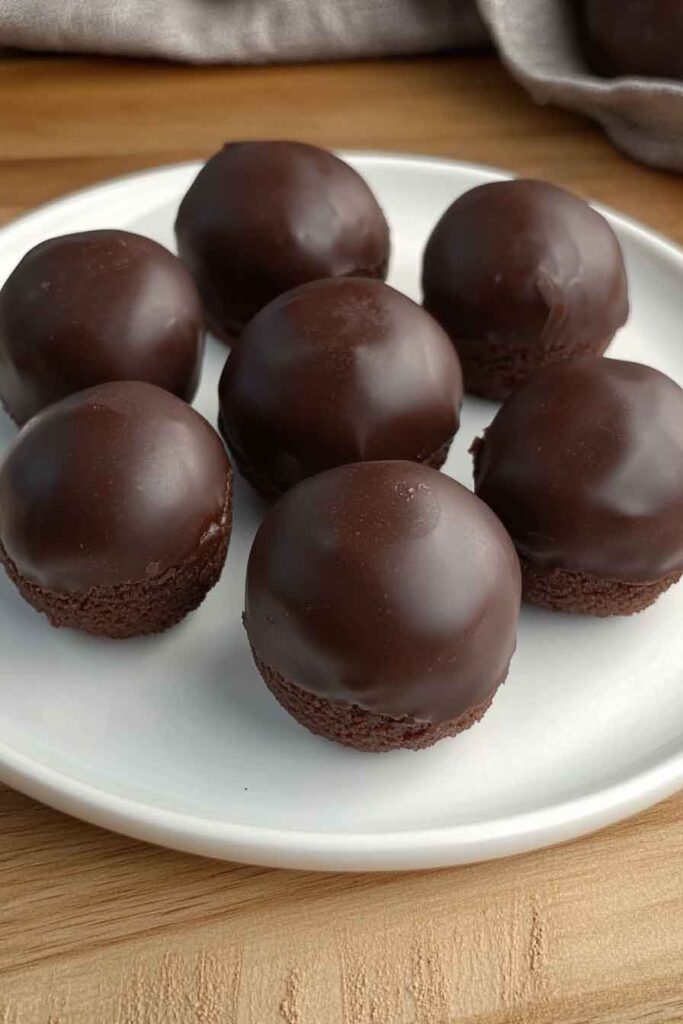
8. Serve and Enjoy Your Chocolate Covered Cheesecake Balls
Once your chocolate-covered cheesecake balls are chilled and the chocolate has hardened, it’s time to serve them! These little treats are perfect for a party, a potluck, or a simple dessert to share with friends and family. Here are a few creative ways to serve them:
- Party Platter: Arrange the cheesecake balls on a decorative platter or cake stand. Add a few fun accessories, like cocktail sticks or small flags, to give them a festive feel.
- Gift Boxes: Chocolate-covered cheesecake balls make an excellent homemade gift! Package them in a small gift box or cellophane bag tied with a ribbon. Your friends and family will be impressed by the thoughtful, delicious gift.
- Dessert Bar: Serve these cheesecake balls as part of a dessert spread at your next event. They pair perfectly with other finger desserts like cookies, brownies, or fruit skewers.
- Individual Serving Cups: For a more refined presentation, serve each cheesecake ball in a small dessert cup or mini cupcake liner. It makes for a cute, individual-sized treat that everyone can enjoy.
9. Storing Chocolate Covered Cheesecake Balls
If you happen to have any leftovers (which is rare!), you can store the chocolate-covered cheesecake balls to enjoy later. Here’s how:
- Refrigerator: Store the cheesecake balls in an airtight container in the refrigerator for up to 1 week. Make sure the container is lined with parchment paper to prevent the balls from sticking to each other.
- Freezer: You can also freeze the cheesecake balls for longer storage. Place them in a single layer on a baking sheet and freeze them for about 1 hour. Afterward, transfer them to a freezer-safe container or zip-top bag and store them in the freezer for up to 3 months. When you’re ready to enjoy, let them thaw in the refrigerator for a few hours.
10. Tips for Success
To ensure your chocolate-covered cheesecake balls turn out perfect every time, here are a few helpful tips:
- Room Temperature Ingredients: Make sure your cream cheese, sour cream, and eggs are at room temperature before mixing. This will ensure a smooth, lump-free filling.
- Chill the Balls Thoroughly: Don’t skip the chilling step! If the cheesecake balls aren’t firm enough when you dip them in chocolate, they may lose their shape or the chocolate may not coat them evenly.
- Use Good Quality Chocolate: The chocolate coating is a key part of the recipe, so make sure to use high-quality semisweet or milk chocolate for the best flavor and texture.
- Don’t Overmix the Filling: When combining the ingredients for the cheesecake filling, avoid overmixing. This can make the filling too soft and prevent the balls from holding their shape.
- Smooth Chocolate Coating: For a glossy and smooth finish, make sure the chocolate is melted properly and that you’re dipping the cheesecake balls quickly so that the chocolate sets evenly.
Nutritional Information (per serving)
Here’s a general breakdown of the nutrition for each chocolate-covered cheesecake ball, based on an average serving size of one ball. Keep in mind that the exact nutritional content may vary depending on the specific brands of ingredients used and any modifications you make to the recipe.
| Nutrient | Amount per Serving (1 cheesecake ball) |
|---|---|
| Calories | ~150-180 kcal |
| Protein | 2-3 grams |
| Carbohydrates | 20-25 grams |
| Sugar | 15-20 grams |
| Fat | 9-12 grams |
| Saturated Fat | 4-5 grams |
| Cholesterol | 15-20 mg |
| Sodium | 40-50 mg |
| Fiber | 1 gram |
Keep in mind, these are just approximations and should be used for general information. You can adjust the recipe by choosing lower-fat or sugar-free ingredients if you’d like to modify the nutritional profile.

Chocolate Covered Cheesecake Balls Recipe
Course: Uncategorized20-25
balls20
minutes~150-180
kcal1-2
hoursIngredients
- For the Cheesecake Balls:
1 ½ cups graham cracker crumbs (about 12 graham crackers, crushed)
3 tbsp unsalted butter, melted
16 oz cream cheese, softened
½ cup granulated sugar
¼ cup sour cream, at room temperature
1 large egg, at room temperature
1 tsp vanilla extract
1 tbsp all-purpose flour
1 pinch fine sea salt
- For the Chocolate Coating:
8 oz semisweet chocolate, chopped or chocolate chips
2 tbsp coconut oil (or vegetable oil)
Directions
- Prepare the Crust: In a bowl, combine graham cracker crumbs and melted butter. Mix well until crumbs are evenly coated.
- Make the Cheesecake Filling: In a separate bowl, beat together softened cream cheese, sugar, sour cream, egg, and vanilla extract until smooth and fluffy. Add the flour and salt, and mix again until fully combined.
- Form the Balls: Scoop about 1 tablespoon of the graham cracker mixture and press it into a small, compact crust in the palm of your hand. Then, scoop 1 tablespoon of the cheesecake filling and roll it into a ball. Wrap the graham cracker crust around the cheesecake filling and shape into a ball. Repeat with remaining mixture.
- Chill the Balls: Place the cheesecake balls on a parchment-lined baking sheet and chill them in the refrigerator for 1-2 hours.
- Melt the Chocolate: Melt the semisweet chocolate and coconut oil in a microwave-safe bowl in 20-second intervals, stirring in between, until smooth.
- Dip in Chocolate: Dip each cheesecake ball into the melted chocolate using a fork, letting excess chocolate drip off before placing them back onto the parchment paper.
- Set the Chocolate: Place the chocolate-covered cheesecake balls in the refrigerator to set for at least 30 minutes.
- Serve and Enjoy: Once the chocolate has hardened, your cheesecake balls are ready to serve!
Storing the Cheesecake Balls:
- In the Refrigerator: Store the cheesecake balls in an airtight container for up to 1 week.
- In the Freezer: Freeze them in a single layer on a baking sheet for 1 hour, then transfer to an airtight container or freezer bag for up to 3 months. Thaw in the refrigerator before serving.
Final Thoughts
This recipe for chocolate-covered cheesecake balls is the perfect way to indulge in a sweet treat that combines the best elements of cheesecake and chocolate. They are easy to make, customizable, and perfect for any occasion. Whether you’re making them for a special celebration or just treating yourself, these cheesecake balls will undoubtedly impress everyone who tries them!
Give this recipe a try, and feel free to get creative with different flavor variations and toppings. If you love chocolate and cheesecake (who doesn’t?), these chocolate-covered cheesecake balls will become a favorite in your dessert rotation.