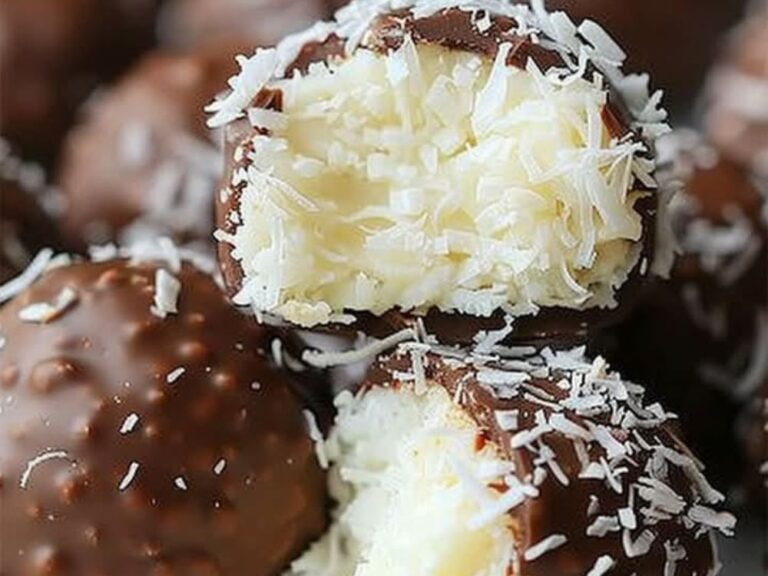
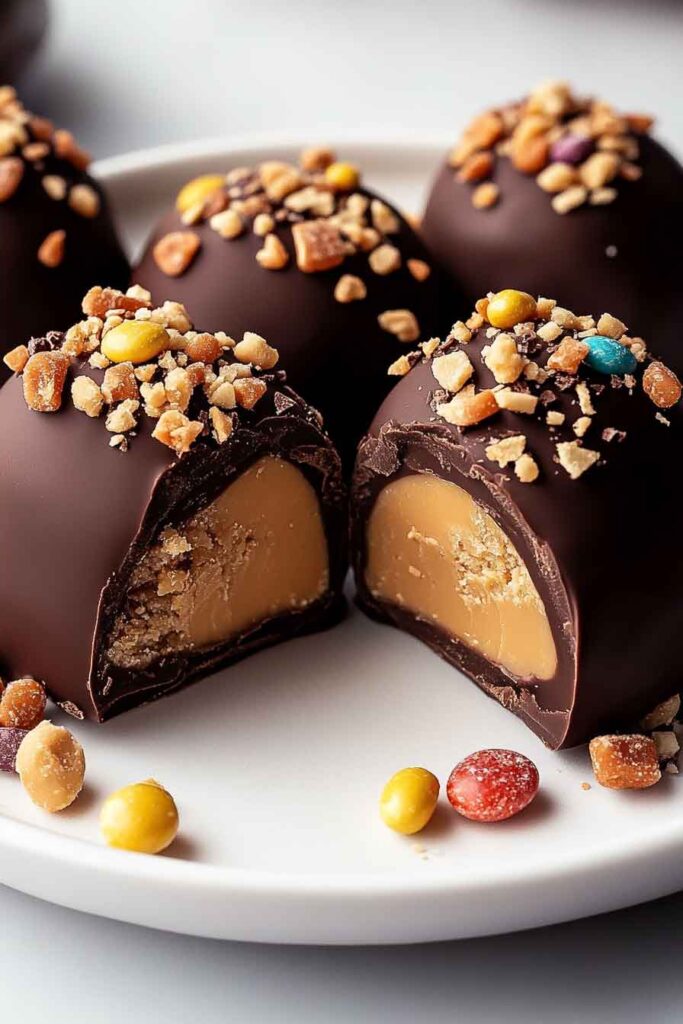
Butterfinger Peanut Butter Bombs
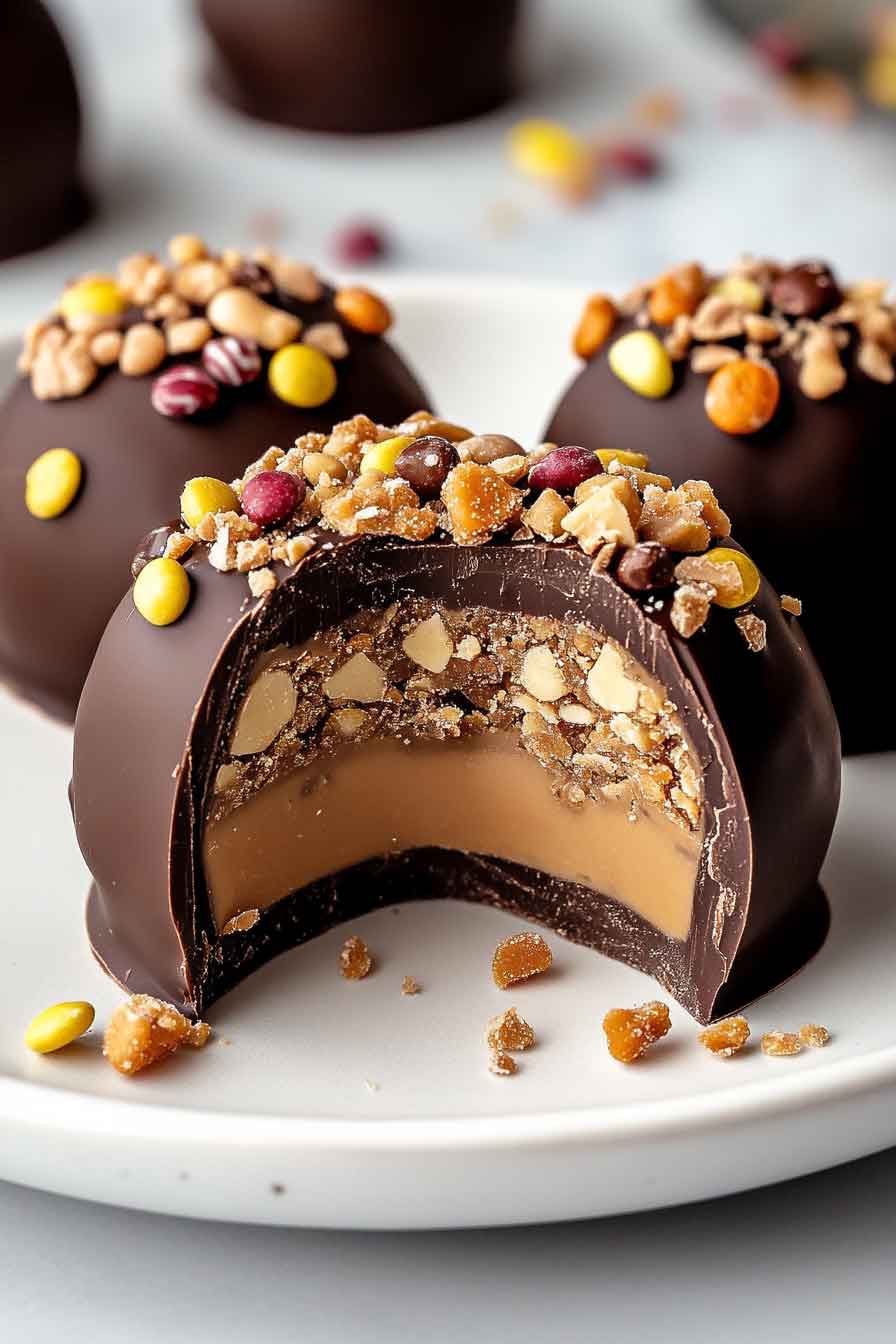
Okay, so if you love peanut butter and chocolate, you have to hear this. These Butterfinger Peanut Butter Bombs are, like, next-level good. I couldn’t stop at one.
I made them the other day, just for fun. And wow—they were gone so fast. Crunchy, creamy, sweet… just so yummy.
They’re no-bake and super easy. Just mix, roll, dip, and boom—dessert magic. Kids love them, and yeah, I kinda do too.
Let me show you how I make them at home. You’ll wanna whip up a batch right away. Trust me, they’re a total hit!

Why You’ll Love This Recipe
- Perfect Balance of Sweet & Salty: The creamy peanut butter pairs perfectly with the crunch of Butterfingers and the richness of milk chocolate.
- No-Bake and Easy to Make: This recipe comes together quickly with no baking required.
- Great for Gifting: Pack these little delights into a cute box or jar, and you’ve got the perfect homemade gift for family or friends.
- Peanut Butter Lover’s Dream: If you’re a peanut butter fanatic, these will be your new favorite treat.
- Crowd-Pleaser: Whether you’re hosting a party or just indulging at home, these are sure to be a hit.
Required Kitchen Tools
Before we dive into the recipe, here’s what you’ll need to whip up these delicious peanut butter bombs:
- Mixing Bowls: You’ll need a large bowl for mixing the peanut butter mixture and a smaller bowl for the melted chocolate.
- Measuring Cups and Spoons: To get the exact amounts for each ingredient.
- Microwave-Safe Bowl: For melting the chocolate (or you can use a double boiler if you prefer).
- Baking Sheet or Tray: To set the peanut butter bombs before they set in the fridge.
- Parchment Paper or Wax Paper: For lining the baking sheet to prevent the bombs from sticking.
- Fork or Small Spoon: For dipping the peanut butter bombs into the chocolate without making a mess.
- Refrigerator: You’ll need it to chill the peanut butter bombs and allow the chocolate to set perfectly.
Ingredients
Let’s take a look at the ingredients that come together to make these Peanut Butter Bombs irresistible:
- Creamy Peanut Butter: The base of the bombs. The creaminess provides the right texture and flavor to complement the crunchy Butterfinger.
- Unsalted Butter (softened): Helps to make the peanut butter mixture smooth and gives it that rich, melt-in-your-mouth texture.
- Powdered Sugar: Sweetens the mixture, and the fine texture helps it blend seamlessly.
- Graham Cracker Crumbs: Adds a deliciously crunchy texture and helps to bind everything together.
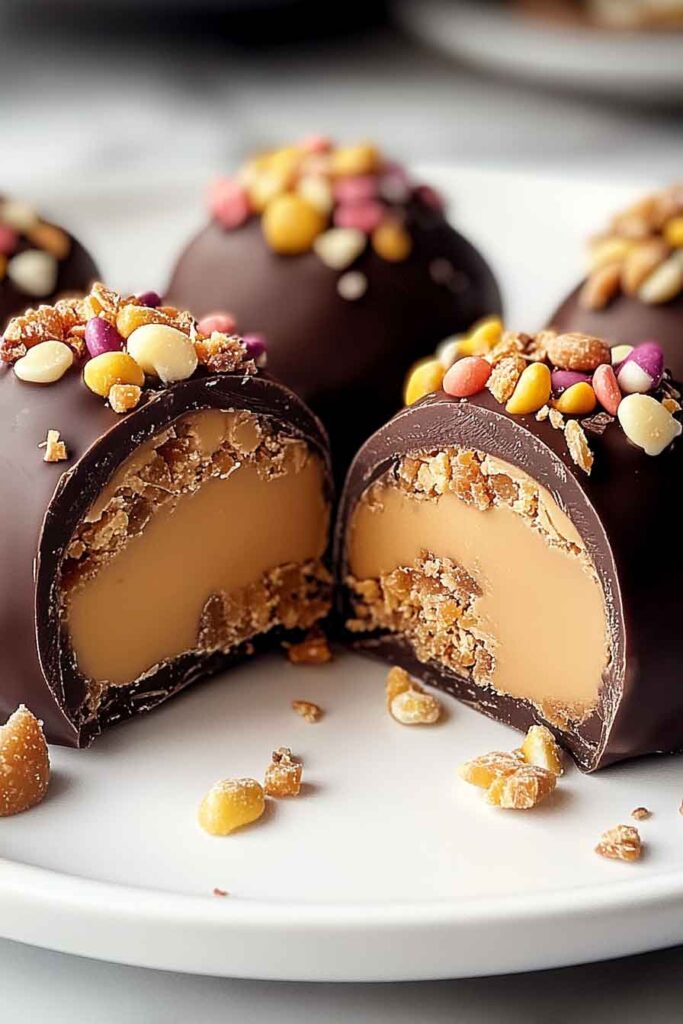
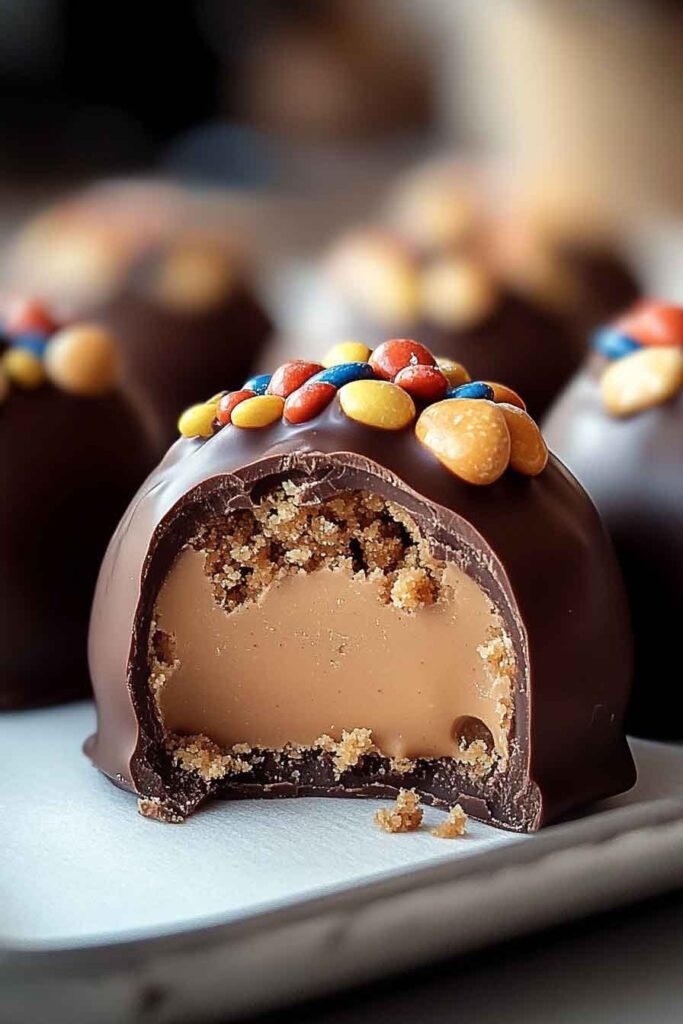
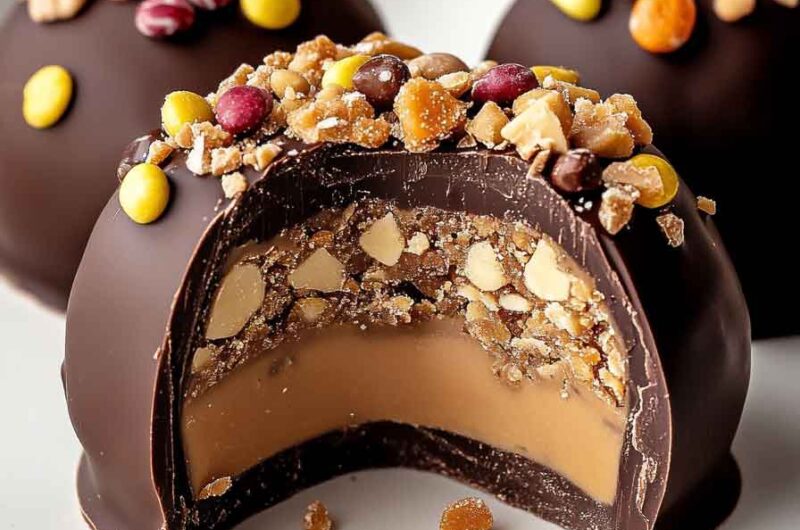
- Butterfinger Candy Bars (crushed): The star of the show! These bring both a crunchy texture and a sugary sweetness that balances the peanut butter flavor.
- Milk Chocolate Chips: For coating the peanut butter bombs. You can’t go wrong with smooth milk chocolate.
- Coconut Oil (optional): This is optional but adds a glossy finish to the chocolate coating, helping it set better and making it easier to dip.
Variations for Butterfinger Peanut Butter Bombs
While the original recipe is divine, here are a few variations you can try if you want to mix things up:
- Use Dark Chocolate: For a richer taste, swap the milk chocolate chips for dark chocolate. This will give the bombs a more sophisticated flavor.
- Peanut Butter Lovers: Add a bit more peanut butter into the mixture for an even stronger peanut butter flavor.
- Add a Salted Caramel Drizzle: For a sweet and salty twist, drizzle some salted caramel over the top after dipping in the chocolate.
- Try Different Candy Bars: If Butterfingers aren’t your thing, swap them for other crushed candy bars like Snickers, Reese’s Peanut Butter Cups, or Milky Way for a new flavor profile.
- Add a Nutty Crunch: You could also stir in some chopped peanuts or almonds to the peanut butter mixture for an extra crunch!
Step-by-Step Instructions for Butterfinger Peanut Butter Bombs
1. Prepare the Peanut Butter Mixture
In a large mixing bowl, combine the creamy peanut butter and softened butter. Mix until smooth and creamy. This will be the base for your bombs.
Add in the powdered sugar and graham cracker crumbs, then stir until well combined. You’ll want to achieve a thick dough-like consistency that will hold together when rolled into balls. Finally, add the crushed Butterfinger bars into the mixture and stir them in evenly, making sure the chunks are spread throughout.
2. Form the Bombs
Once your mixture is ready, it’s time to shape it into bombs. Use your hands or a spoon to scoop out about 1 tablespoon of the mixture. Roll it into a ball, then place it on a baking sheet lined with parchment or wax paper. Repeat until you’ve used up all of the mixture.
You should end up with about 20-25 balls, depending on how big you make them. Place the tray in the refrigerator for at least 30 minutes to let the bombs firm up and hold their shape.
Part 2: Dipping and Finalizing the Butterfinger Peanut Butter Bombs
Now that your peanut butter bombs are chilled and firm, it’s time to dip them in rich, creamy chocolate and make them look like a million bucks. This step is easy, but requires a little patience to get that perfect chocolate coating. Let’s dive into it!
3. Melt the Chocolate
In a microwave-safe bowl, place the milk chocolate chips (and coconut oil if you’re using it). Microwave in 20-30 second intervals, stirring in between, until the chocolate is smooth and fully melted. The coconut oil helps the chocolate melt more evenly and gives it a beautiful, glossy finish.
If you don’t want to use the microwave, you can also melt the chocolate using a double boiler. Simply place the chocolate and coconut oil in a heatproof bowl over a pot of simmering water, stirring occasionally until fully melted.
4. Dip the Peanut Butter Bombs
Once your chocolate is melted and smooth, it’s time to dip the peanut butter bombs. Using a fork or a small spoon, gently dip each peanut butter ball into the chocolate. Make sure the ball is fully coated, then lift it out, letting any excess chocolate drip off. Place the dipped bomb back onto the parchment-lined tray.
If you like, you can add a bit of extra flair by sprinkling some crushed Butterfinger or even a few chocolate shavings over the top before the chocolate hardens.
5. Let the Chocolate Set
Once all of your peanut butter bombs are dipped in chocolate, pop the tray back in the refrigerator. Let them chill for about 20-30 minutes or until the chocolate is fully set and firm. This ensures that the chocolate coating stays intact when you bite into the peanut butter bombs.
If you’re in a rush, you can place the tray in the freezer for 10-15 minutes for a quicker set.
6. Serve and Enjoy!
Once the chocolate has set, your Butterfinger Peanut Butter Bombs are ready to serve. These treats are perfect for any occasion, whether you’re hosting a party, celebrating a birthday, or simply craving something sweet.
How to Serve Butterfinger Peanut Butter Bombs
There are several ways you can enjoy these little peanut butter treats:
- As a Snack: These are perfect for an afternoon pick-me-up or late-night snack.
- In Desserts: Crumble them on top of ice cream, cupcakes, or a no-bake cheesecake for an added crunch.
- As a Gift: Place them in a cute jar or box, and you’ve got a homemade gift that’s sure to impress friends and family.
- For Parties: These peanut butter bombs are perfect for party platters or holiday spreads.
Storage and Meal Prep Tips
- Storage: Once the chocolate has set, store the Butterfinger Peanut Butter Bombs in an airtight container. They will keep for up to 1 week in the refrigerator. If you want to keep them for a longer time, they can be frozen for up to 3 months. Just let them thaw at room temperature for about 10-15 minutes before enjoying.
- Meal Prep Tip: You can make a large batch of the peanut butter mixture and roll it into balls, then freeze them. When you’re ready to serve, dip them in chocolate and let them set.
Tips and Tricks for Success
- Make Sure the Peanut Butter Mixture Is Firm: If the peanut butter mixture is too soft, the balls won’t hold their shape when you roll them. If that happens, simply refrigerate the mixture for a bit longer before forming the balls.
- Don’t Skip the Chilling: Chilling the peanut butter bombs is crucial for both holding their shape and ensuring the chocolate coating sets properly.
- Choose High-Quality Chocolate: Since the chocolate is a big part of the flavor, choose a good-quality milk chocolate for the best taste.
- Use Coconut Oil for Smooth Dipping: The coconut oil helps thin the chocolate just enough so it coats the bombs smoothly without clumping.
As you savor each bite of these Butterfinger Peanut Butter Bombs, you’ll indulge in the perfect balance of creamy peanut butter, crunchy Butterfinger candy, and rich milk chocolate. Whether you’re treating yourself or sharing with friends and family, these little delights are sure to please everyone. Let’s wrap up with the nutritional information, a few additional tips, and a final word of encouragement.
Nutrition Information for Butterfinger Peanut Butter Bombs
While these little bombs are a treat, they’re also packed with delicious ingredients that bring a good amount of energy. Here’s an approximate breakdown of the nutrition per serving (based on a serving size of one bomb):
| Nutrient | Amount |
|---|---|
| Calories | 200 kcal |
| Total Fat | 12g |
| Saturated Fat | 5g |
| Trans Fat | 0g |
| Cholesterol | 10mg |
| Sodium | 45mg |
| Total Carbohydrates | 23g |
| Dietary Fiber | 1g |
| Sugars | 20g |
| Protein | 4g |
Note: The exact nutritional values may vary depending on the size of your peanut butter bombs and the ingredients used. For a more accurate breakdown, you can input the ingredients into a nutrition calculator based on your specific ingredients.
Conclusion
These Butterfinger Peanut Butter Bombs are an absolute winner in the world of no-bake treats. Combining creamy peanut butter, buttery graham crackers, and crunchy Butterfinger candy, then coating them in smooth milk chocolate, makes for a bite-sized indulgence that’s hard to beat. Whether you’re looking for a quick snack, a sweet addition to a party, or the perfect homemade gift, these peanut butter bombs will satisfy every craving.
Butterfinger Peanut Butter Bombs
Course: Uncategorized20-25
bombs15
minutes30
minutes200
kcalIngredients
1 cup creamy peanut butter
1/4 cup unsalted butter, softened
1 1/2 cups powdered sugar
1 cup graham cracker crumbs
4-5 Butterfinger candy bars, crushed
1 cup milk chocolate chips
1 tbsp coconut oil (optional, for smoothing chocolate)
Directions
- Prepare the Peanut Butter Mixture: Combine the peanut butter and softened butter in a large bowl. Stir until smooth. Add the powdered sugar, graham cracker crumbs, and crushed Butterfingers. Mix until fully combined.
- Form the Bombs: Scoop out 1 tablespoon of the mixture and roll it into a ball. Place the balls on a parchment-lined tray. Chill in the fridge for 30 minutes.
- Melt the Chocolate: Microwave the milk chocolate chips and coconut oil in 20-30 second intervals, stirring until smooth.
- Dip the Bombs: Using a fork or spoon, dip each peanut butter ball into the melted chocolate. Let the excess drip off and place the dipped balls back on the tray.
- Let Set: Chill the peanut butter bombs in the fridge for 20-30 minutes, or until the chocolate is firm and set.
- Serve and Enjoy: Serve the Butterfinger Peanut Butter Bombs as a snack, dessert, or gift!
FAQs for Butterfinger Peanut Butter Bombs
Can I use crunchy peanut butter?
Yes, you can use crunchy peanut butter for a bit of extra texture, though it will change the smoothness of the bombs a bit.
Can I freeze these?
Absolutely! Store the peanut butter bombs in an airtight container in the freezer for up to 3 months. Thaw at room temperature for about 10-15 minutes before serving.
Can I use another type of chocolate?
Of course! Dark chocolate or white chocolate can be used for a different flavor profile. You can even swirl the chocolates together for a unique look.
How do I prevent the chocolate from cracking when I dip?
Make sure your peanut butter balls are fully chilled before dipping and let the excess chocolate drip off slowly. If necessary, you can dip the balls twice for a thicker chocolate coating.