Black Cocoa Miso Brownies: A Decadent Sweet-Savory Treat
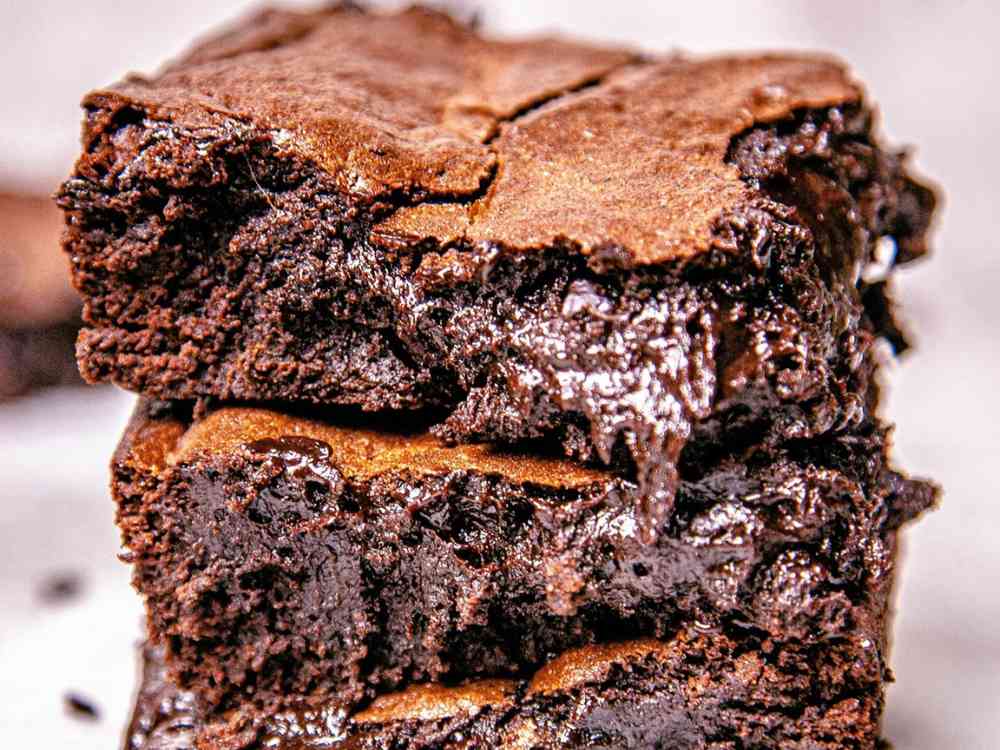
Have you ever craved a dessert that’s both familiar and intriguingly different? Imagine the rich, deep flavor of black cocoa paired with the savory touch of miso, creating a brownie experience unlike any other. These Black Cocoa Miso Brownies are the perfect marriage of sweet and savory, and they’re sure to become your new favorite indulgence.
Brownies have always been a comfort dessert, but this recipe takes them to the next level. The addition of black cocoa gives them a dark, velvety richness, while the miso paste adds a subtle umami that balances the sweetness beautifully. It’s a bold twist that keeps you coming back for more, bite after bite.
If you’re looking for a dessert that impresses both in flavor and uniqueness, these brownies are the answer. Whether you’re an adventurous baker or someone who loves classic treats with a twist, this recipe offers the perfect combination of comfort and creativity. Let’s dive in and make something truly special!
What is Miso?
Miso is a traditional Japanese seasoning made by fermenting soybeans with salt and a mold called koji. It’s known for its salty, umami-rich flavor and is widely used in savory dishes like soups and marinades. However, in recent years, miso has been making its way into desserts, and for a good reason. Its subtle savory notes enhance the sweetness of ingredients like chocolate, making desserts richer and more complex.
For these brownies, we’ll use white miso paste. It has a milder, less salty flavor than its red or yellow counterparts, which allows it to blend seamlessly into the brownie batter without overwhelming the sweetness of the chocolate.
Ingredient Notes
Here’s a breakdown of the key ingredients you’ll need for these black cocoa miso brownies:
- Black Cocoa Powder: This is a highly alkalized form of cocoa powder that gives baked goods an intense, almost Oreo-like flavor. If you can’t find black cocoa powder, you can substitute it with Dutch-processed cocoa powder, though the flavor will be less intense.
- White Miso Paste: You can find this in most Asian markets or even some larger grocery stores near the tofu section. It adds depth to the brownies without making them taste “salty.” Avoid using red or yellow miso paste, as these have a stronger flavor that can overpower the dessert.
- Semi-Sweet Chocolate Chips: These provide a sweet balance to the savory miso. For a richer experience, you can also use dark chocolate chips.
- Butter: For that classic, buttery richness. Unsalted butter works best here since the miso already adds a salty element.
- Granulated Sugar: To add sweetness and help create that irresistible crinkle on top of the brownies.
- Eggs: Cold eggs help achieve that shiny, crackly top that every brownie lover craves.
- All-Purpose Flour: The foundation of the brownie, giving it structure without making it too cakey.
- Vanilla Extract: This enhances the flavors, making the chocolate and miso stand out even more.
- Fine Sea Salt: Just a touch to balance the flavors, ensuring the brownies aren’t too sweet.
Step-by-Step Instructions
1. Melt the Butter, Chocolate, and Miso Paste
In a microwave-safe bowl or over a double boiler, combine the butter, semi-sweet chocolate chips, and white miso paste. Heat in short intervals, stirring in between, until the mixture is completely smooth and melted. The miso should dissolve into the chocolate mixture without any lumps.
Tip: Be sure to melt the mixture slowly, as chocolate can burn easily in the microwave.
2. Whisk the Eggs and Sugar
In a large mixing bowl, whisk together the eggs, sugar, and vanilla extract. Whisk until the mixture becomes light and fluffy, about 2-3 minutes. This will help dissolve the sugar and create that signature shiny, crinkly top when the brownies bake.
3. Combine Wet and Dry Ingredients
Slowly stream the melted chocolate mixture into the egg and sugar mixture, whisking constantly until fully combined.
In a separate bowl, whisk together the flour, black cocoa powder, and fine sea salt. Gently fold the dry ingredients into the wet ingredients, making sure not to overmix. Once the mixture is mostly combined, fold in any additional chocolate pieces for extra richness.
4. Prepare the Pan and Bake
Preheat your oven to 350°F (180°C). Line an 8×8 inch baking pan with parchment paper, allowing some overhang for easy removal later.
Pour the brownie batter into the prepared pan, smoothing the top with a spatula. Bake for 30-35 minutes or until the center is puffed and a toothpick inserted into the middle comes out with a few moist crumbs.
Tip: For extra fudgy brownies, underbake slightly so the center stays gooey.
5. Cool and Slice
Let the brownies cool in the pan on a wire rack for at least 1-2 hours. Once cooled, use the parchment paper to lift the brownies out of the pan. Use a sharp knife to slice into squares, cleaning the knife between each cut to ensure clean edges.
Storage Tips
- Room Temperature: Store the brownies in an airtight container at room temperature for up to 3 days. Avoid refrigerating them, as this can dry them out.
- Freezing: To freeze, wrap individual brownie squares in plastic wrap, then foil, and store in an airtight container or freezer bag for up to 3 months. To enjoy, simply let them thaw at room temperature for about an hour.
Pro Baking Tips
- Use a Kitchen Scale: For the most accurate results, use a kitchen scale to measure your ingredients, especially the flour. Too much flour can make the brownies cakey, while too little can make them greasy.
- Cold Eggs = Crinkle Top: Using cold eggs straight from the fridge helps create that shiny, crinkly top we all love on brownies.
- Underbake for Fudginess: If you prefer your brownies extra gooey and fudgy, underbake them slightly. A toothpick should come out with a few moist crumbs but not wet batter.
- Use a Metal Pan: Metal pans conduct heat more evenly, which is essential for brownies. Avoid glass or ceramic pans as they require longer baking times and can result in unevenly baked brownies.
Filling Gaps from Competitors
While our competitor’s recipe is solid, there are several areas where we can enhance the recipe for a more comprehensive experience:
- Ingredient Alternatives and Variations: Not everyone has access to black cocoa or white miso paste. Offering alternatives like Dutch-processed cocoa powder or yellow miso can help broaden the audience.
- Detailed Flavor Profiles: Expand on how miso and black cocoa complement each other. Explain that while the miso adds umami, it also enhances the natural sweetness of the chocolate, creating a more balanced flavor. This can help readers understand why these unique ingredients work so well together.
- Texture Explanation: Adding a section on the different textures you can achieve (gooey vs. cakey brownies) based on baking time will give readers more control over the final result.
- Nutrition Breakdown: Include a basic nutrition breakdown so readers are informed about what they’re consuming. Many readers appreciate knowing the calorie content, especially with indulgent desserts.
FAQs
Can I Use Regular Cocoa Powder Instead of Black Cocoa Powder?
Yes, you can substitute regular unsweetened cocoa powder or Dutch-processed cocoa powder for black cocoa powder. However, the flavor will be less intense, and the color will be lighter.
What Can I Substitute for Miso Paste?
If you can’t find white miso paste, you can use yellow miso, but it may add a stronger, saltier flavor. In a pinch, you can omit the miso and add a pinch of salt, though you will miss out on the unique umami flavor.
Can I Double the Recipe?
Yes! To double the recipe, simply use a 9×13 inch baking pan and double all the ingredients. Keep an eye on the baking time, as you may need to increase it slightly.
Conclusion
Black cocoa miso brownies are a dessert unlike any other. The combination of rich, dark cocoa and the subtle umami of miso creates a complex yet balanced flavor that is sure to impress both novice bakers and seasoned dessert lovers alike. These brownies are the perfect example of how a little creativity in the kitchen can lead to something truly special.
So, why not give these brownies a try? You’ll not only learn new baking techniques, but you’ll also discover how unexpected ingredients can elevate a classic treat. Happy baking!
Nutrition Information (Per Serving)
| Calories | Fat | Carbohydrates | Protein |
|---|---|---|---|
| 290 | 16g | 35g | 4g |


