Brown Butter Rice Krispie Treats: A Perfectly Gooey Twist on a Classic
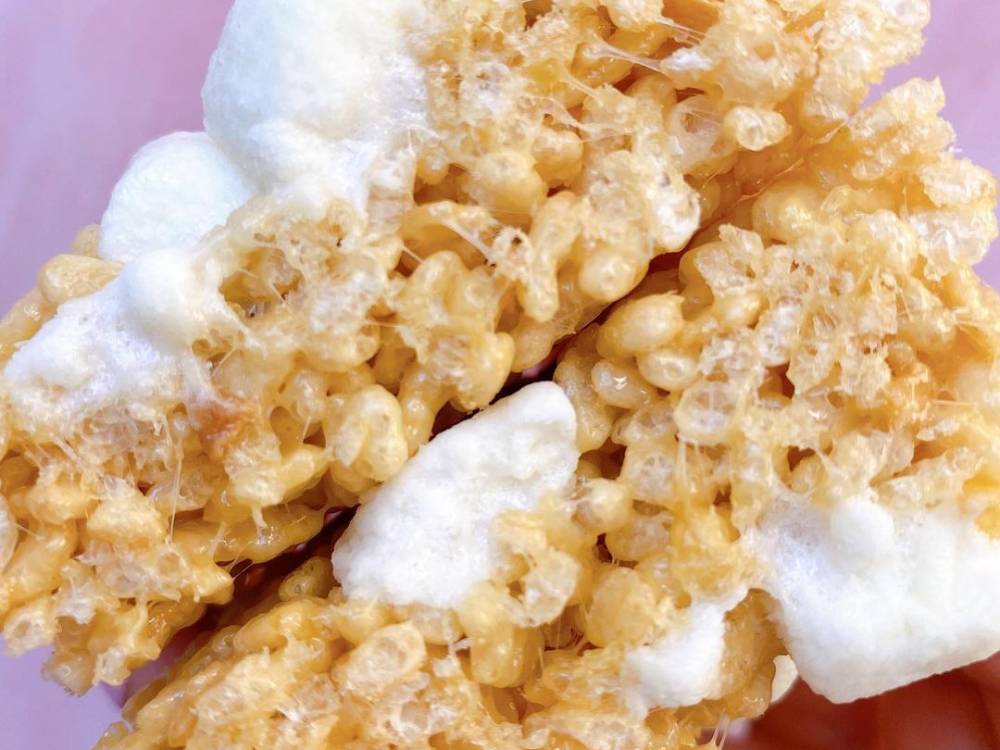
Rice Krispie Treats have been a household favorite for generations. But what if I told you there’s a way to make them even better? Enter Brown Butter Rice Krispie Treats—the same nostalgic treat you love, but with an elevated, nutty flavor that’s hard to resist.
If you’ve ever found yourself craving something simple, sweet, and satisfying, these treats are the answer. With just a little extra effort, you’ll transform the humble Rice Krispie Treat into a decadent dessert perfect for any occasion.
And guess what? They’re still just as easy to make! Stick around as we walk you through this trusted recipe step by step.
What Makes Brown Butter So Special?
Brown butter is the key to unlocking a deeper, richer flavor in these treats. By slowly cooking butter until the milk solids turn golden brown, you develop a nutty aroma that adds a whole new layer of complexity to the traditionally simple Rice Krispie Treats. If you’ve never tried it before, prepare to be amazed!

Ingredients for Brown Butter Rice Krispie Treats
To make these delicious, gooey treats, you’ll need just a few basic ingredients—most of which you probably already have in your pantry:
- Butter: We’ll be using unsalted butter to create that signature brown butter flavor.
- Mini Marshmallows: These will melt into a gooey, sweet base for the treats.
- Rice Krispies Cereal: The classic crunch that balances out the gooeyness.
- Vanilla Extract: Adds a subtle depth of flavor.
- Salt: A small pinch to enhance the sweetness.
Pro Tip:
Using high-quality vanilla extract makes a noticeable difference in flavor. And don’t skip the salt—it helps balance the sweetness beautifully!
Step-by-Step: How to Make Brown Butter Rice Krispie Treats
1. Prepare Your Pan
Start by buttering a 9×9-inch baking dish or lining it with parchment paper. This ensures the treats will come out easily when it’s time to cut them.
2. Brown the Butter
This is where the magic happens! In a large saucepan, melt your butter over medium heat. Stir frequently until the butter begins to foam, and you see golden brown specks at the bottom of the pan. The smell will be heavenly—nutty, caramel-like, and irresistibly fragrant. Be careful not to burn the butter, as it can go from brown to burnt quickly.
3. Melt the Marshmallows
Once your butter is browned, reduce the heat to low and add in the mini marshmallows. Stir constantly until the marshmallows are fully melted and combined with the brown butter. The mixture will be smooth and glossy.
4. Add Rice Krispies Cereal
Remove the pan from heat and quickly stir in your Rice Krispies cereal. Be gentle as you fold the cereal into the marshmallow mixture, ensuring every piece is coated.
5. Add Extra Marshmallows (Optional)
For an extra gooey treat, you can fold in an additional cup of mini marshmallows at this stage. These won’t fully melt, giving you delightful pockets of marshmallow throughout the treats.
6. Press Into the Pan
Using a spatula or your hands (with a little butter or plastic wrap to prevent sticking), press the mixture evenly into your prepared pan. Don’t press too hard, as you want to keep the treats light and airy.
7. Let Them Set
Allow the treats to cool at room temperature for at least an hour before cutting. This step requires a bit of patience, but trust me, it’s worth the wait! Once set, use a sharp knife to cut the treats into squares or rectangles.
Why Brown Butter Elevates This Simple Dessert
You might wonder: why go through the extra step of browning the butter? The answer lies in the depth of flavor. Brown butter has a unique nutty richness that enhances the marshmallows’ sweetness without overwhelming it. It’s a small step that makes a big difference, turning a childhood favorite into a gourmet treat.
Common Mistakes to Avoid
While this recipe is straightforward, there are a few pitfalls to watch out for:
1. Overheating the Marshmallows
Once the marshmallows are melted, take the pan off the heat immediately. Overheating can cause the mixture to harden, making your Rice Krispie Treats less chewy and more difficult to work with.
2. Skipping the Salt
A tiny pinch of salt might seem insignificant, but it actually enhances all the other flavors, balancing the sweetness and making the treats taste even better.
3. Pressing Too Hard
When transferring the mixture to the pan, be gentle. Pressing too hard will make your treats dense rather than light and airy.
Customizing Your Brown Butter Rice Krispie Treats
One of the best things about this recipe is how easily customizable it is! Here are a few ideas to make these treats your own:
1. Add Chocolate
For chocolate lovers, drizzle some melted chocolate over the top of the treats before they cool, or stir in chocolate chips for a decadent twist.
2. Add Peanut Butter
Peanut butter can be mixed into the marshmallow and brown butter mixture before adding the Rice Krispies. The combination of nutty flavors is a game-changer!
3. Add Sprinkles
If you’re making these for a holiday or celebration, a handful of sprinkles mixed in can add a festive touch.
Storing and Freezing Tips
These treats are best enjoyed fresh, but they can be stored for up to 3 days at room temperature in an airtight container. If you want to keep them longer, you can freeze them for up to 6 weeks. Just be sure to wrap each piece individually in plastic wrap before placing them in a freezer bag.
Final Thoughts: The Ultimate Rice Krispie Treat
Brown Butter Rice Krispie Treats take a beloved classic and give it a gourmet twist. The browned butter adds depth, richness, and an almost caramel-like flavor that makes these treats irresistible. Plus, they’re still easy enough to whip up in under 30 minutes, making them perfect for busy weeknights or last-minute gatherings.
Whether you’re a seasoned home cook or just starting out in the kitchen, these treats are a foolproof recipe that everyone will love. So go ahead, give them a try—and let us know in the comments how yours turned out!
FAQs About Brown Butter Rice Krispie Treats
Can I use regular marshmallows instead of mini ones?
Yes, but mini marshmallows melt faster and more evenly, which is why they’re recommended for this recipe.
How do I know when my butter is perfectly browned?
You’ll know it’s ready when you see golden brown specks at the bottom of the pan, and the butter smells nutty and fragrant. Keep a close eye, as it can burn quickly!
Can I make these treats ahead of time?
Absolutely! These treats can be made up to 3 days in advance and stored at room temperature in an airtight container.
Conclusion
If you’re looking to elevate a classic, these Brown Butter Rice Krispie Treats are the way to go. The simple step of browning the butter makes all the difference, adding a richness that will have everyone asking for seconds. And with such an easy-to-follow recipe, you can enjoy these delicious treats anytime!
So, what are you waiting for? Gather your ingredients, roll up your sleeves, and get ready to enjoy the best Rice Krispie Treats you’ve ever had. Happy cooking!

