Pumpkin Snickerdoodle Cookies: Your New Favorite Fall Treat
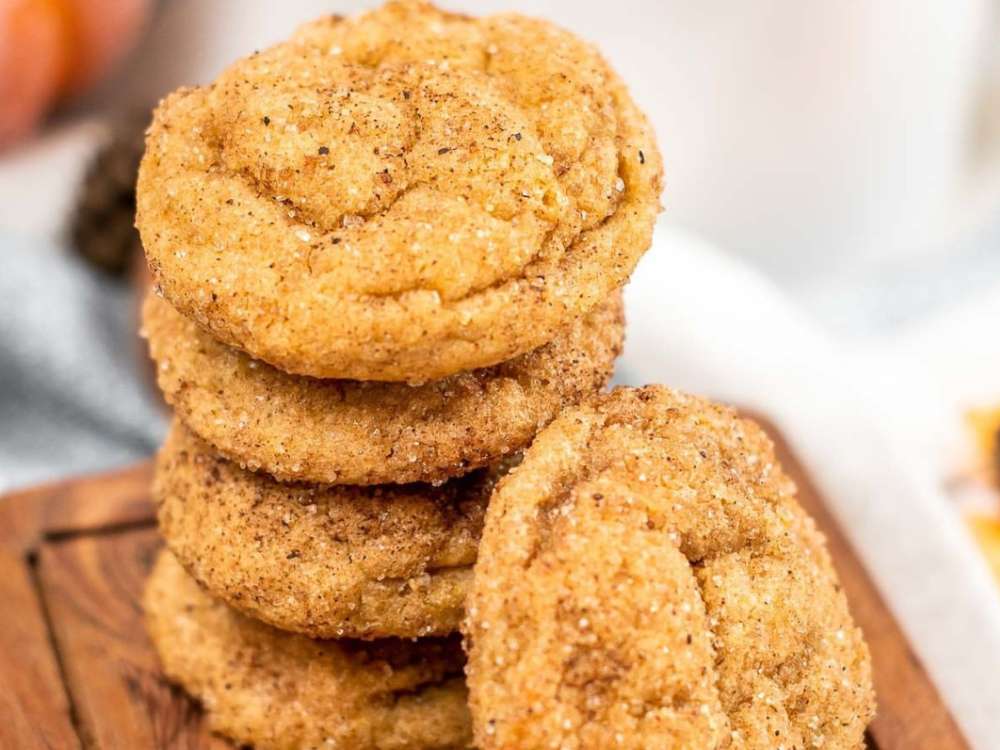
If there’s one thing that screams fall, it’s the warm, cozy flavor of pumpkin spice. And if you love the classic snickerdoodle cookie, you’re in for a real treat! These Pumpkin Snickerdoodle Cookies take everything you love about the original—soft, chewy texture and that cinnamon-sugar coating—and add a seasonal twist with rich pumpkin flavor and all the best fall spices. Imagine biting into a cookie that tastes like a pumpkin pie and a snickerdoodle combined. Tempting, right?
Grab your apron, and let’s get started. Trust me, your kitchen is about to smell amazing!

What You’ll Need to Make Pumpkin Snickerdoodle Cookies
The great thing about this recipe is that most of the ingredients are probably already in your pantry. Here’s what you’ll need to whip up these delightful fall cookies:
- Pumpkin Puree: Not to be confused with pumpkin pie filling! Pure pumpkin adds moisture and that unmistakable fall flavor.
- Butter: Butter makes everything better. Use it softened for easy mixing.
- Sugar: We’re using both granulated and brown sugar for a perfect balance of sweetness and chewiness.
- Flour: Good ol’ all-purpose flour keeps things simple.
- Cinnamon & Nutmeg: These warm spices bring out all the cozy fall flavors we love.
- Egg Yolk: Just the yolk! It adds richness without making the dough too wet since the pumpkin already gives it a lot of moisture.
- Cream of Tartar: A classic ingredient in snickerdoodles, it gives that signature tang and chewy texture.
- Baking Soda & Baking Powder: These help the cookies rise and keep them soft.
See? Nothing too fancy! Now, let’s get baking.
Step-by-Step Guide to Baking Pumpkin Snickerdoodle Cookies
Baking these cookies is a breeze, and I’ll walk you through it so you can feel confident every step of the way. Ready? Here’s how to make your new favorite fall cookies.
1. Mix Up the Dry Ingredients
In a medium bowl, whisk together your flour, cream of tartar, baking soda, cinnamon, nutmeg, and a pinch of salt. This makes sure the spices are evenly spread throughout your dough. It’s a small but important step that guarantees each bite is full of that warm, cozy flavor.
2. Cream the Butter and Sugars
In a larger bowl, use a hand or stand mixer to beat together the butter, granulated sugar, and brown sugar until it’s nice and fluffy. You’ll know it’s ready when it looks a little pale and smooth. This step helps give your cookies that chewy texture and makes them melt-in-your-mouth good.
3. Add the Pumpkin and Egg Yolk
Now, mix in the pumpkin puree, egg yolk, and vanilla extract until everything is well combined. Don’t be surprised if the dough turns a beautiful shade of orange—this is where that signature pumpkin flavor and color come from!
4. Combine the Wet and Dry Ingredients
Slowly add your dry ingredient mixture into the wet ingredients. Be gentle here—mix just until it all comes together. Overmixing can make the cookies tough, and we definitely want them soft and chewy.
5. Chill the Dough
Here’s a key step: chill the dough! I know it’s tempting to skip this, but chilling the dough for at least 30 minutes (or up to 2 hours) will make it easier to roll and prevent the cookies from spreading too much. Plus, it lets all those delicious flavors meld together.
6. Roll and Coat in Cinnamon Sugar
After chilling, preheat your oven to 350°F (175°C) and line a baking sheet with parchment paper. In a small bowl, mix some sugar and cinnamon. Now for the fun part: roll the dough into balls (about a tablespoon each), and then roll them in the cinnamon sugar mixture. Make sure they’re fully coated for that signature snickerdoodle crunch!
7. Bake
Place your dough balls on the baking sheet, leaving space between them because they’ll spread a bit. Bake for 10-12 minutes, just until the edges are set but the centers are still soft. Don’t worry if they look slightly underdone—that’s exactly what makes them chewy and perfect!
Let them cool on the baking sheet for a few minutes before transferring to a wire rack to cool completely (if you can wait that long!).
Pro Tips for Perfect Pumpkin Snickerdoodles
These cookies are pretty straightforward, but here are a few tips to make sure they turn out just right every time:
- Chill the Dough: I know I mentioned this already, but seriously, don’t skip it! Chilling prevents the cookies from spreading too much and keeps them soft.
- Measure Flour Correctly: Too much flour can make your cookies dry. To avoid this, spoon the flour into your measuring cup and level it off with a knife.
- Don’t Overbake: The cookies will continue to bake a little after you take them out of the oven, so make sure to pull them out when the edges are set, even if the centers look slightly underdone.
What to Serve with Pumpkin Snickerdoodles
These cookies are perfect on their own, but if you want to take them to the next level, here are a few serving ideas:
- With Coffee or a Latte: There’s nothing like enjoying these cookies with a warm cup of coffee, chai tea, or even a pumpkin spice latte. You’ll feel like you’re in a cozy coffee shop!
- Ice Cream Sandwiches: Feeling adventurous? Sandwich some vanilla or cinnamon ice cream between two cookies for a dessert that’s out of this world.
- With Warm Apple Cider: The spiced cider pairs perfectly with the cinnamon-sugar coating of the cookies for a full-on fall flavor experience.
Storing Your Pumpkin Snickerdoodle Cookies
If you’re lucky enough to have leftovers, these cookies stay fresh in an airtight container for up to five days. They also freeze well, so you can make a big batch and pop them in the freezer for when you need a quick treat. Just thaw them at room temperature, and they’ll be as soft and chewy as the day you baked them.
Final Thoughts
I think we can all agree that fall is the best time for baking, and these Pumpkin Snickerdoodle Cookies are the perfect addition to your autumn baking lineup. They’re soft, chewy, and packed with pumpkin flavor and warm spices. Whether you’re whipping these up for a cozy weekend at home or sharing them with friends and family, they’re sure to be a hit.
Give them a try, and let me know what you think! And if you have any fun twists on the recipe, I’d love to hear about them in the comments below.
Happy baking! 🍁🎃

