Holiday Oreo Truffle Snowballs
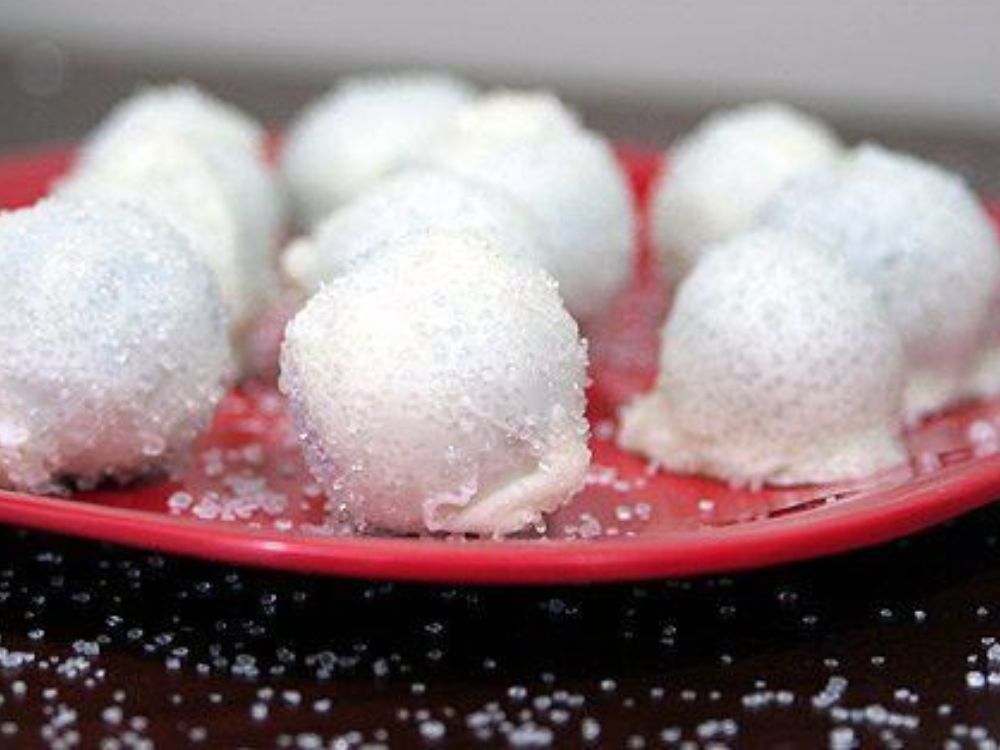
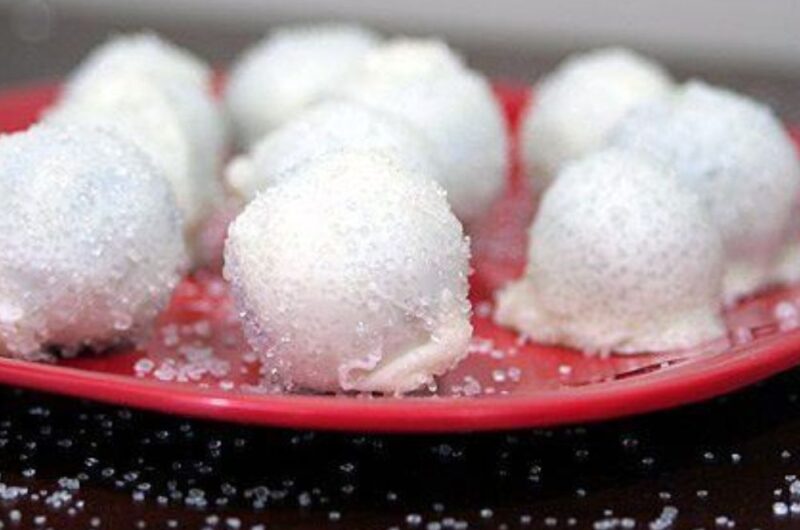
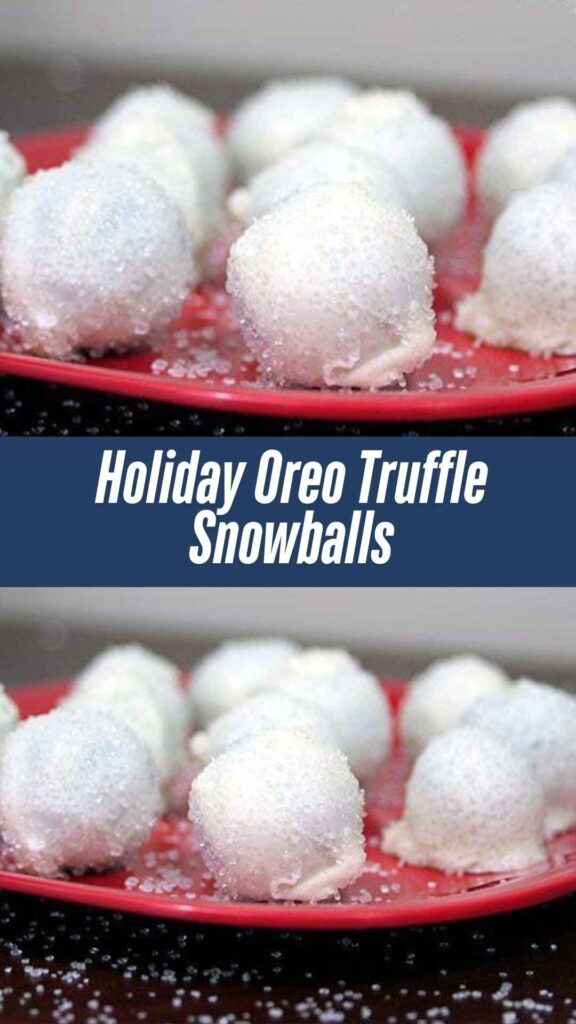
Oh wow, you guys, these Holiday Oreo Truffle Snowballs are little bites of magic! They’re chocolatey, creamy, and covered in a dreamy layer of white chocolate. Seriously, they taste just like the holidays!
The best part? They only need a few simple ingredients—Oreos, cream cheese, and chocolate. No baking, no stress, just pure holiday happiness.
Every bite melts in your mouth, and oh my gosh, they are so fun to make! Perfect for gifts, parties, or just sneaking a few while watching holiday movies. Plus, they look like real little snowballs—so cute!
Let’s get rolling and make some together! You won’t believe how easy and delicious they are. Trust me, you’re gonna love these!
Why You’ll Love This Recipe
- Reader Favorite: As one of our readers exclaimed, “These truffles are my new holiday tradition! So rich and indulgent!”
- No-Bake: No need to turn on the oven for these delicious treats. Just mix, roll, and chill.
- Perfect for Gifting: These cute truffles make for a great homemade gift for friends and family.
- Customizable Coating: Choose from festive sprinkles, coconut, or simply dip them in melted white chocolate.
- Simple Ingredients: You probably already have most of these ingredients at home—making it a breeze to whip up a batch!

Required Kitchen Tools
Before diving into the recipe, let’s make sure you have everything you need:
- Mixing Bowl: A large bowl to mix your ingredients together.
- Food Processor or Ziploc Bag & Rolling Pin: To crush your Oreos into fine crumbs.
- Spoon or Cookie Scoop: For portioning out the truffle mixture.
- Baking Sheet: A tray to place the truffles on while they chill.
- Parchment Paper or Wax Paper: To line the baking sheet for easy removal.
- Microwave-Safe Bowl or Double Boiler: For melting the white chocolate.
Ingredients for Oreo Truffle Snowballs
Here’s what you’ll need to make these irresistible snowballs (exact measurements are in the recipe card below):
- Oreo Cookies: These will form the base of the truffle. You can use any variety of Oreos, but the classic ones work best for this recipe.
- Cream Cheese: Softened cream cheese adds a creamy, rich texture and helps bind the crumbs together.
- White Chocolate Chips: Used for coating the truffles, creating a sweet and smooth finish.
- Sugar Crystals or Sprinkles: For a festive touch, these add sparkle and color to your snowballs.
- Coconut: Optional, but toasted shredded coconut gives the snowballs a snow-like texture and a subtle tropical flavor.
Variations for Oreo Truffle Snowballs
- Dark Chocolate Coating: Instead of white chocolate, use dark or milk chocolate for a richer taste.
- Add Flavoring: Add a little peppermint extract for a festive minty flavor or vanilla extract for a smooth, classic taste.
- Try Different Sprinkles: Instead of traditional sprinkles, consider using crushed peppermint candy, colorful holiday-themed sprinkles, or even mini chocolate chips for added texture.
- Use Flavored Oreos: Switch things up by using a flavored Oreo, such as Mint or Peanut Butter, for a unique twist on the classic truffle.
Step-by-Step Instructions
1. Crush the Oreos
Start by crushing the Oreos into fine crumbs. You can do this by placing them in a food processor or, if you don’t have one, by putting the cookies in a Ziploc bag and using a rolling pin to crush them. You want fine crumbs for the perfect truffle texture.
2. Mix with Cream Cheese
In a large mixing bowl, combine the crushed Oreos with softened cream cheese. Use a spatula or your hands to mix until well combined. You want a thick dough-like consistency that will hold together when rolled into balls.
3. Roll Into Balls
Using a spoon or cookie scoop, scoop out the mixture and roll it into small balls, about 1 inch in diameter. Place them onto a parchment-lined baking sheet. Once all the truffles are rolled, refrigerate them for at least 30 minutes to firm up.
4. Melt the White Chocolate
While the truffles are chilling, it’s time to melt the white chocolate for coating. You can melt it using a microwave-safe bowl or by using a double boiler.
Microwave Method:
- Place the white chocolate chips in a microwave-safe bowl.
- Microwave in 20-30 second intervals, stirring after each interval, until the chocolate is fully melted and smooth.
Double Boiler Method:
- In a saucepan, simmer a small amount of water.
- Place a heatproof bowl on top of the saucepan (making sure the bowl doesn’t touch the water).
- Add the white chocolate chips to the bowl and stir until melted and smooth.
5. Coat the Truffles
Once your white chocolate is melted and smooth, it’s time to dip the truffles. One by one, dip each chilled truffle into the melted chocolate, ensuring it is fully coated. You can use a fork to help submerge the truffle and lift it out of the chocolate. Allow any excess chocolate to drip off before placing the coated truffle back on the parchment-lined sheet.
6. Add the Finishing Touches
While the chocolate is still soft, immediately sprinkle your truffles with sugar crystals, holiday-themed sprinkles, or shredded coconut for that snowball effect. You can get creative with your toppings or keep it simple—it’s up to you!
7. Chill Again
Once all the truffles are coated and decorated, refrigerate them for at least 30 minutes to allow the chocolate to set and harden.
Serving and Decoration
How to Serve Oreo Truffle Snowballs
These delicious treats are perfect for any holiday gathering, from casual family dinners to festive parties. Serve them as a sweet treat on a dessert platter or individually in small festive cups or treat boxes.
- On a Platter: Arrange the snowballs on a decorative platter with a sprinkle of powdered sugar for extra wintery charm.
- In Gift Boxes: Pack them in small gift boxes as a homemade gift for friends and family. You can even tie them with a ribbon for that extra special touch.
- At Parties: These truffles are great for parties because they are easy to eat, portable, and will be a hit with guests of all ages.
Storing Oreo Truffle Snowballs
- Refrigerate: Store the truffles in an airtight container in the fridge for up to 1 week. The cool temperature helps preserve their texture and taste.
- Freezing: If you need to store them for longer, these truffles freeze wonderfully. Simply place them in a single layer on a baking sheet, freeze until solid, and then transfer them to a freezer-safe container. They’ll last for up to 3 months. To thaw, place them in the fridge for a few hours before serving.
Nutrition Information (Optional)
| Serving Size: 1 Truffle | Calories | Fat | Carbs | Protein |
|---|---|---|---|---|
| 1 Truffle | 130 | 7g | 18g | 1g |
Please note that the nutritional values are approximate and may vary depending on the exact ingredients used.
Tips and Tricks for Success
- Use Room Temperature Cream Cheese: Make sure your cream cheese is softened to room temperature. This helps it blend smoothly with the crushed Oreos and prevents lumps in the truffle mixture.
- Don’t Overheat the Chocolate: When melting the white chocolate, be careful not to overheat it. Stir frequently to avoid burning, and always melt in short intervals, whether using the microwave or double boiler method.
- Chill Well: Ensure your truffles are properly chilled before dipping them in chocolate. This helps them keep their shape and prevents the coating from becoming too runny.
- Make it a Family Activity: These truffles are simple enough that kids can help with the mixing, rolling, and decorating. It’s a fun and festive way to spend time together during the holidays.
Conclusion
These Holiday Oreo Truffle Snowballs are an easy and delightful treat for any holiday celebration. The blend of crushed Oreos and creamy cream cheese, paired with the sweetness of white chocolate and festive toppings, makes for a dessert everyone will adore. Whether you’re gifting them or serving them at your holiday table, they’re sure to be a hit.
So what are you waiting for? Grab your ingredients, and start making these delicious, festive truffles today. They’re simple to make, and with a little time in the fridge, you’ll have a batch of sweet, snowball-like treats ready for everyone to enjoy!
Holiday Oreo Truffle Snowballs
Course: Uncategorized24 truffles
servings15
minutes1
minute130
kcalIngredients
1 package (15.35 oz) Oreo cookies, crushed
1 package (8 oz) cream cheese, softened
1 package (12 oz) white chocolate chips
Holiday sugar crystals, sprinkles, or shredded coconut for decoration
Directions
- Crush the Oreos: In a food processor or Ziploc bag, crush the Oreos into fine crumbs.
- Mix with Cream Cheese: In a mixing bowl, combine crushed Oreos with softened cream cheese. Mix until well blended.
- Roll Into Balls: Scoop out the mixture and roll into 1-inch balls. Place them on a parchment-lined baking sheet and refrigerate for at least 30 minutes.
- Melt the White Chocolate: Melt the white chocolate chips using the microwave or double boiler method.
- Coat the Truffles: Dip each chilled truffle into the melted white chocolate, letting the excess drip off. Place back on the sheet.
- Decorate: Sprinkle with sugar crystals, sprinkles, or shredded coconut while the chocolate is still soft.
- Chill: Refrigerate for another 30 minutes to allow the chocolate to set.
- Serve: Enjoy these festive treats at holiday parties, as gifts, or just as a sweet snack!
Holiday Oreo Truffle Snowballs FAQs
Can I make these ahead of time?
Absolutely! You can prepare these truffles up to 3 days in advance. Just store them in an airtight container in the fridge until you’re ready to serve.
Can I use dark chocolate instead of white chocolate?
Yes! Dark chocolate makes a great alternative if you prefer a more intense chocolate flavor.
How do I store these truffles?
Store the truffles in an airtight container in the fridge for up to 1 week or freeze them for up to 3 months.

