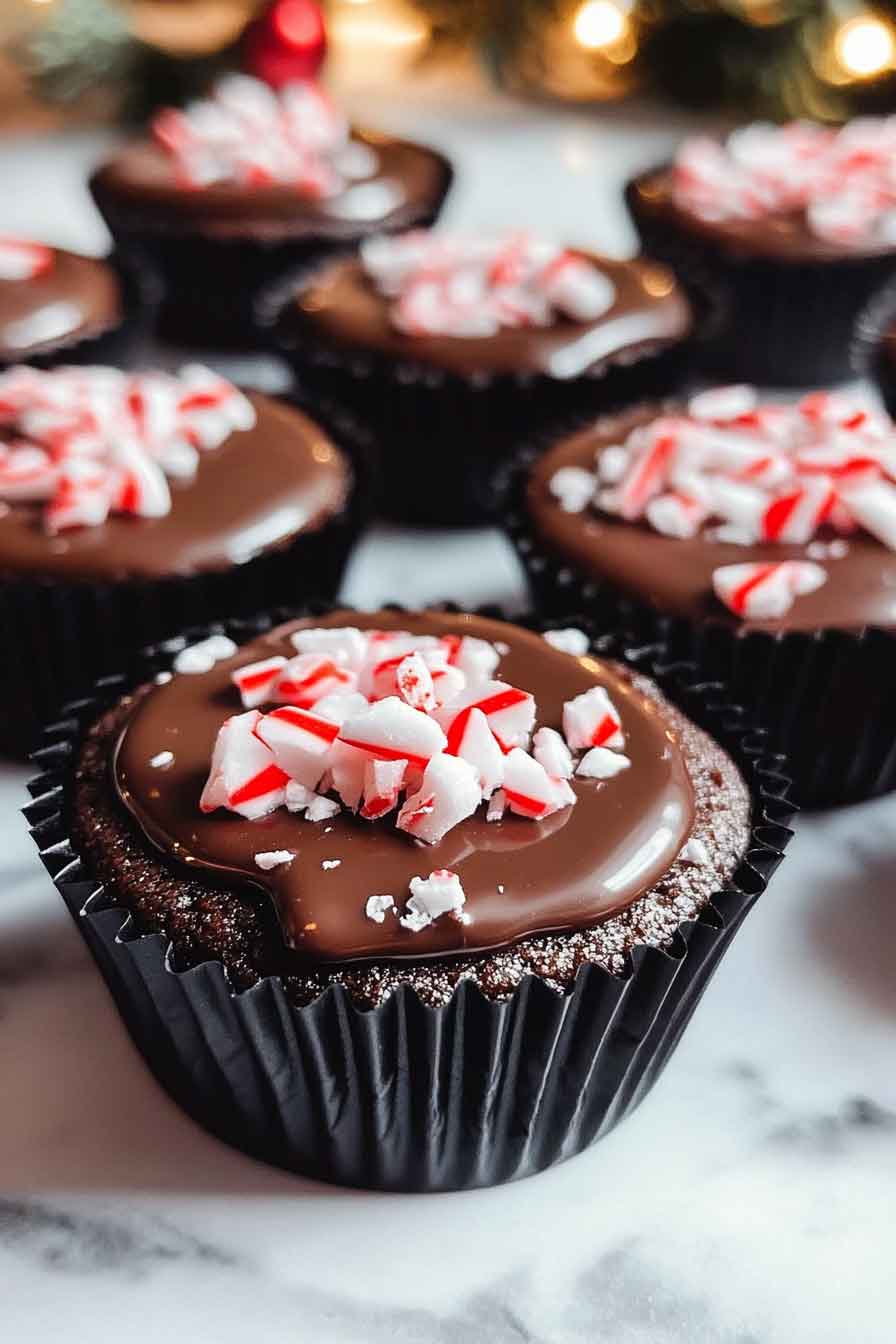
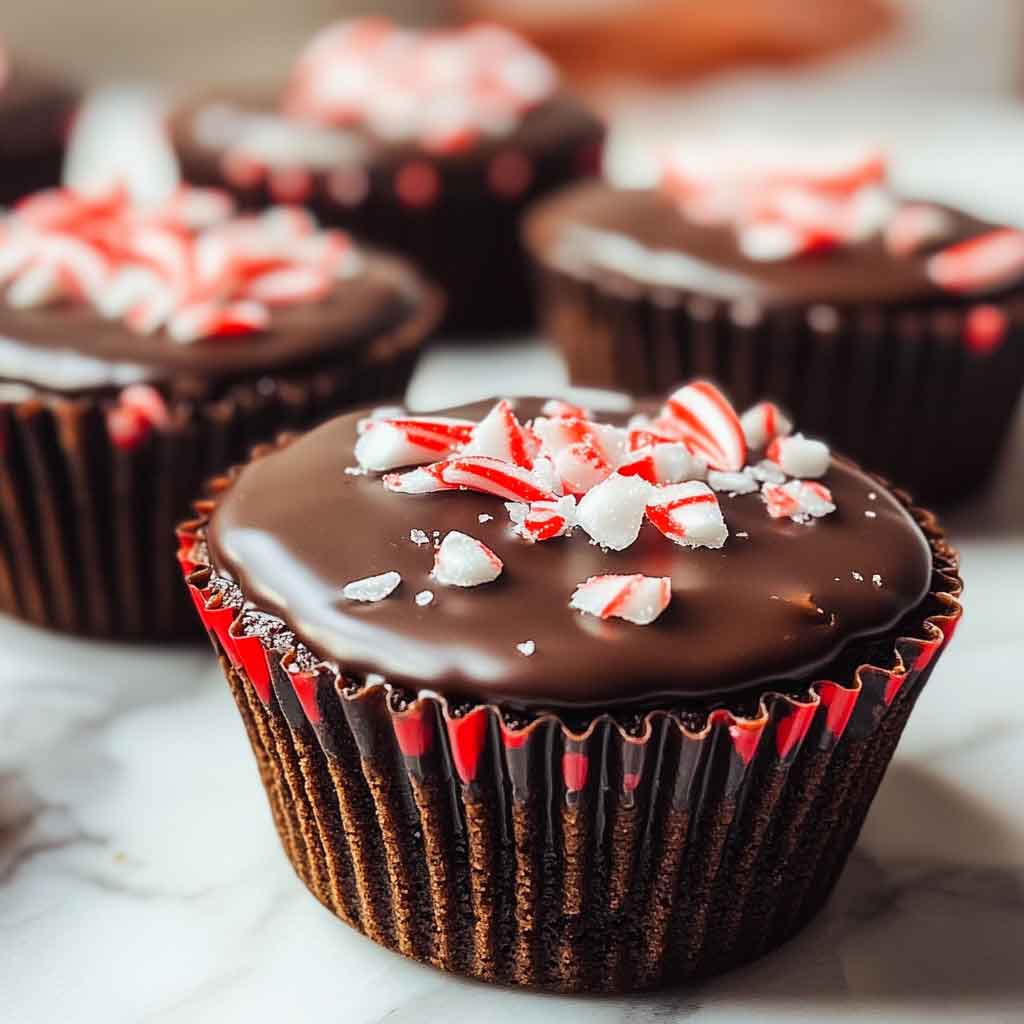
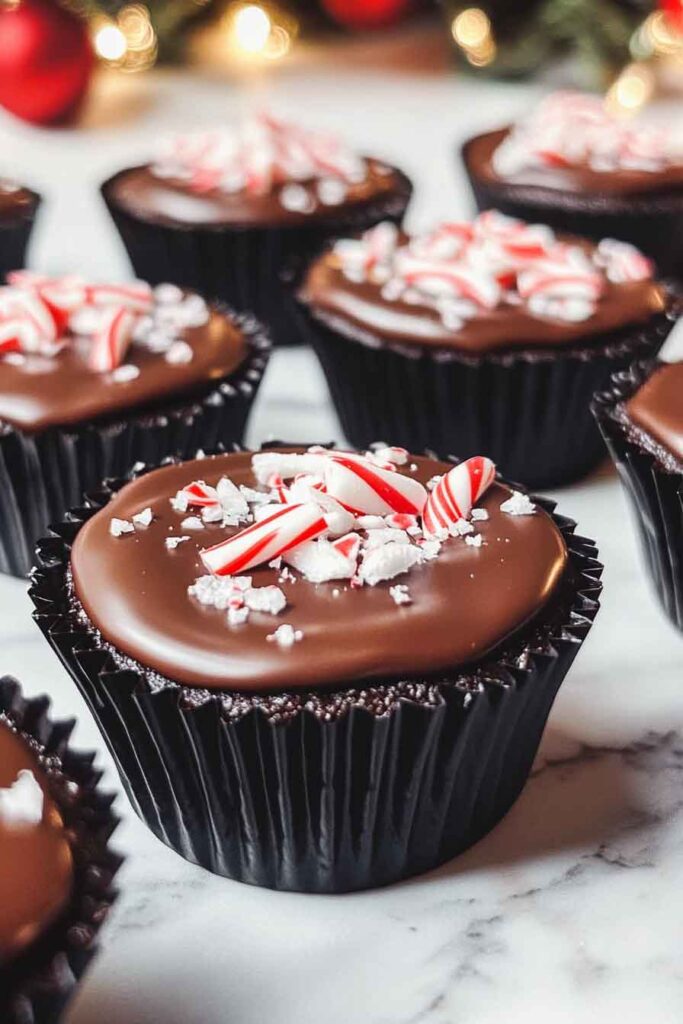
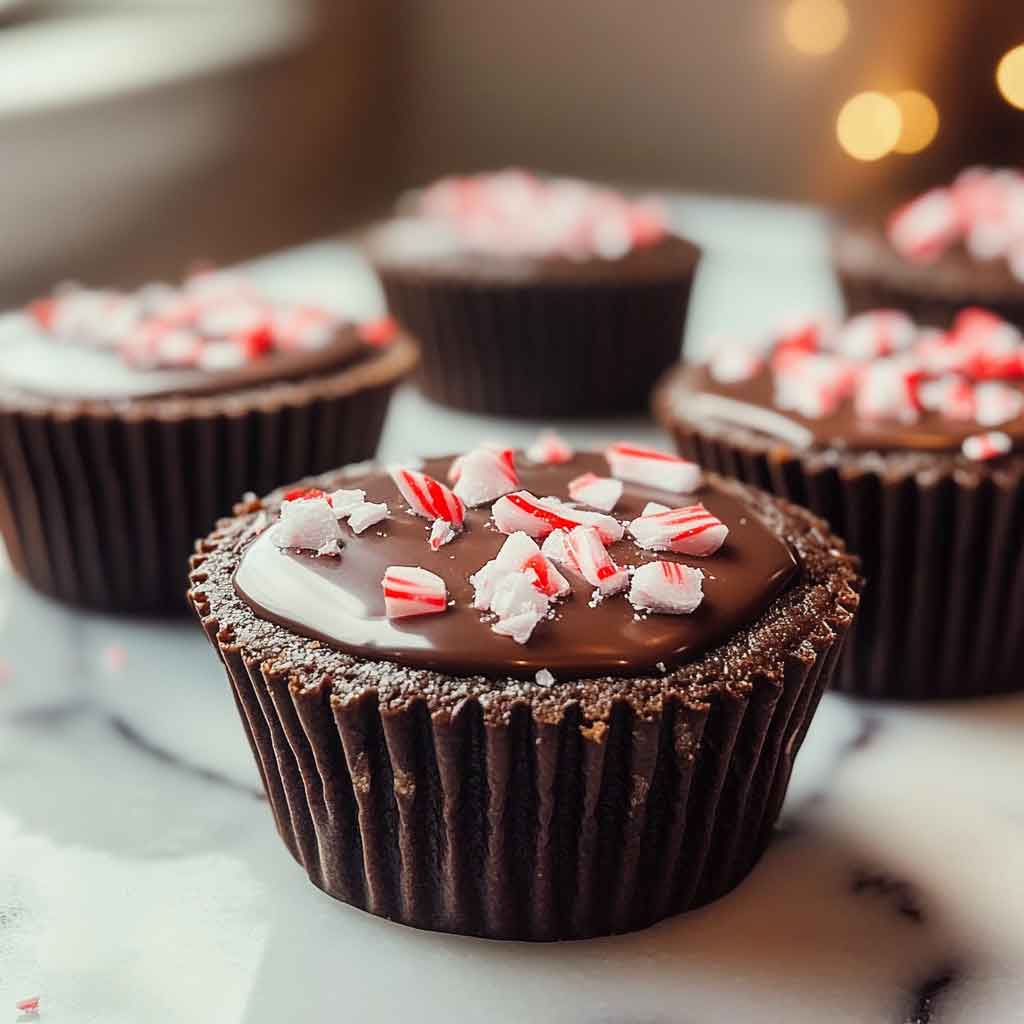
Peppermint Chocolate Cookie Cups
Oh wow, these Peppermint Chocolate Cookie Cups are my new holiday obsession! They’re minty, chocolatey, and just so darn cute. I could honestly eat a whole tray by myself.
They’ve got soft cookie bottoms and creamy peppermint chocolate in the middle. Every bite feels like a little Christmas hug. And the best part? They’re super easy to bake.
My family always lights up when I make these. It makes me so happy to see them enjoy each bite. I promise, you’ll wanna make them again and again.
So let’s bake a batch together and fill our kitchens with yummy holiday smells. You’re gonna love it. Let’s get started right now!

Why You’ll Love This Recipe
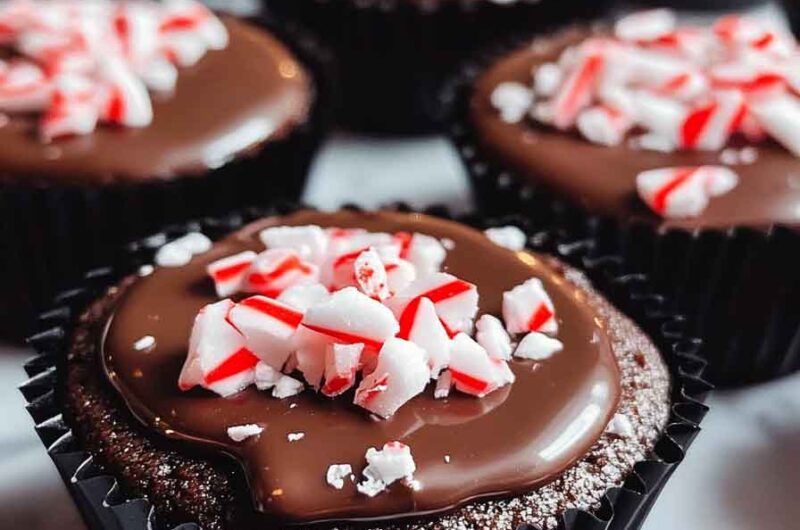
- Festive and Fun: These peppermint chocolate cookie cups are a crowd-pleasing treat that screams “holiday cheer” with every bite.
- Decadent and Creamy: The rich chocolate cookie cup combined with the creamy, peppermint cheesecake filling creates a perfect balance of flavors.
- Easy to Make: Despite the impressive presentation, these cookie cups are simple to prepare and require just a few basic ingredients.
- Great for Gifting: These cookie cups make a fantastic edible gift for friends, family, and coworkers during the holiday season.
- Customizable: You can easily adjust the level of peppermint or chocolate to suit your preferences.
Required Kitchen Tools
Before you begin making these delicious cookie cups, make sure you have the following kitchen tools ready:
- Mixing Bowls: For mixing the dry and wet ingredients.
- Stand or Hand Mixer: For mixing the dough and cheesecake filling (you can also use a whisk for the filling if you prefer).
- Measuring Cups and Spoons: To ensure accurate measurements for perfect results.
- Cookie Scoop or Tablespoon: To form uniform cookie cups.
- Mini Muffin Tin: Essential for shaping the cookie cups. A 24-cup mini muffin tin works best.
- Parchment Paper or Muffin Liners: To prevent sticking and make cleanup easier.
- Cooling Rack: For cooling the cookie cups once baked.
- Electric Mixer or Whisk: To blend the cream cheese and whipping cream together for the filling.
- Spatula: For folding the filling and scraping out the cookie dough.
Ingredients
Here’s what you’ll need to make this delightful treat (exact measurements are included in the recipe card below):
For the Chocolate Cookie Cups:
- All-Purpose Flour: 2 cups, for the structure of the cookie dough.
- Dutch-Processed Cocoa Powder: 1/4 cup, for a smooth, rich chocolate flavor.
- Black Cocoa Powder: 1/4 cup, gives the cookie cups a deeper, darker chocolate taste.
- Baking Soda: 1 tsp, to help the cookies rise slightly.
- Salt: 1/2 tsp, to balance the sweetness and enhance the chocolate flavor.
- Unsalted Butter (Room Temperature): 1 cup, for a soft, tender texture.
- Granulated Sugar: 1/2 cup, to sweeten the dough.
- Light Brown Sugar (Packed): 1 cup, adds moisture and a slight caramel flavor.
- Eggs (Room Temperature): 2 large eggs, to bind the ingredients and give the cookies structure.
- Vanilla Extract: 1 tsp, for added depth and flavor in the cookie dough.
For the Peppermint Cheesecake Filling:
- Heavy Whipping Cream (Chilled): 1 cup, for making a fluffy and stable whipped cream base.
- Cream Cheese (Full Fat): 8 oz, softened, for a rich, creamy texture.
- Granulated Sugar: 1/2 cup, for sweetness.
- Peppermint Extract: 1 tsp, this is the key ingredient that gives the filling that signature minty flavor.
- Red Gel Food Coloring: A few drops, to give the filling a festive red hue (optional).
- Candy Canes (Chopped): A handful, for that delightful crunch and minty burst on top.
Variations for Peppermint Chocolate Cookie Cups
Want to get creative with this recipe? Here are some ideas to put your own spin on these cookie cups:
- Add a Drizzle of Chocolate: For extra richness, drizzle some melted chocolate over the top of the finished cookie cups.
- Use White Chocolate Chips: Stir in some white chocolate chips into the cookie dough for a subtle sweetness to balance the peppermint.
- Swap for Dark Chocolate: If you’re a fan of rich, bitter chocolate, use dark chocolate cocoa powder and dark chocolate chips for a more intense flavor.
- Experiment with Different Fillings: You can make the cheesecake filling your own by swapping the peppermint extract for other extracts like vanilla or chocolate.
- Sprinkles or Holiday Decorations: Top your cookie cups with festive sprinkles or colored sugar to add a pop of color.
Step-by-Step Instructions
1. Prepare the Cookie Dough
Mix Dry Ingredients: Start by preheating your oven to 350°F (175°C) and lining a mini muffin tin with parchment paper or muffin liners. In a medium-sized bowl, whisk together the all-purpose flour, Dutch-processed cocoa powder, black cocoa powder, baking soda, and salt. Set aside.
Cream the Butter and Sugars: In a stand mixer or using a hand mixer, cream together the unsalted butter, granulated sugar, and light brown sugar on medium speed until the mixture becomes light and fluffy. This should take about 3-4 minutes.
Add Eggs and Vanilla: Next, beat in the eggs, one at a time, ensuring that each egg is fully incorporated before adding the next. Mix in the vanilla extract until just combined.
Combine Wet and Dry Ingredients: Gradually add the dry ingredients into the wet ingredients, mixing on low speed until the dough comes together. Be careful not to overmix.
2. Shape the Cookie Cups
Form the Dough: Using a cookie scoop or tablespoon, scoop the dough into each muffin tin cavity. Each scoop should be about 1.5 tablespoons of dough. Press the dough gently into the muffin tin, creating a small well in the center of each cookie.
Bake the Cookies: Place the muffin tin into the preheated oven and bake for 8-10 minutes or until the cookie edges are set but the centers are still slightly soft. Allow the cookies to cool in the tin for 5 minutes before transferring them to a wire rack to cool completely.
3. Prepare the Peppermint Cheesecake Filling
Whip the Cream: In a chilled mixing bowl, beat the heavy whipping cream until stiff peaks form. Set aside.
Make the Cream Cheese Mixture: In another bowl, beat the softened cream cheese and granulated sugar together until smooth and creamy. Mix in the peppermint extract and a few drops of red gel food coloring, if desired.
Fold in the Whipped Cream: Gently fold the whipped cream into the cream cheese mixture until smooth and fluffy. Be careful not to deflate the whipped cream too much.
4. Assemble the Cookie Cups
Fill the Cookie Cups: Once the cookies have cooled completely, use a spoon or piping bag to fill the wells of the cookie cups with the peppermint cheesecake filling.
Top with Crushed Candy Canes: Sprinkle chopped candy canes generously over the filled cheesecake mixture for a festive crunch and extra minty flavor.
5. Chill and Serve
Chill the Cookie Cups: Refrigerate the filled cookie cups for at least 30 minutes before serving. This helps the cheesecake filling firm up, making it easier to handle and more satisfying to eat.
Serve: Serve the peppermint chocolate cookie cups chilled, and enjoy the festive flavors of chocolate and peppermint with every bite. They are perfect for holiday parties, cookie exchanges, or as a sweet gift for your loved ones.
Storing Peppermint Chocolate Cookie Cups
- Refrigeration: Store the cookie cups in an airtight container in the refrigerator for up to 3-4 days. This will keep the cheesecake filling fresh and prevent the cookies from becoming too soft.
- Freezing: You can freeze the cookie cups before adding the cheesecake filling. Once baked and cooled, wrap each cookie cup individually in plastic wrap, then place them in a freezer-safe bag or container. Freeze for up to 1 month. When ready to serve, thaw the cookies, fill with the peppermint cheesecake mixture, and refrigerate for 30 minutes before serving.
Nutrition Information
| Serving Size | Calories | Fat | Carbs | Protein |
|---|---|---|---|---|
| 1 Cookie Cup | 200 | 12g | 25g | 2g |
Note: These values are approximate and may vary depending on ingredient brands and portion sizes.
Conclusion
These Peppermint Chocolate Cookie Cups are a sweet, festive treat that will make everyone’s holiday season a little brighter. The combination of rich chocolate cookie cups, creamy peppermint cheesecake filling, and a crunchy candy cane topping creates the ultimate dessert for any occasion. Whether you’re hosting a holiday party or looking for a giftable treat, these cookie cups are sure to impress. Easy to make and even easier to enjoy, these peppermint chocolate delights will quickly become a favorite in your holiday baking repertoire.
Peppermint Chocolate Cookie Cups
Course: Uncategorized24
cookie cups25
minutes10
minutes200
kcal30
minutesIngredients
- For the Cookie Cups:
2 cups all-purpose flour
1/4 cup Dutch-processed cocoa powder, sifted
1/4 cup black cocoa powder
1 tsp baking soda
1/2 tsp salt
1 cup unsalted butter, room temperature
1/2 cup granulated sugar
1 cup light brown sugar, packed
2 large eggs, room temperature
1 tsp vanilla extract
- For the Peppermint Cheesecake Filling:
1 cup heavy whipping cream, chilled
8 oz cream cheese, full-fat
1/2 cup granulated sugar
1 tsp peppermint extract
Red gel food coloring (optional)
Candy canes, chopped for topping
Directions
- Preheat oven to 350°F (175°C) and line a mini muffin tin with parchment paper or muffin liners.
- In a medium bowl, whisk together the flour, cocoa powders, baking soda, and salt. Set aside.
- Cream the butter, granulated sugar, and brown sugar in a stand mixer until light and fluffy. Beat in the eggs, one at a time, and add the vanilla extract.
- Gradually add the dry ingredients to the wet mixture and mix until just combined.
- Scoop dough into muffin tin and press gently to form a well in each cookie cup. Bake for 8-10 minutes and cool completely.
- For the filling, whip the heavy cream until stiff peaks form. In a separate bowl, beat the cream cheese and sugar until smooth, then add the peppermint extract and food coloring.
- Fold the whipped cream into the cream cheese mixture and pipe into the cooled cookie cups.
- Top with crushed candy canes and refrigerate for 30 minutes before serving.