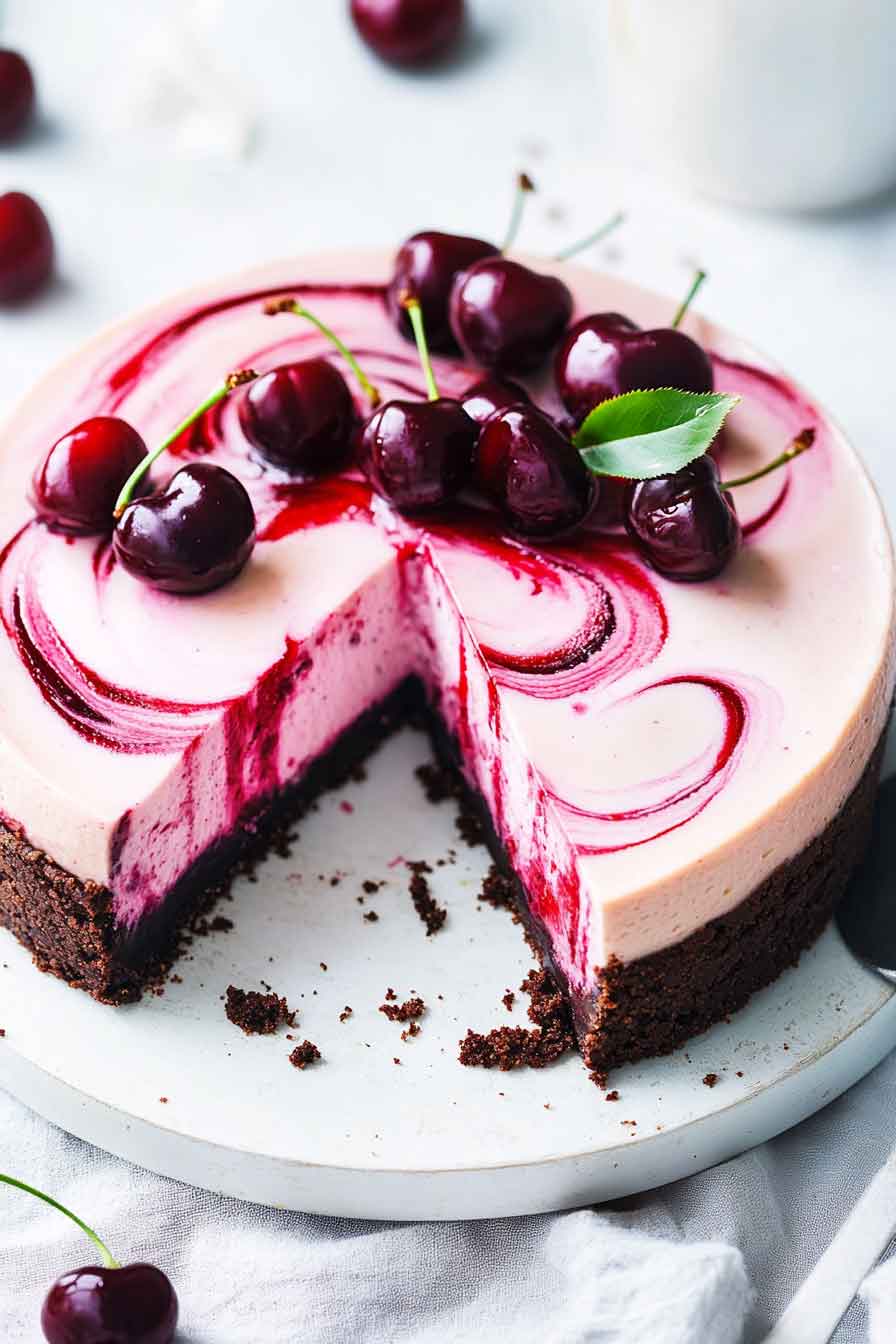
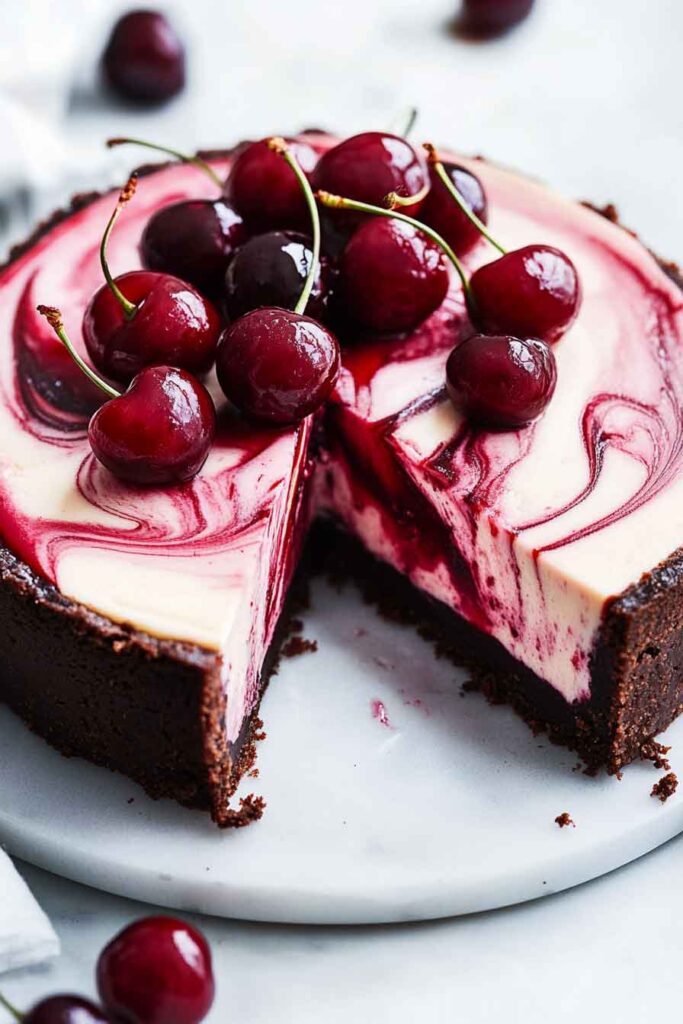
Cherry Ripple Cheesecake Recipe
This Cherry Ripple Cheesecake? Oh wow, it’s like love at first bite.
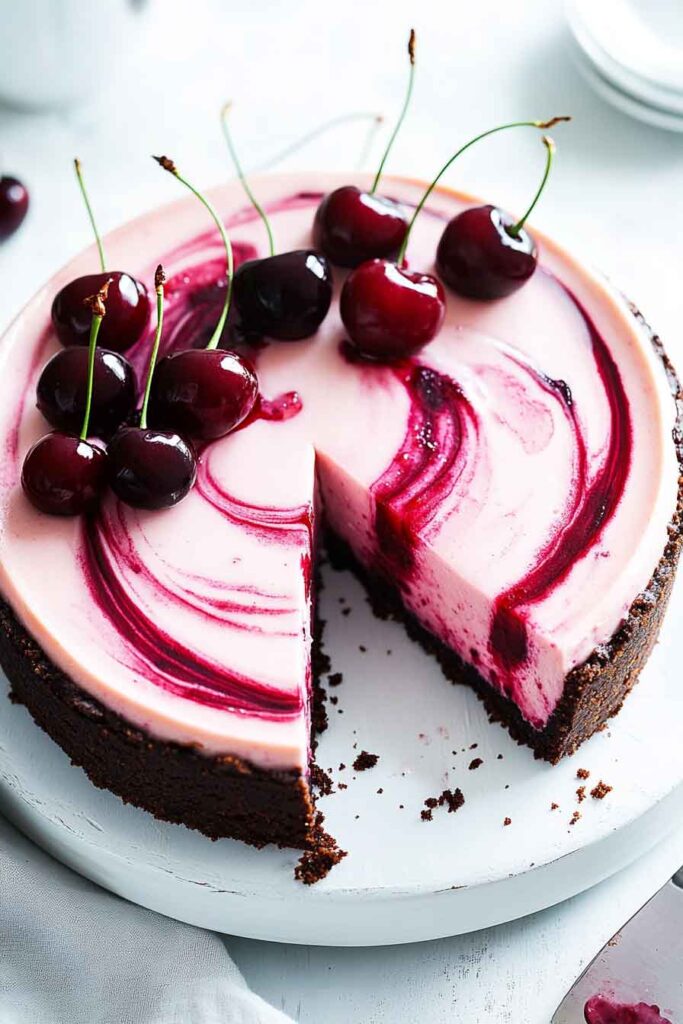
The swirls of cherry make it look so pretty—and taste even better.
The cheesecake is creamy and smooth. The cherry ripple adds that sweet and tangy pop.
We tried it once, and now it’s one of our favorite desserts to make.
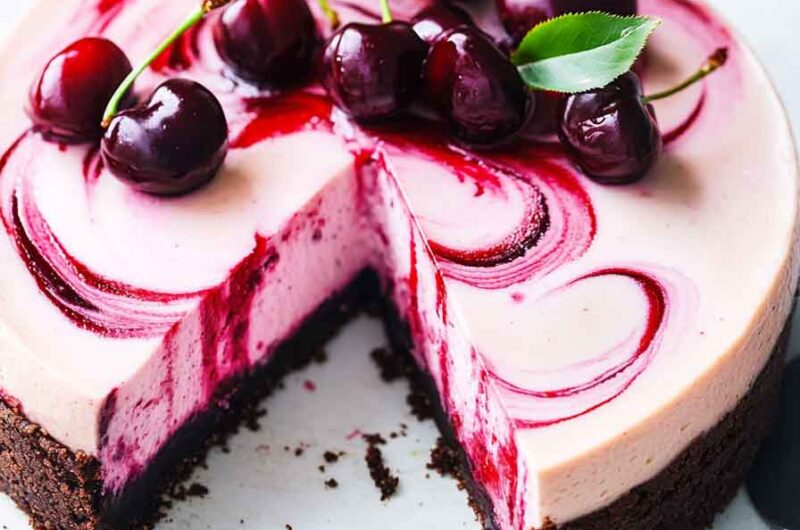
It feels fancy but is actually simple to do. And honestly? Each slice looks like it came from a bakery.
It’s the kind of cake that makes everyone smile at the table.
Let’s bake one together. Grab some cherries and cream cheese, and I’ll show you how we did it.

Why You’ll Love This Cherry Ripple Cheesecake
- Delicious Cherry Sauce: A luscious, sweet, and slightly tangy cherry sauce swirls beautifully through the creamy cheesecake filling.
- Oreo Crust: A rich, crunchy Oreo crust that adds the perfect contrast to the smooth filling.
- Creamy Cheesecake: A decadent, velvety filling made with three blocks of cream cheese, heavy cream, and a touch of vanilla extract.
- No-Bake: This cheesecake requires no baking in the oven, making it an easy yet impressive dessert.
- Perfect for Every Occasion: Whether it’s a family gathering, a birthday, or just a weekend treat, this cheesecake is guaranteed to shine at any event.
Required Kitchen Tools
Before you get started, gather these essential kitchen tools to help you prepare the Cherry Ripple Cheesecake:
- Food Processor or Blender: For crushing the Oreos into crumbs for the crust.
- Springform Pan: A 9-inch springform pan works best for this cheesecake recipe, allowing you to easily remove the dessert when it’s ready to serve.
- Mixer (Hand or Stand): For beating the cream cheese and other filling ingredients to a smooth, lump-free texture.
- Saucepan: For making the cherry sauce.
- Spatula or Spoon: For swirling the cherry sauce into the cheesecake filling.
- Chilled Bowl: For whipping the heavy cream into soft peaks.
Ingredients
Here’s what you’ll need to make this indulgent dessert (exact measurements are in the recipe card below):
Cherry Sauce Ingredients:
- Cherries: 1 3/4 cups (250g) of fresh or frozen cherries, halved and pitted.
- Granulated Sugar: 2 tablespoons, to sweeten the cherry sauce.
Oreo Crust Ingredients:
- Oreo Cookies: 33 cookies (about 380g), crushed into fine crumbs.
- Brown Sugar: 1/3 cup (65g), adds a touch of molasses flavor to the crust.
- Unsalted Butter: 1/2 cup (125g), melted, to bind the crust ingredients together.
Cheesecake Filling Ingredients:
- Cream Cheese: 3 blocks (750g) of softened cream cheese for a rich, smooth filling.
- Caster Sugar: 1/2 cup (105g), adds sweetness to the filling.
- Sour Cream: 1/4 cup (60g), adds a bit of tang and extra smoothness to the filling.
- Powdered Sugar: 2 tablespoons, to sweeten the filling without affecting its texture.
- Milk Powder: 1/2 cup (105g), for added creaminess and texture.
- Vanilla Extract: 1 tablespoon, for that familiar, comforting vanilla flavor.
- Heavy Cream: 1 1/4 cup (300ml), whipped into soft peaks to give the filling its airy, light texture.
Step-by-Step Instructions for Cherry Ripple Cheesecake
Let’s dive into the detailed steps on how to make this Cherry Ripple Cheesecake. Trust me, the results will be worth every minute you spend!
1. Make the Cherry Sauce
The cherry ripple is what truly sets this cheesecake apart. It’s a simple, fresh, and tangy cherry sauce that beautifully swirls through the creamy cheesecake filling.
- Combine Cherries and Sugar: In a medium saucepan, add the halved cherries and sugar. If you’re using frozen cherries, don’t worry—just add them directly from the freezer.
- Simmer: Cook the cherries and sugar over medium heat for about 10 minutes, stirring occasionally, until the cherries have softened and released their juices. The sauce should thicken slightly.
- Cool the Sauce: Remove the saucepan from heat and allow the cherry sauce to cool to room temperature. The sauce will continue to thicken as it cools.
2. Prepare the Oreo Crust
Now, let’s get to the crunchy, sweet base of this cheesecake—Oreo crust! It’s simple to make and adds a rich contrast to the creamy filling.
- Crush the Oreos: In a food processor or blender, crush the Oreo cookies into fine crumbs. You can also place them in a ziplock bag and crush them with a rolling pin if you don’t have a food processor.
- Mix the Crust: In a medium bowl, combine the Oreo crumbs, brown sugar, and melted butter. Stir until everything is well combined and the mixture resembles wet sand.
- Press the Crust: Transfer the mixture into the bottom of your springform pan. Use the back of a spoon to press the crumbs into an even layer, making sure the crust is compact and even. Place the pan in the refrigerator while you prepare the cheesecake filling.
3. Make the Cheesecake Filling
This cheesecake filling is rich, creamy, and oh-so-smooth. You’ll need to beat the ingredients together carefully to avoid any lumps.
- Beat the Cream Cheese: In a large mixing bowl, beat the softened cream cheese using a hand or stand mixer until smooth and creamy. This should take about 2-3 minutes on medium speed.
- Add the Sugars and Sour Cream: Add the caster sugar, powdered sugar, and sour cream to the cream cheese. Continue mixing until everything is combined and smooth.
- Incorporate the Milk Powder and Vanilla: Mix in the milk powder and vanilla extract, making sure the mixture is completely smooth.
- Whip the Heavy Cream: In a chilled bowl, whip the heavy cream into soft peaks. You can use a hand mixer or stand mixer for this step. Be careful not to overwhip the cream—stop when you have soft peaks.
- Fold the Cream into the Cheesecake Mixture: Gently fold the whipped heavy cream into the cream cheese mixture, being careful not to deflate the whipped cream. You want the filling to stay light and airy.
4. Assemble the Cheesecake
Now, it’s time to bring everything together. Let’s layer the cheesecake with that beautiful cherry sauce!
- Add the Cheesecake Filling: Spoon the cheesecake filling into the springform pan, over the Oreo crust. Use a spatula to smooth the top, making sure the filling is even.
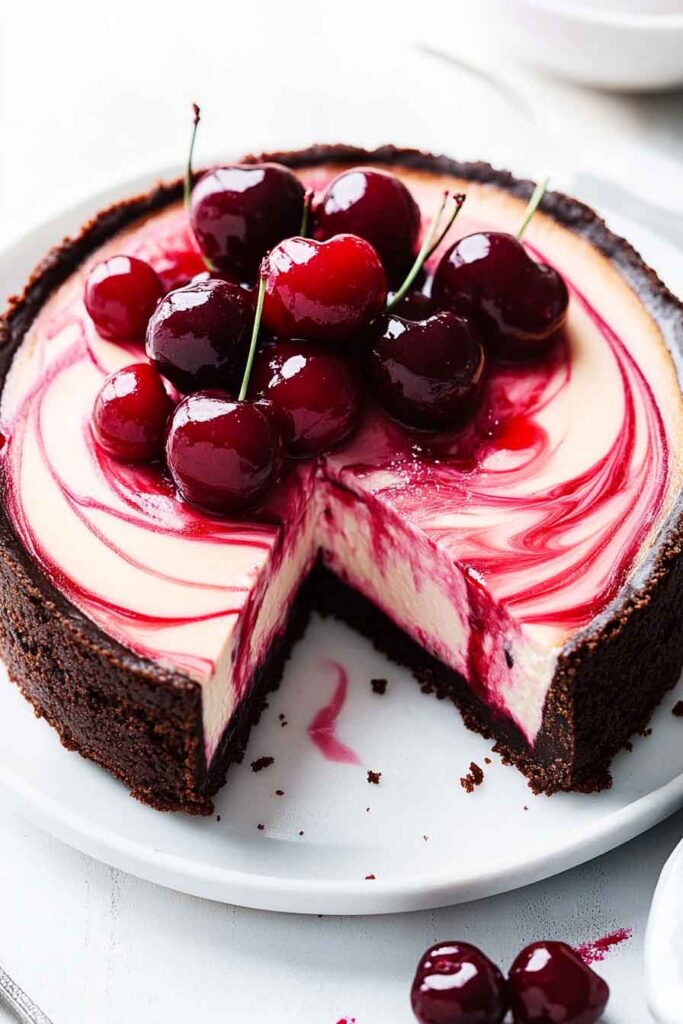
- Add the Cherry Sauce: Drop spoonfuls of the cooled cherry sauce on top of the cheesecake filling. Use a knife or skewer to swirl the cherry sauce into the filling, creating a beautiful ripple effect.
- Chill the Cheesecake: Place the cheesecake in the refrigerator and let it chill for at least 6 hours, or overnight, for best results. The cheesecake will firm up and set perfectly during this time.
How to Serve Cherry Ripple Cheesecake
This Cherry Ripple Cheesecake is perfect on its own, but there are many fun ways to serve and garnish it:
- Fresh Cherries: Add a few fresh cherries on top of the cheesecake for extra color and texture.
- Whipped Cream: A dollop of fresh whipped cream on each slice elevates the presentation and adds an extra touch of richness.
- Chocolate Shavings: For a decadent touch, sprinkle some chocolate shavings or drizzle with melted chocolate on top.
Storing Cherry Ripple Cheesecake
- Leftovers: Store any leftover cheesecake in an airtight container in the refrigerator for up to 3-4 days. The cheesecake will stay creamy and fresh, and the flavors will continue to meld together.
- Freezing: If you need to freeze the cheesecake, slice it first and wrap individual slices tightly in plastic wrap and aluminum foil. Store in the freezer for up to 1 month. Thaw in the fridge overnight before serving.
Cherry Ripple Cheesecake – Nutrition Facts (per serving)
| Nutrient | Amount |
|---|---|
| Calories | 420 kcal |
| Total Fat | 25 g |
| Saturated Fat | 14 g |
| Cholesterol | 95 mg |
| Sodium | 280 mg |
| Total Carbohydrates | 42 g |
| Dietary Fiber | 1 g |
| Sugars | 31 g |
| Protein | 7 g |
Cherry Ripple Cheesecake FAQs
Can I use frozen cherries instead of fresh?
Yes, you can absolutely use frozen cherries for the cherry sauce. Just make sure to thaw them before using and drain any excess liquid before cooking.
Can I make the cheesecake without the cherry sauce?
While the cherry sauce is what gives this cheesecake its unique flavor and presentation, you can certainly skip it if you prefer a plain cheesecake. Simply omit the cherry sauce and garnish with other toppings of your choice, such as fresh berries or chocolate sauce.
How do I prevent cracks in my cheesecake?
This no-bake cheesecake recipe is designed to prevent cracks, but be sure to allow the cheesecake to chill completely before slicing. Avoid using a hot knife to slice; instead, dip the knife in warm water before making each cut.
Cherry Ripple Cheesecake Recipe
Course: Uncategorized10-12
servings25
minutes420
kcal6
hoursIngredients
- Cherry Sauce:
1 3/4 cups (250g) cherries, halved and pitted
2 tbsp granulated sugar
- Oreo Crust:
33 Oreo cookies (380g), crushed into fine crumbs
1/3 cup (65g) brown sugar
1/2 cup (125g) unsalted butter, melted
- Cheesecake Filling:
3 blocks (750g) cream cheese, softened
1/2 cup (105g) caster sugar
1/4 cup (60g) sour cream
2 tbsp powdered sugar
1/2 cup (105g) milk powder
1 tbsp vanilla extract
1 1/4 cups (300ml) heavy cream
- To Serve:
Extra cherries for garnish
Directions
- Make the Cherry Sauce: Combine cherries and sugar in a saucepan. Cook over medium heat for 10 minutes, stirring occasionally. Allow to cool.
- Prepare the Oreo Crust: Crush Oreo cookies into crumbs. Mix with brown sugar and melted butter. Press into the base of a springform pan and refrigerate.
- Make the Cheesecake Filling: Beat the cream cheese until smooth. Add sugars, sour cream, and vanilla, mixing until smooth. Fold in whipped heavy cream.
- Assemble: Spoon the cheesecake mixture into the crust. Swirl in the cherry sauce. Refrigerate for at least 6 hours or overnight.
- Serve: Garnish with fresh cherries and whipped cream if desired. Slice and enjoy!
Conclusion
This Cherry Ripple Cheesecake is everything you could want in a dessert—creamy, flavorful, and visually stunning. Whether you’re hosting a party or enjoying a quiet evening at home, this cheesecake will surely be the star of the show. With its perfect balance of tangy cherry sauce and rich cheesecake filling, it’s an absolute crowd-pleaser. So go ahead, gather your ingredients, and indulge in a slice of this dreamy dessert!